Setting up Cypress for an Angular Project
Cypress (cypress.io) is a testing tool that can test anything that runs in a browser from unit tests to end-to-end tests.
I recently has a chance to use Cypress in an Angular project I’m working on. Cypress is used as a replacement of the built-in Protractor to implement integration and end-to-end testing of the project.
Note: in this post, I’m referring Cypress as the open-source Cypress Test Runner, and not their commercial Dashboard Service.
Why Cypress?
I heard about Cypress from Adventures in Angular podcast. Back then Cypress only supports Google Chrome so it didn’t convince me much and I decided to go with CodeceptJS instead.
Over the time, I could also see Cypress has gained popularity and features. Now with Cypress 4.0, Firefox and Edge are supported so there are no reason not to try it.
Things I like about Cypress
- It’s framework-agnostic – It doesn’t matter how the application is built. As long as it runs on the browser, Cypress can test it.
- It’s easy to set up in an on-going project.
- It’s easy to write tests. Tests can be written in either BDD or TDD styles.
- It works well with our CI environments (we use GitLab CI at work).
- It’s fast(er) and (more) reliable, compared to CodeceptJS.
- The time travel feature is HUGE – we can go back in time at any step of the test and see what happened.
1. Adding Cypress to an Angular project
In this post, I will use a bare bone Angular project generated with Angular CLI as a test project, but the main content will not be specific to Angular at all.
There are already many articles on the internet on how to use Cypress with an Angular project and I learned from some of them. You might want to check these articles:
- How to get started with Cypress on Angular In Depth blog
- Why I Moved from Protractor to Cypress and the 7 Steps to Cypress E2E Testing Success by Christian Lüdemann
I create a companion repo for this post at (https://github.com/armno/angular-cypress-101)
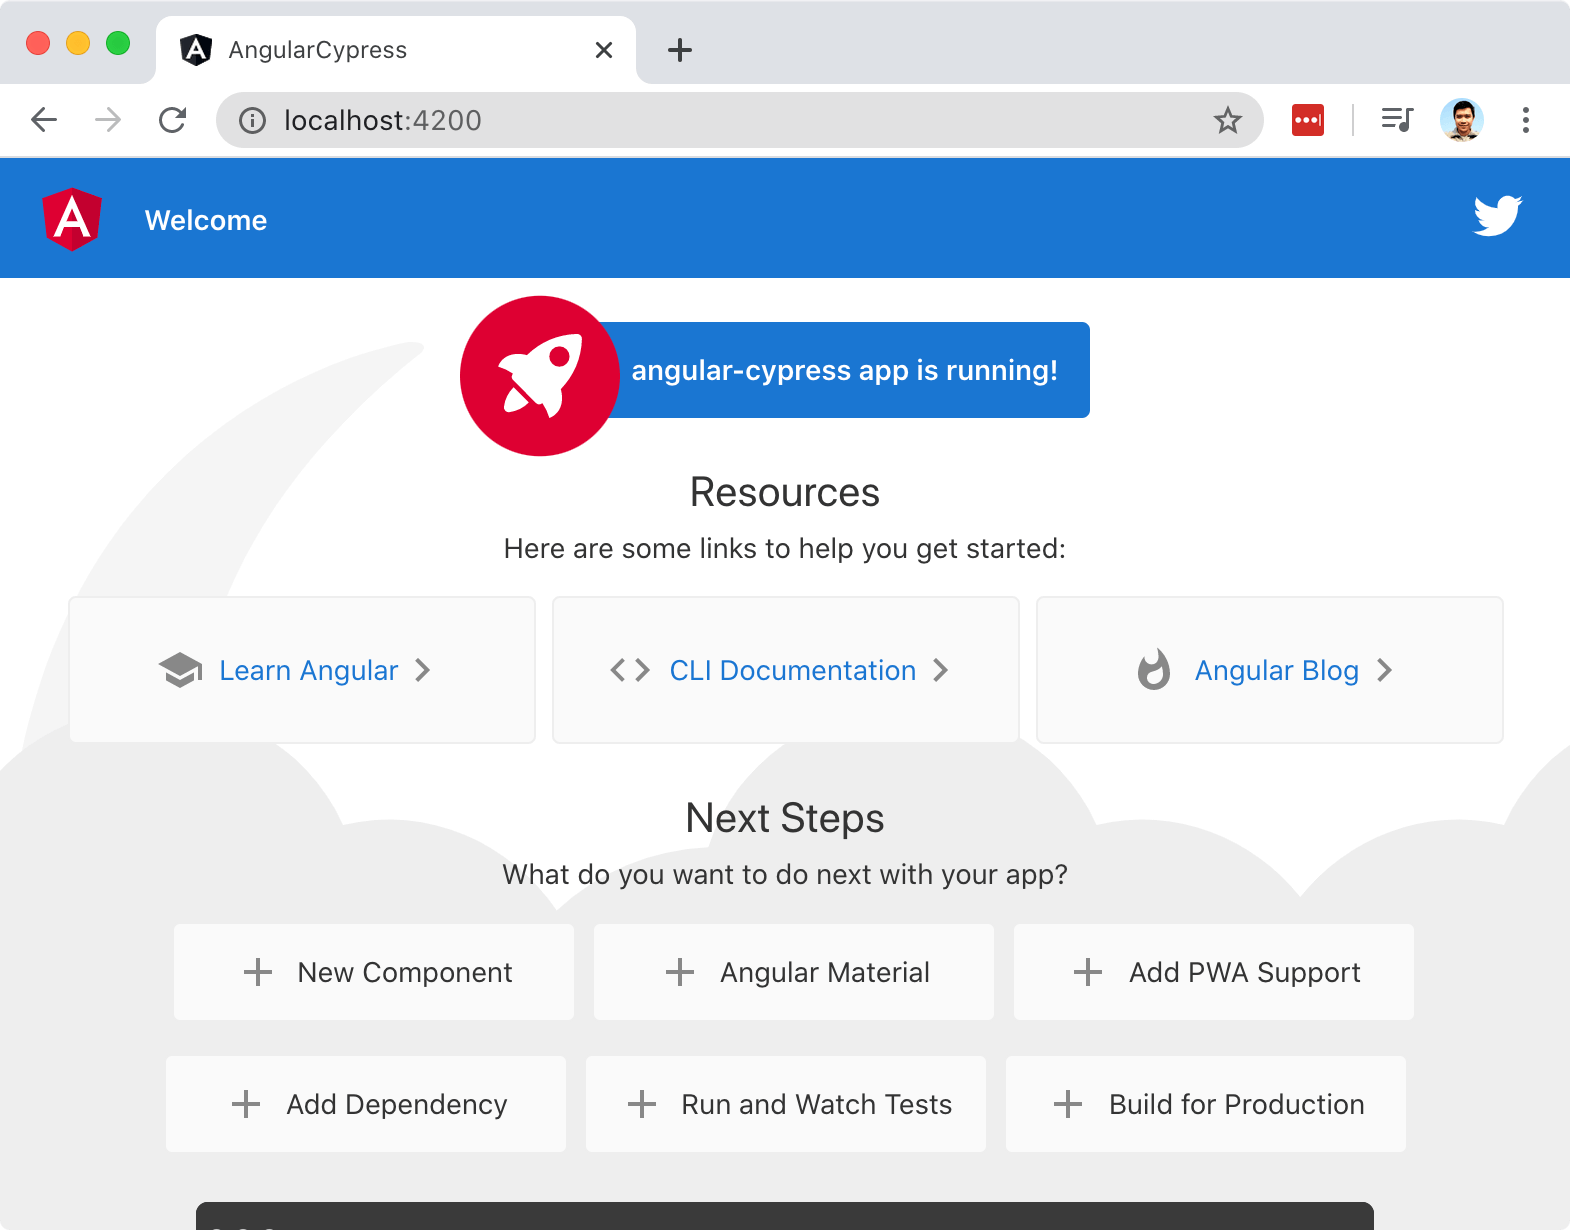
We are going to test the default home page which looks like this:
To install Cypress into the project:
$ npm install --save-dev cypressThen we can run Cypress with the command
$ npx cypress openIt will open a Cypress standalone app in its own window.
When we run Cypress for the first time, it generates a bunch of examples that we can learn from.
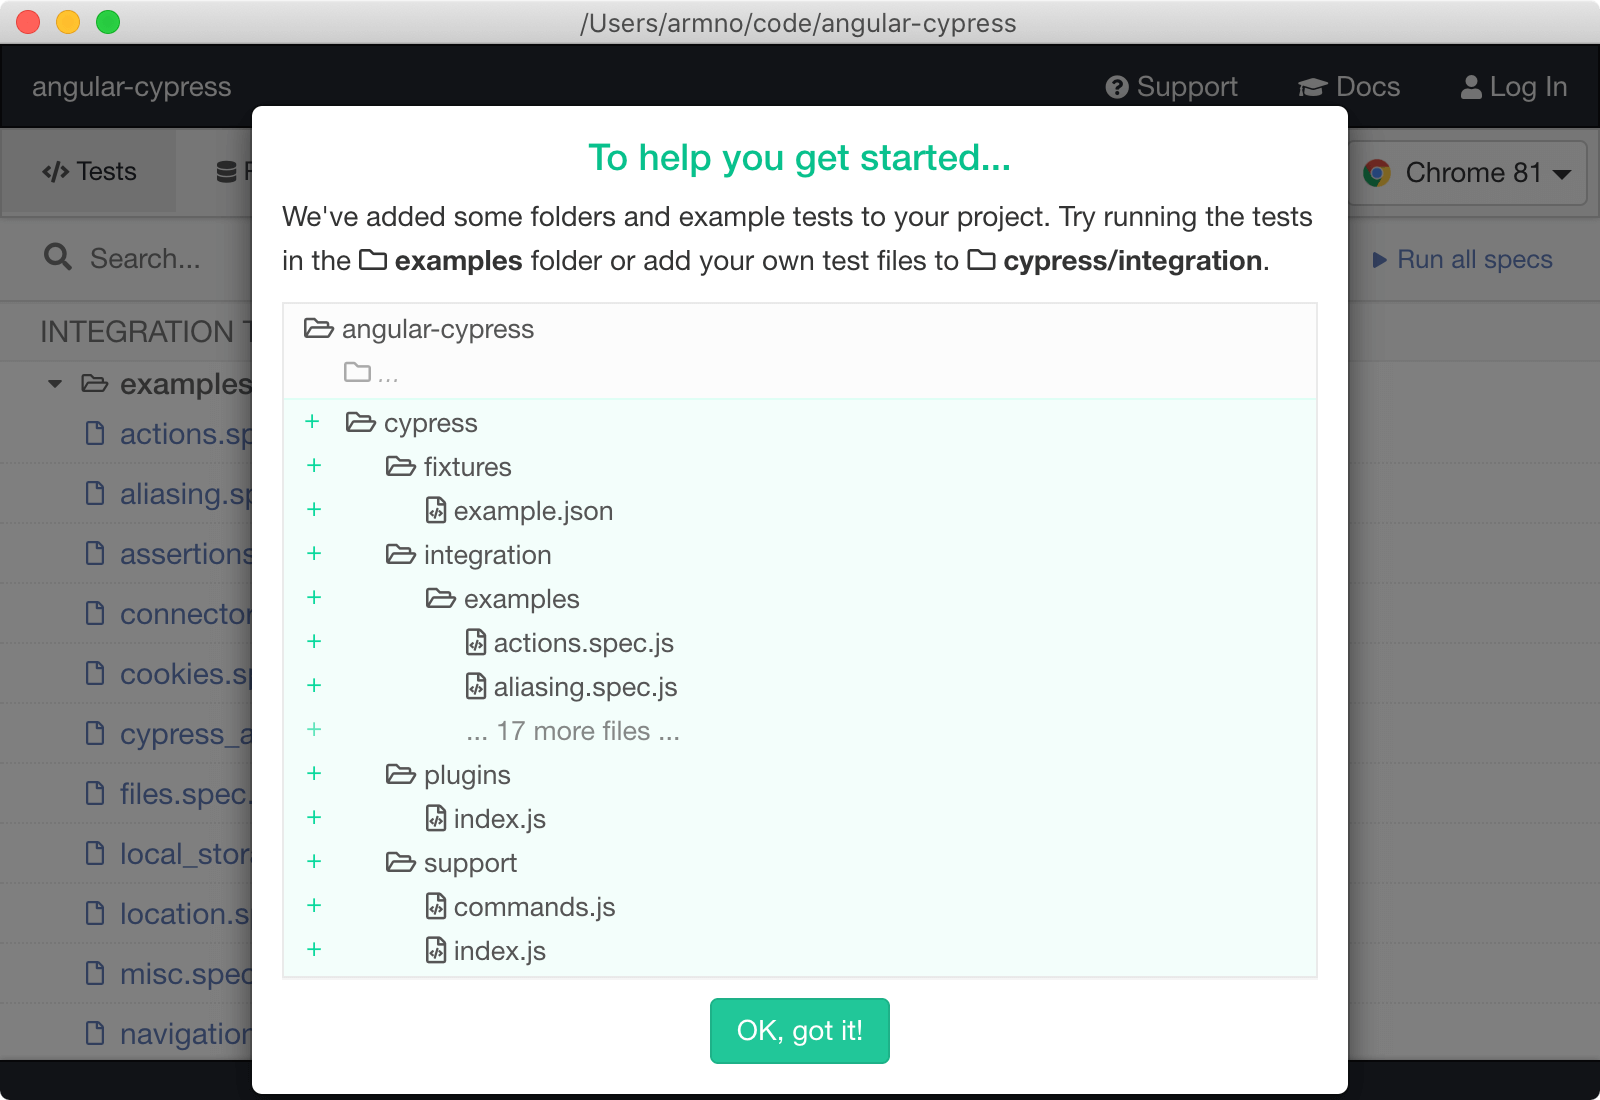
We can run the example tests to see Cypress in action.
2. Configure Cypress in cypress.json
cypress.json is a config file for Cypress. It should be already generated
at the project’s root folder.
By default, it’s an empty JSON file.
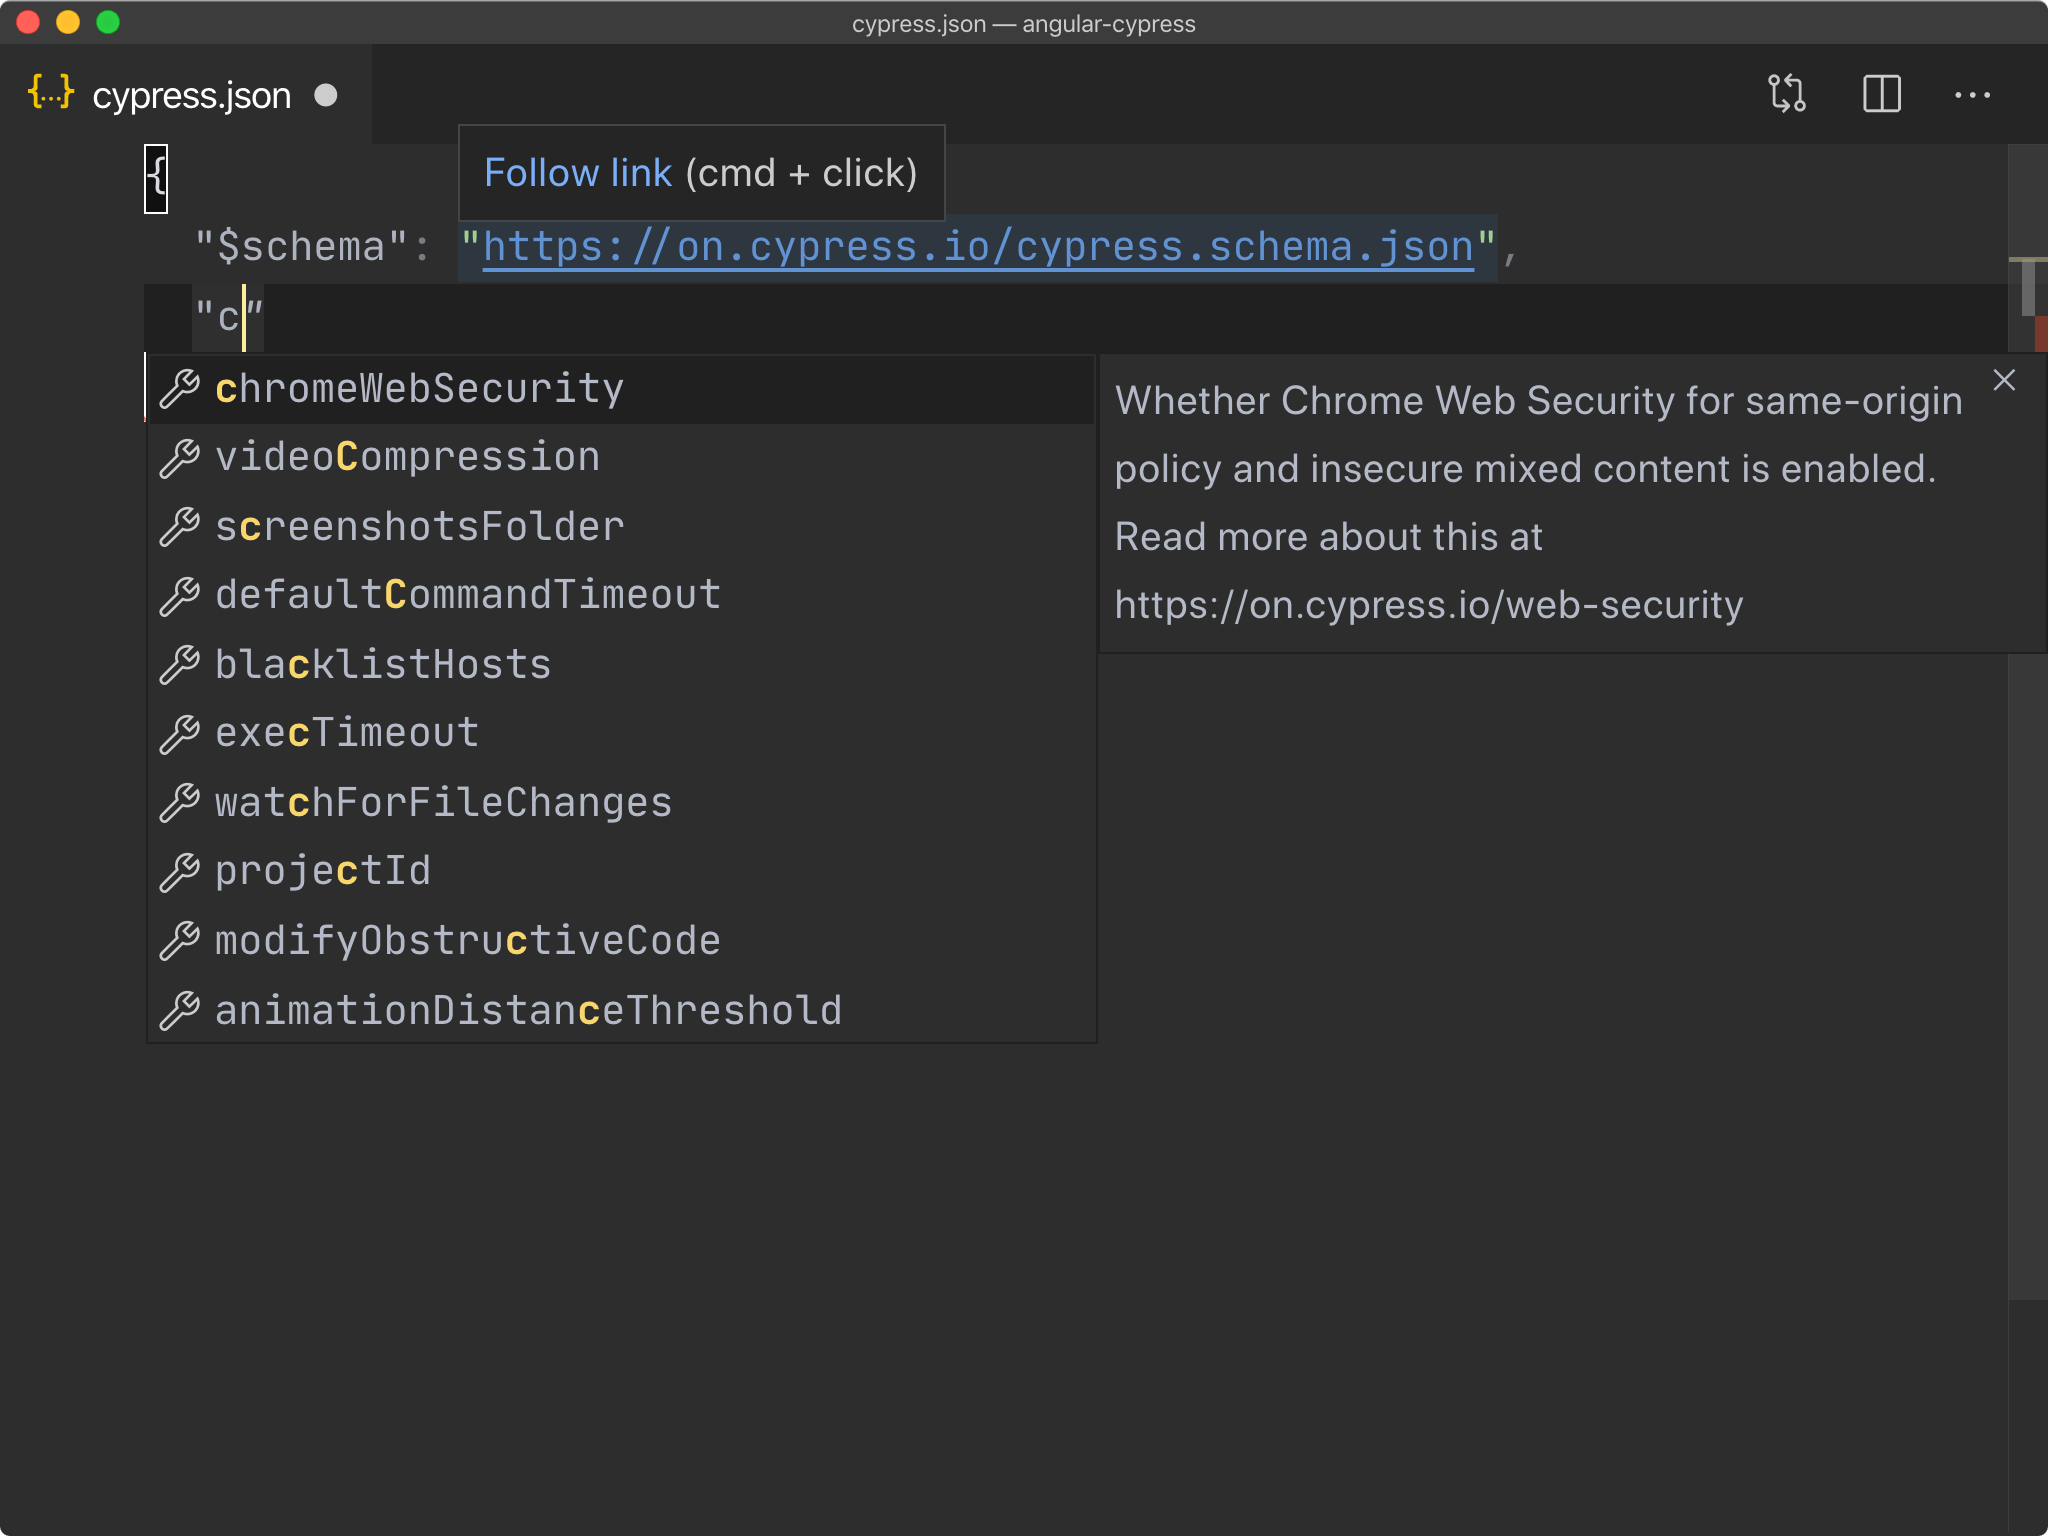
First thing I do is adding JSON schema to the config file to get Code Intellisense support from VSCode.
{
  "$schema": "https://on.cypress.io/cypress.schema.json"
}
By adding $schema, VSCode knows what are the possible configurations
we can add to the config file.
Changing tests directory
By default, Cypress keeps everything inside cypress/ directory.
I like rename the folder to tests/e2e to make it more generic.
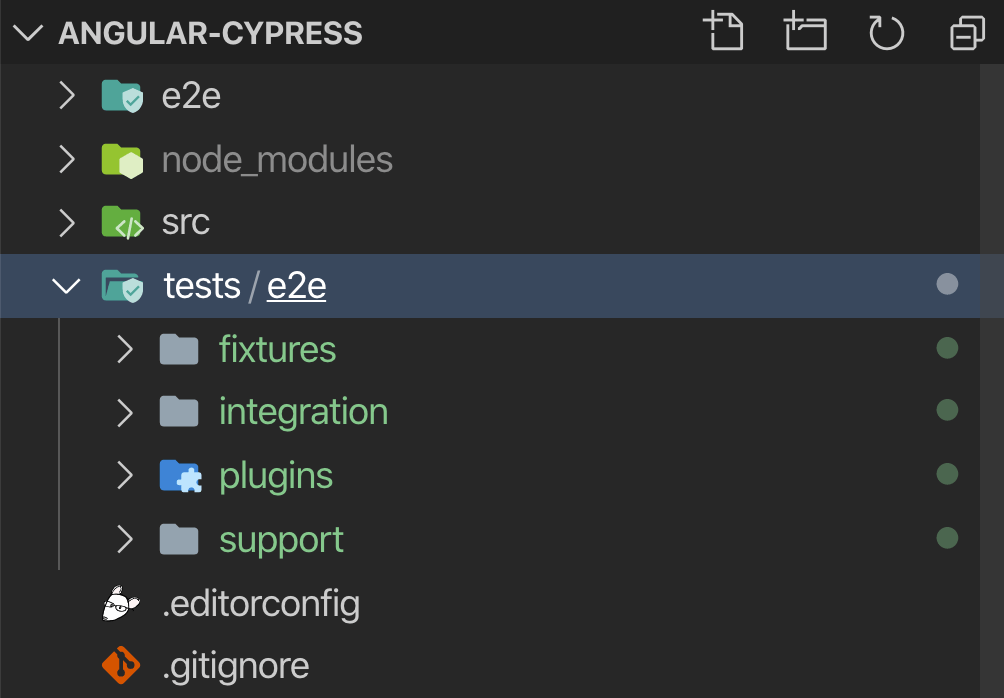
Then we need to update the paths in cypress.json file to reflect
the new directory structure.
{
  ...
  "fixturesFolder": "tests/e2e/fixtures",
  "integrationFolder": "tests/e2e/integration",
  "pluginsFile": "tests/e2e/plugins/index.js",
  "supportFile": "tests/e2e/support/index.js"
  ...
}
Cypress can capture screenshots and videos from the tests. I see them as an output from the test so I keep them separate from test input (specs).
Normally I keep the output files in output/ directory of the project.
This directory is ignored by Git.
Set the paths of captured screenshots and video files in cypress.json
config file:
{
  ...
  "screenshotsFolder": "output/e2e/screenshots",
  "videosFolder": "output/e2e/videos"
  ...
}
Then I set the baseUrl in the config to point to
Angular’s dev server’s URL
{
  ...
  "baseUrl": "http://localhost:4200",
  ...
}
My whole cypress.json config file looks like this:
{
  "$schema": "https://on.cypress.io/cypress.schema.json",
  "chromeWebSecurity": false,
  "fixturesFolder": "tests/e2e/fixtures",
  "integrationFolder": "tests/e2e/integration",
  "pluginsFile": "tests/e2e/plugins/index.js",
  "supportFile": "tests/e2e/support/index.js",
  "screenshotsFolder": "output/e2e/screenshots",
  "videosFolder": "output/e2es/videos",
  "baseUrl": "http://localhost:4200"
}
Run the Angular app
$ ng serve3. Writing Tests
I will remove the generated examples from Cypress as we don’t need them for our app.
$ rm -rf tests/e2e/integration/examplesThen I create my first test file
$ touch tests/e2e/integration/home-page.spec.jsBefore writing any tests, I add a TypeScript <reference> directive
at the top of the spec file.
/// <reference types="Cypress" />This is to get type definition support from VSCode’s IntelliSense for auto-completion and method signatures of Cypress.
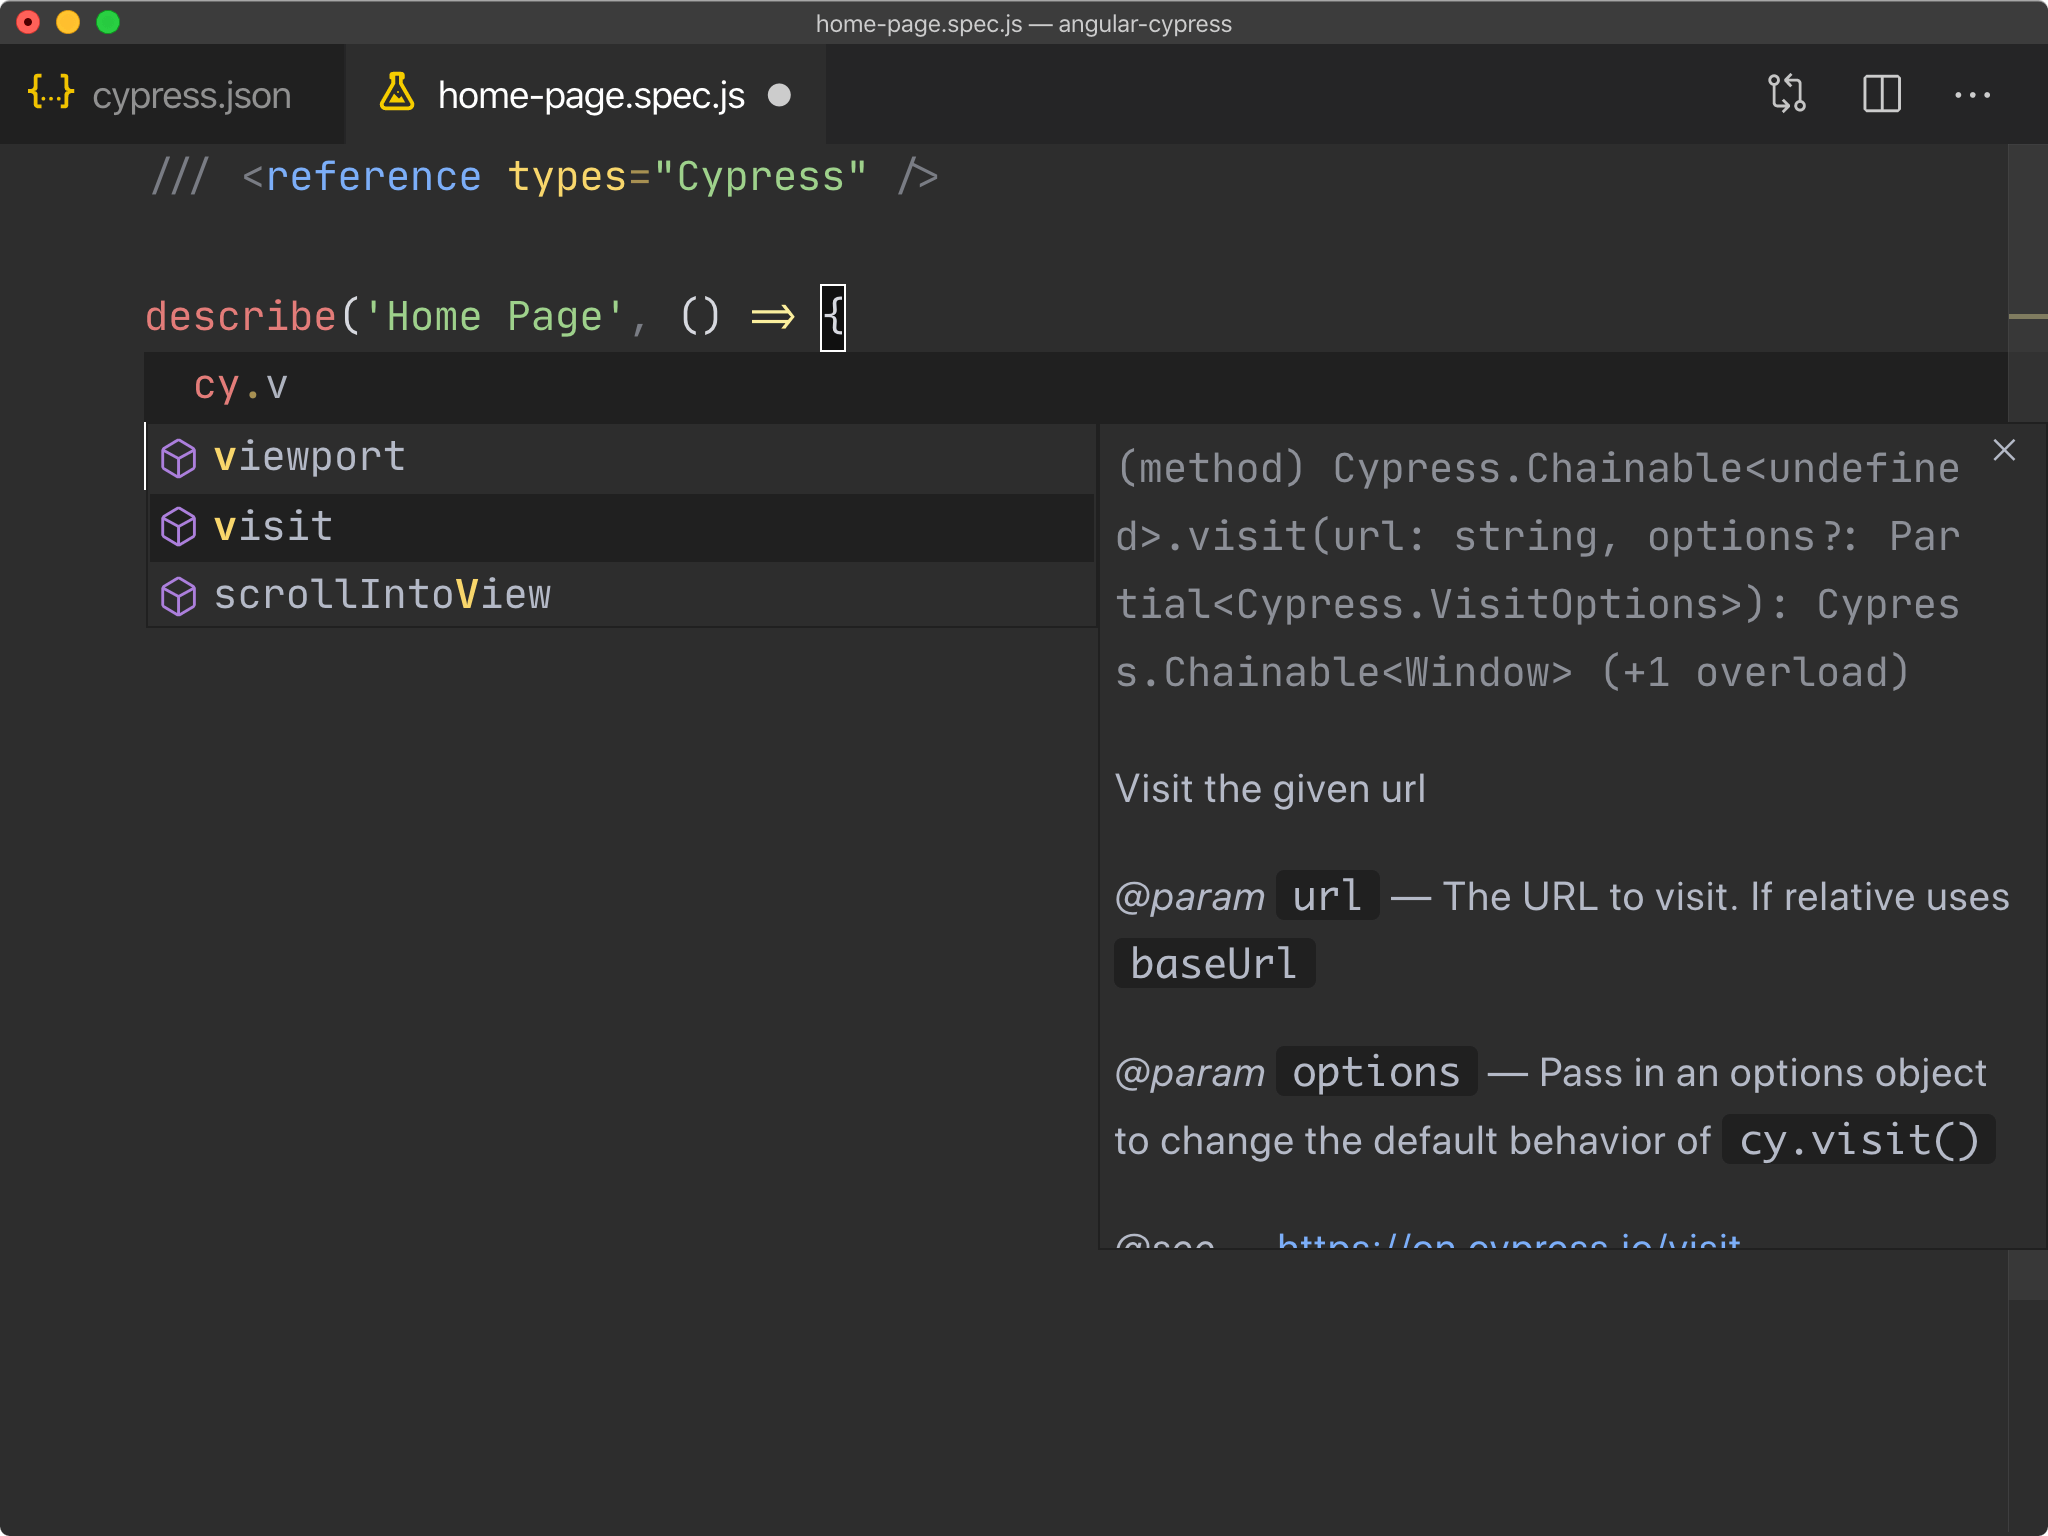
Then write the first test in home-page.spec.js file.
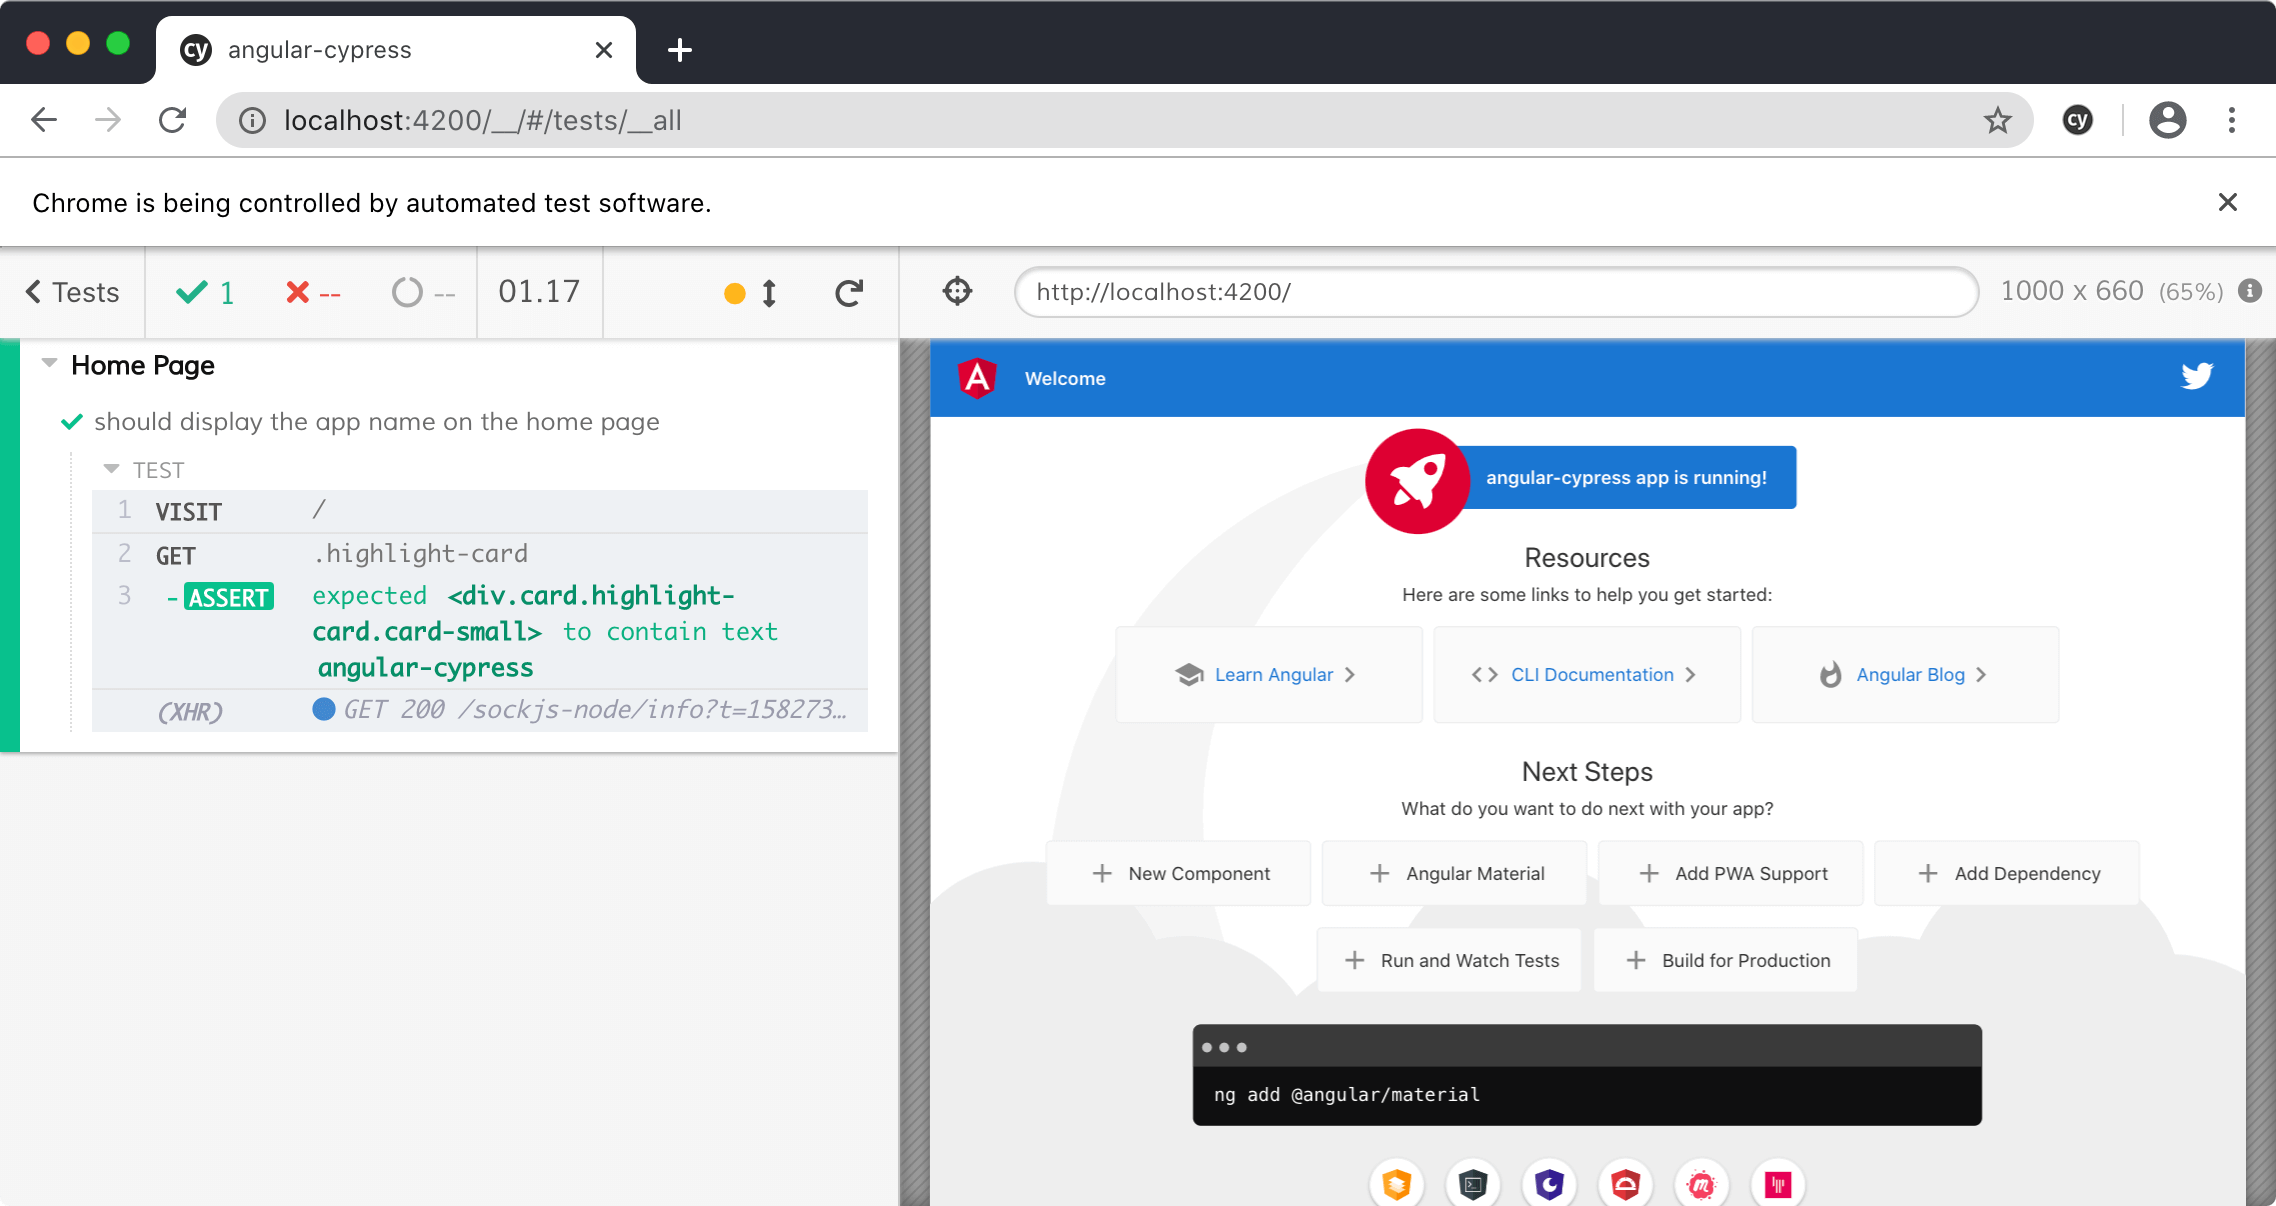
We want to test if the generated app name shows up correctly.
/// <reference types="Cypress" />
describe('Home Page', () => {
it('should display the app name on the home page', () => {
cy.visit('/'); // go to the home page
// get the rocket element and verify that the app name is in it
cy.get('.highlight-card')
.should('contain.text', 'angular-cypress');
});
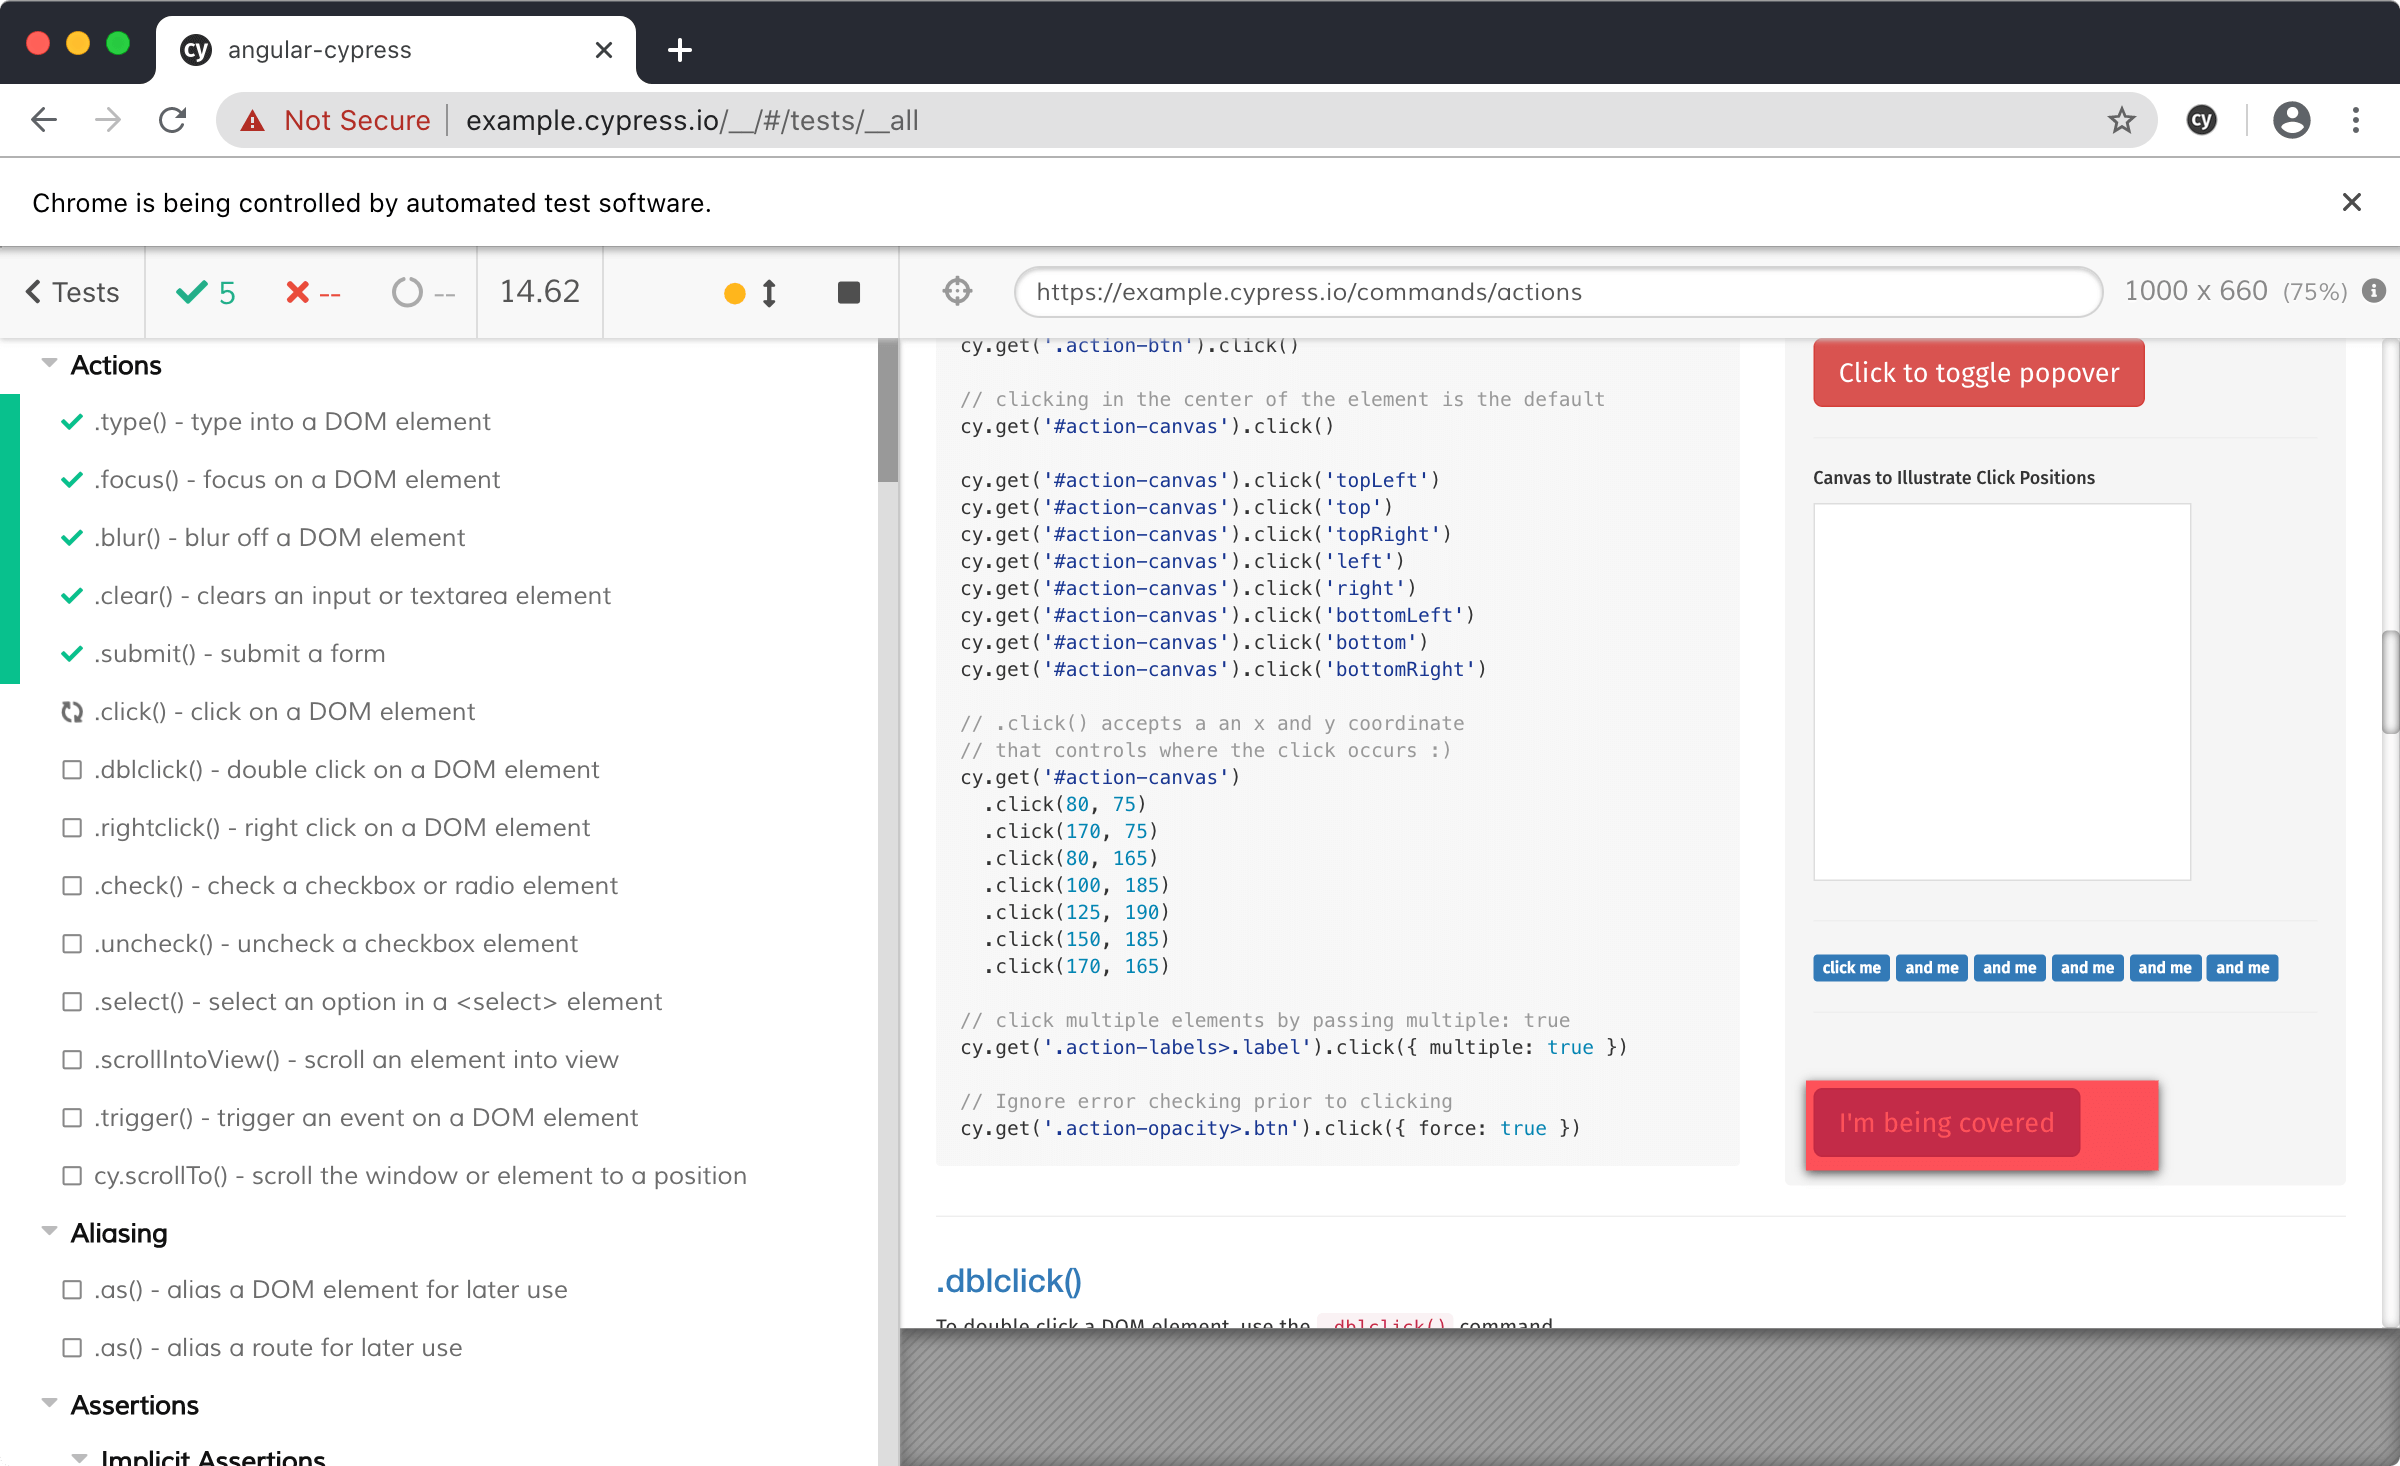
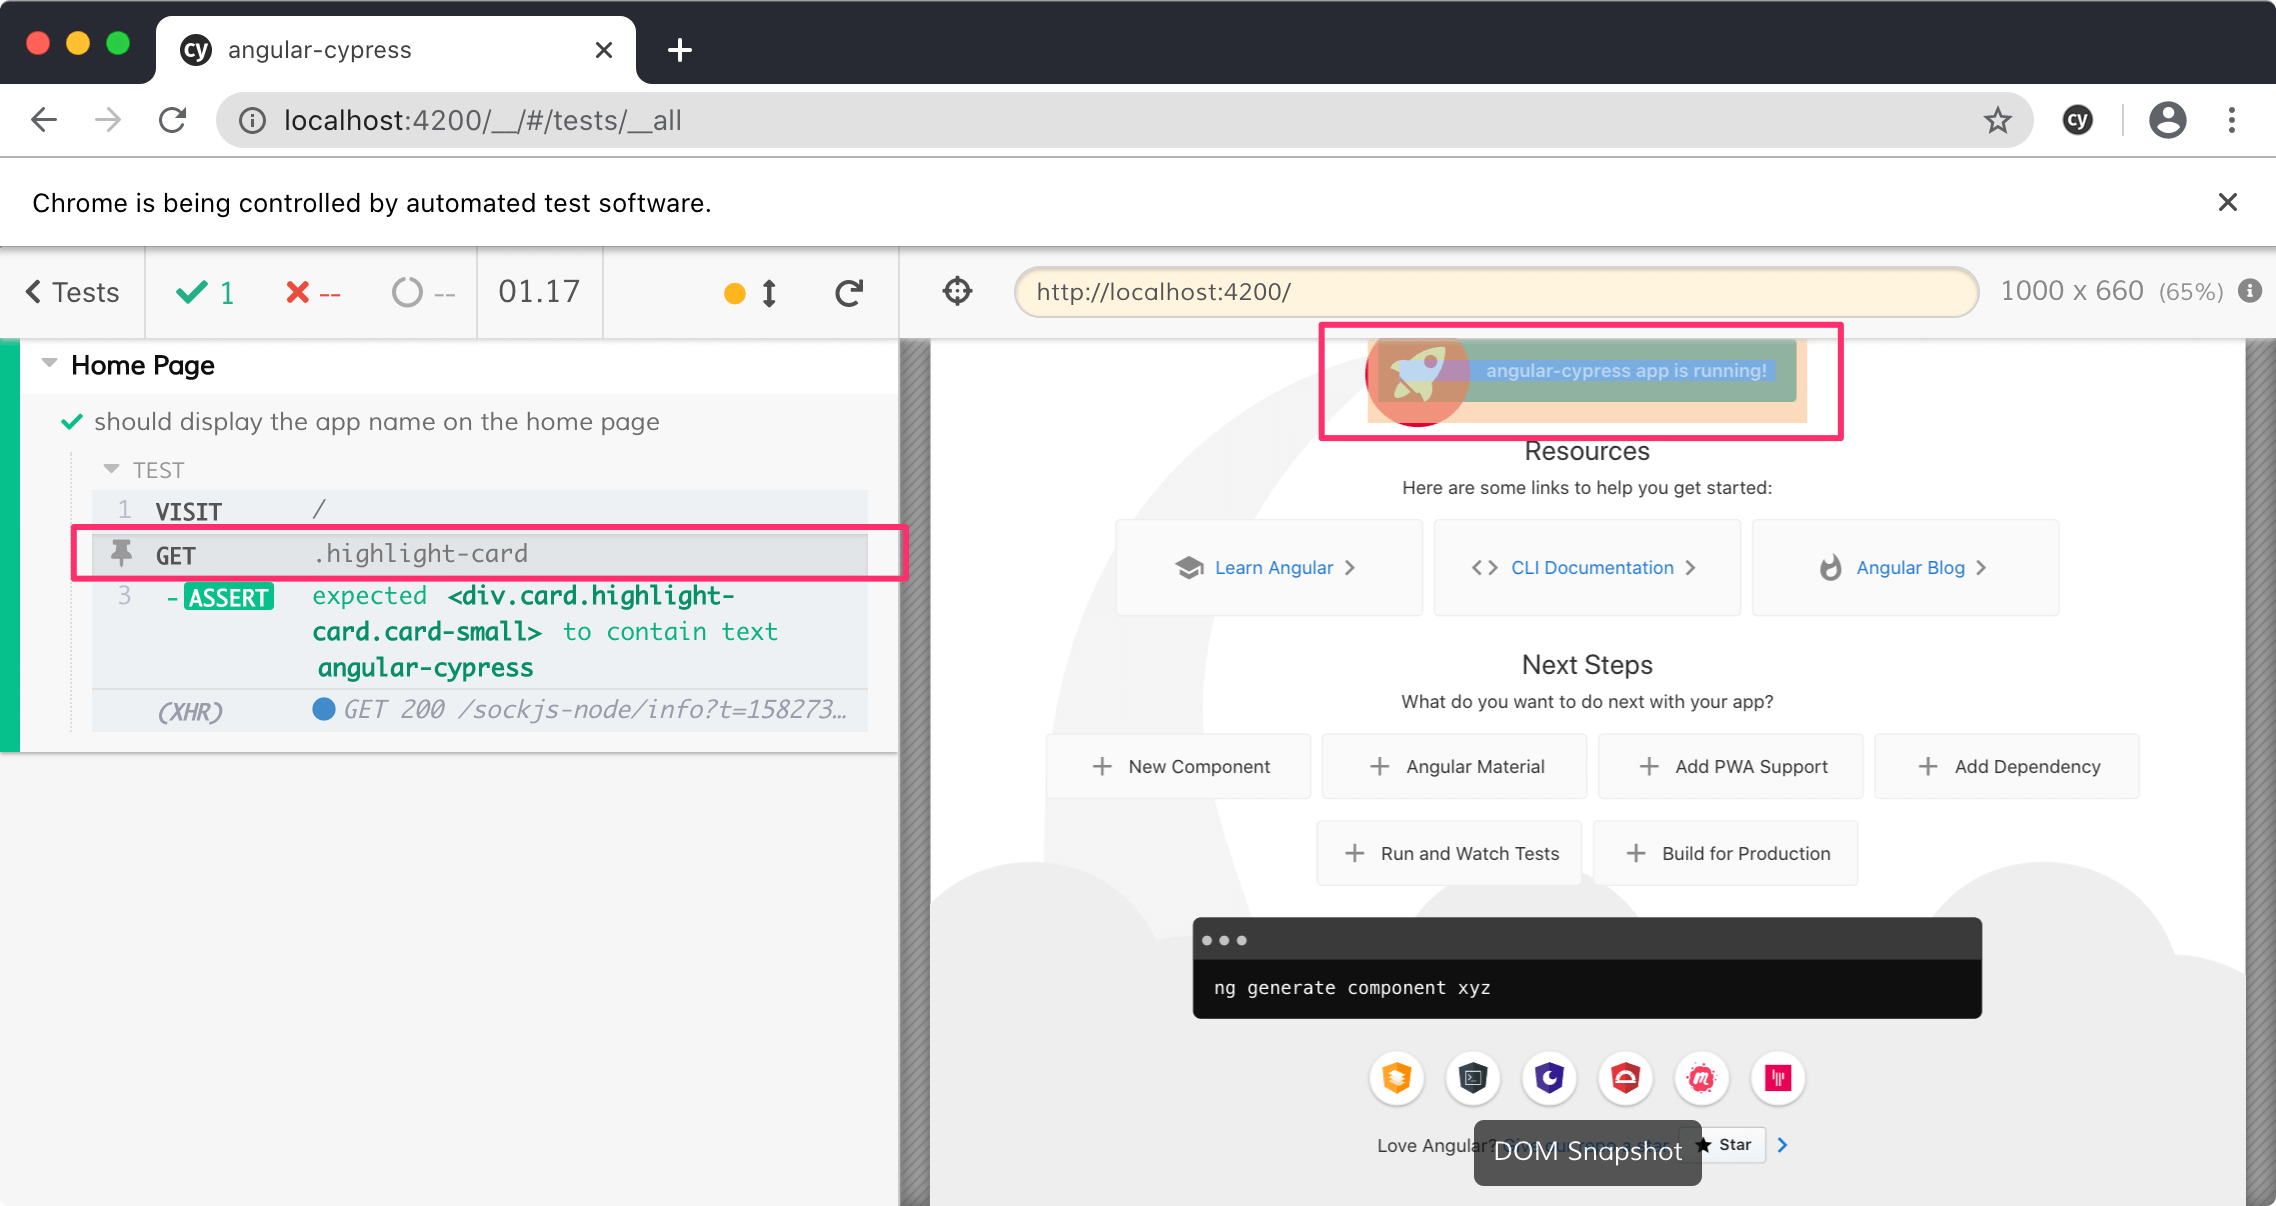
});In the Cypress app, click Run all specs button. We can also choose the browser to run the test from the dropdown above Run all specs button.
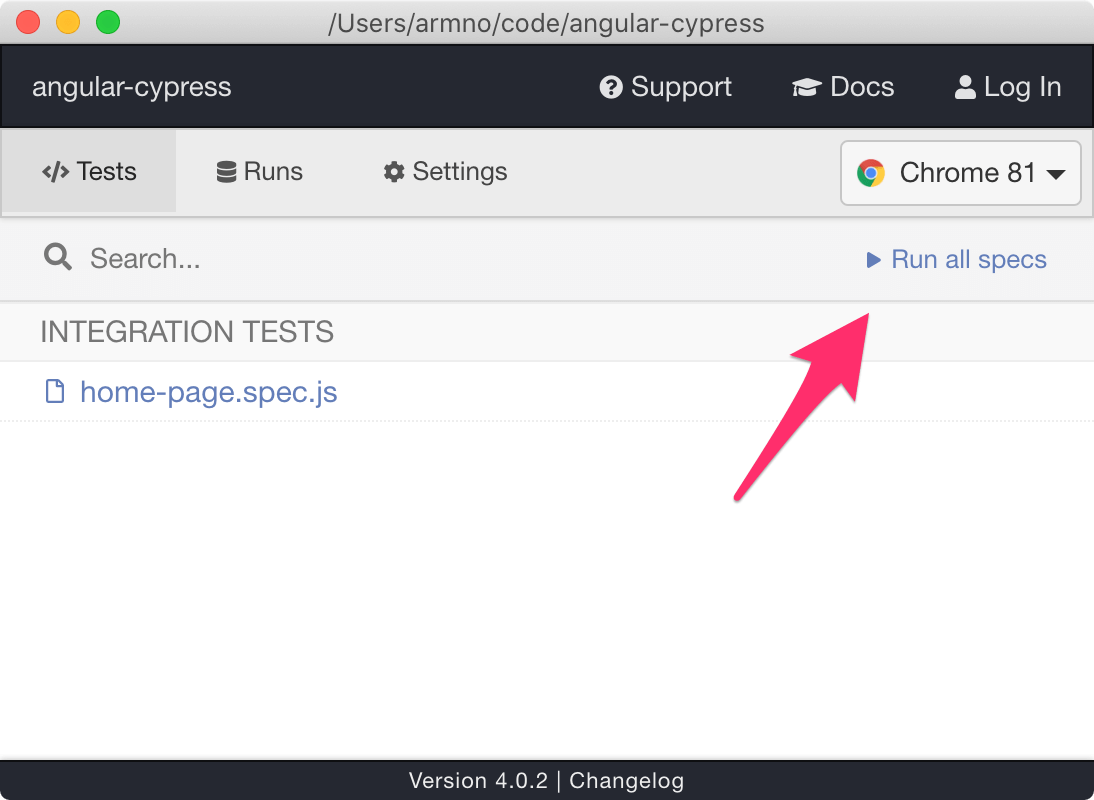
Cypress will open a new browser window and run the test. We can see the test steps on the left panel and the preview browser on the right. And we can see the test is success.
When hover over a step on the left panel, the preview window shows what is happening.
In this case, I get an element with cy.get()
so the browser highlights the element on the page.
Add another test
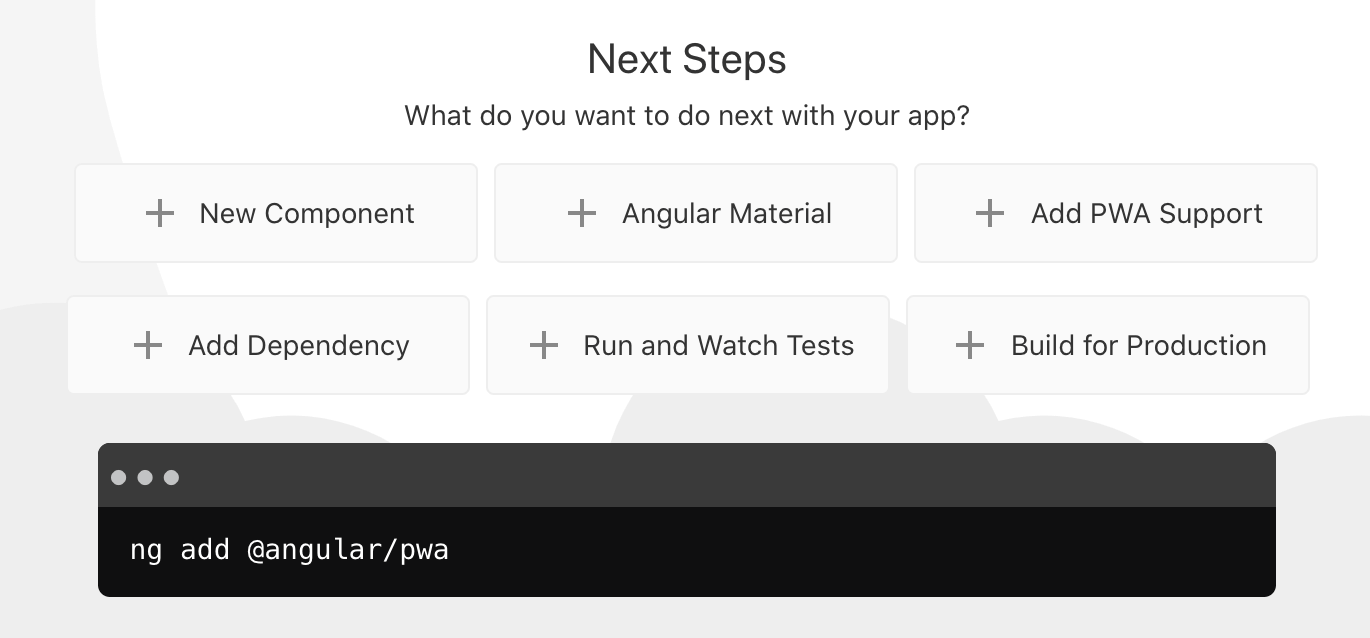
Let’s add a bit more complex test case on the home page.
We will test buttons in the Next Steps section if they correctly – the buttons should display the command in the terminal preview area below.
Create another test case in home-page.spec.js file.
The test doesn’t do any assertion yet. Just visit the home page.
// home-page.spec.js
it('should update preview command in the terminal area based on the selected button', () => {
  cy.visit('/');
});
When we run the tests, Cypress opens a browser window again. This time, we use the Selector Playground icon near the preview window’s address bar.
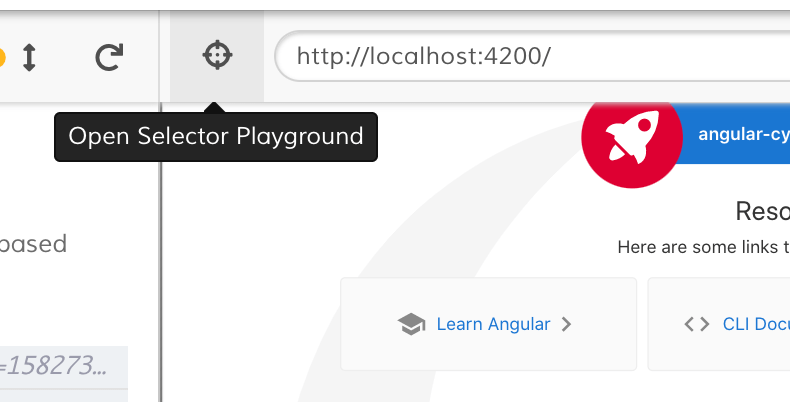
Then we can select an element on the page
and it will create a selector with cy.get()
that we can copy it to use in our test.
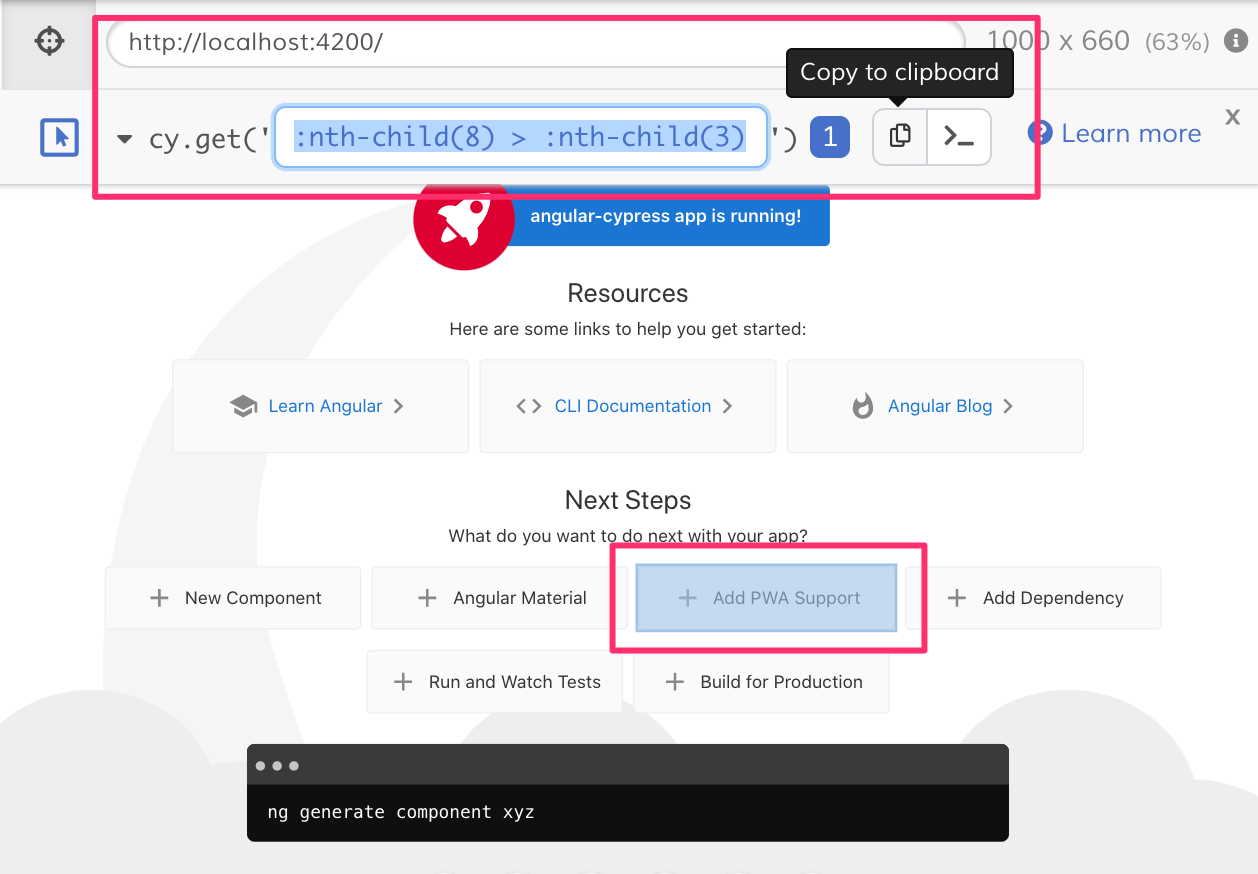
Update our test case with action and assertion.
// home-page.spec.js
it('should update preview command in the terminal area based on the selected button', () => {
  cy.visit('/');

  // click the `Add PWA Support` button
  cy.get(':nth-child(8) > :nth-child(3)').click();

  // verify that the text in the terminal area is updated
  cy.get('.terminal').should('contain.text', 'ng add @angular/pwa');
});
The test re-runs and we should see the result.
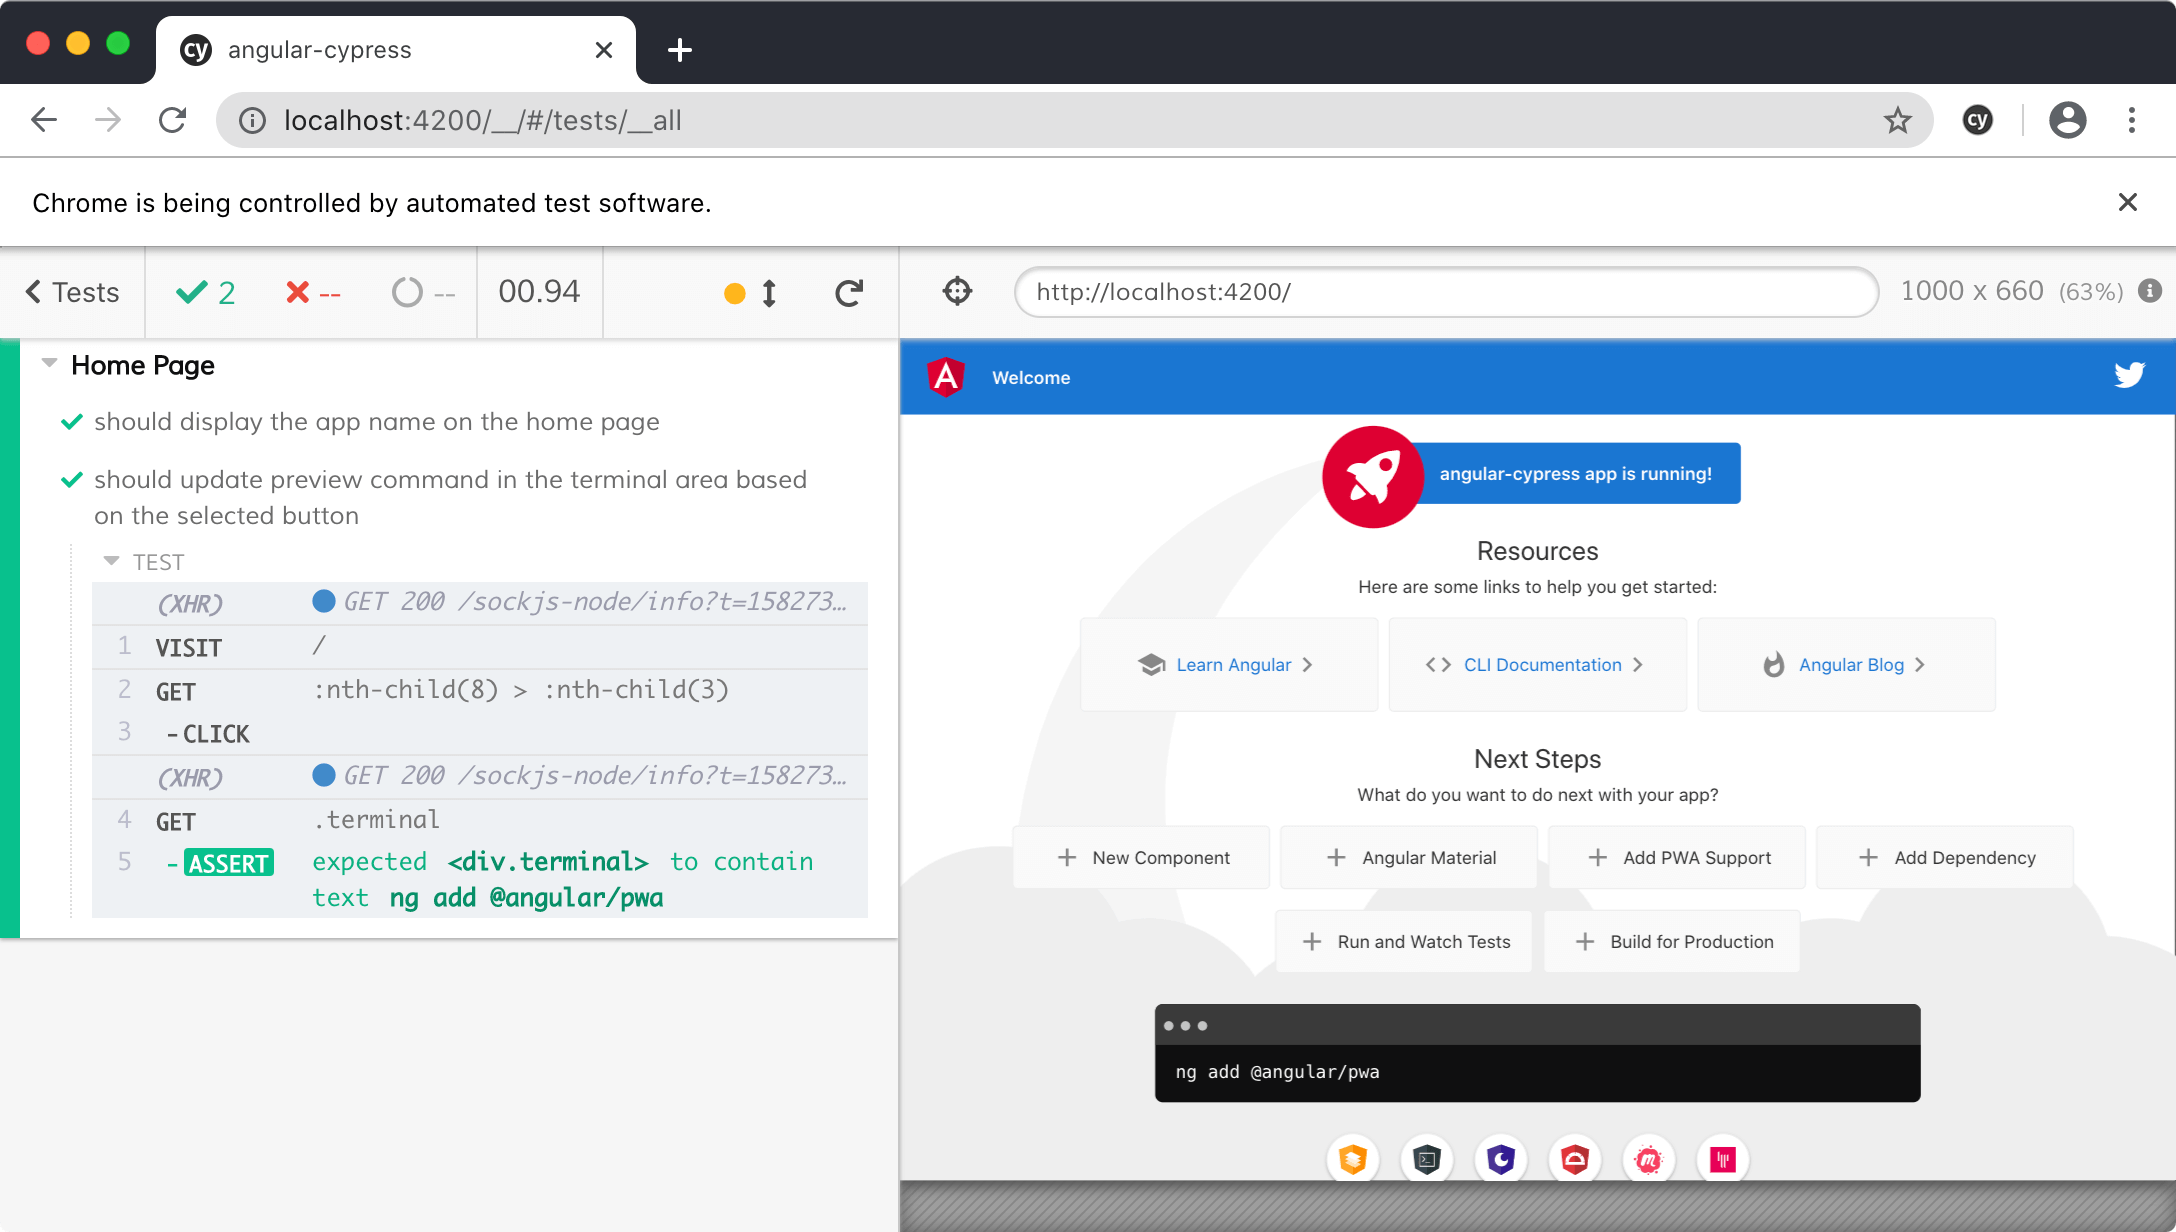
We can click on each step of the test to see what happen. That’s the time travel.

There is a lot more Cypress can do – things like triggering actions to the DOM elements or stubbing network requests or capturing videos or even testing REST APIs.
Overall, I really like Cypress. It makes automated UI testing fun again.
Be sure to check their documentation and their example repos on GitHub. They are very good resources to learn from.
Happy Testing,
Armno
Related posts