Adding Videos to Keystatic Content with Astro
Since I started using Keystatic and Markdoc, one thing I miss is the ability to add a video to the content. It's useful to embed a short screen recording in mp4 video instead of using an animated GIF image.
Normally we can use HTML tags in a Markdown file, which means we can put the <video> HTML tag in the content.
<video src="/videos/add-video-to-keystatic-content/big_buck_bunny_720p_1mb.mp4" controls></video>In Astro, we have to add allowHTML option to the Markdoc integration in Astro's config file first.
// astro.config.ts
export default defineConfig({
// ...
integrations: [
markdoc({
allowHTML: true
})
],
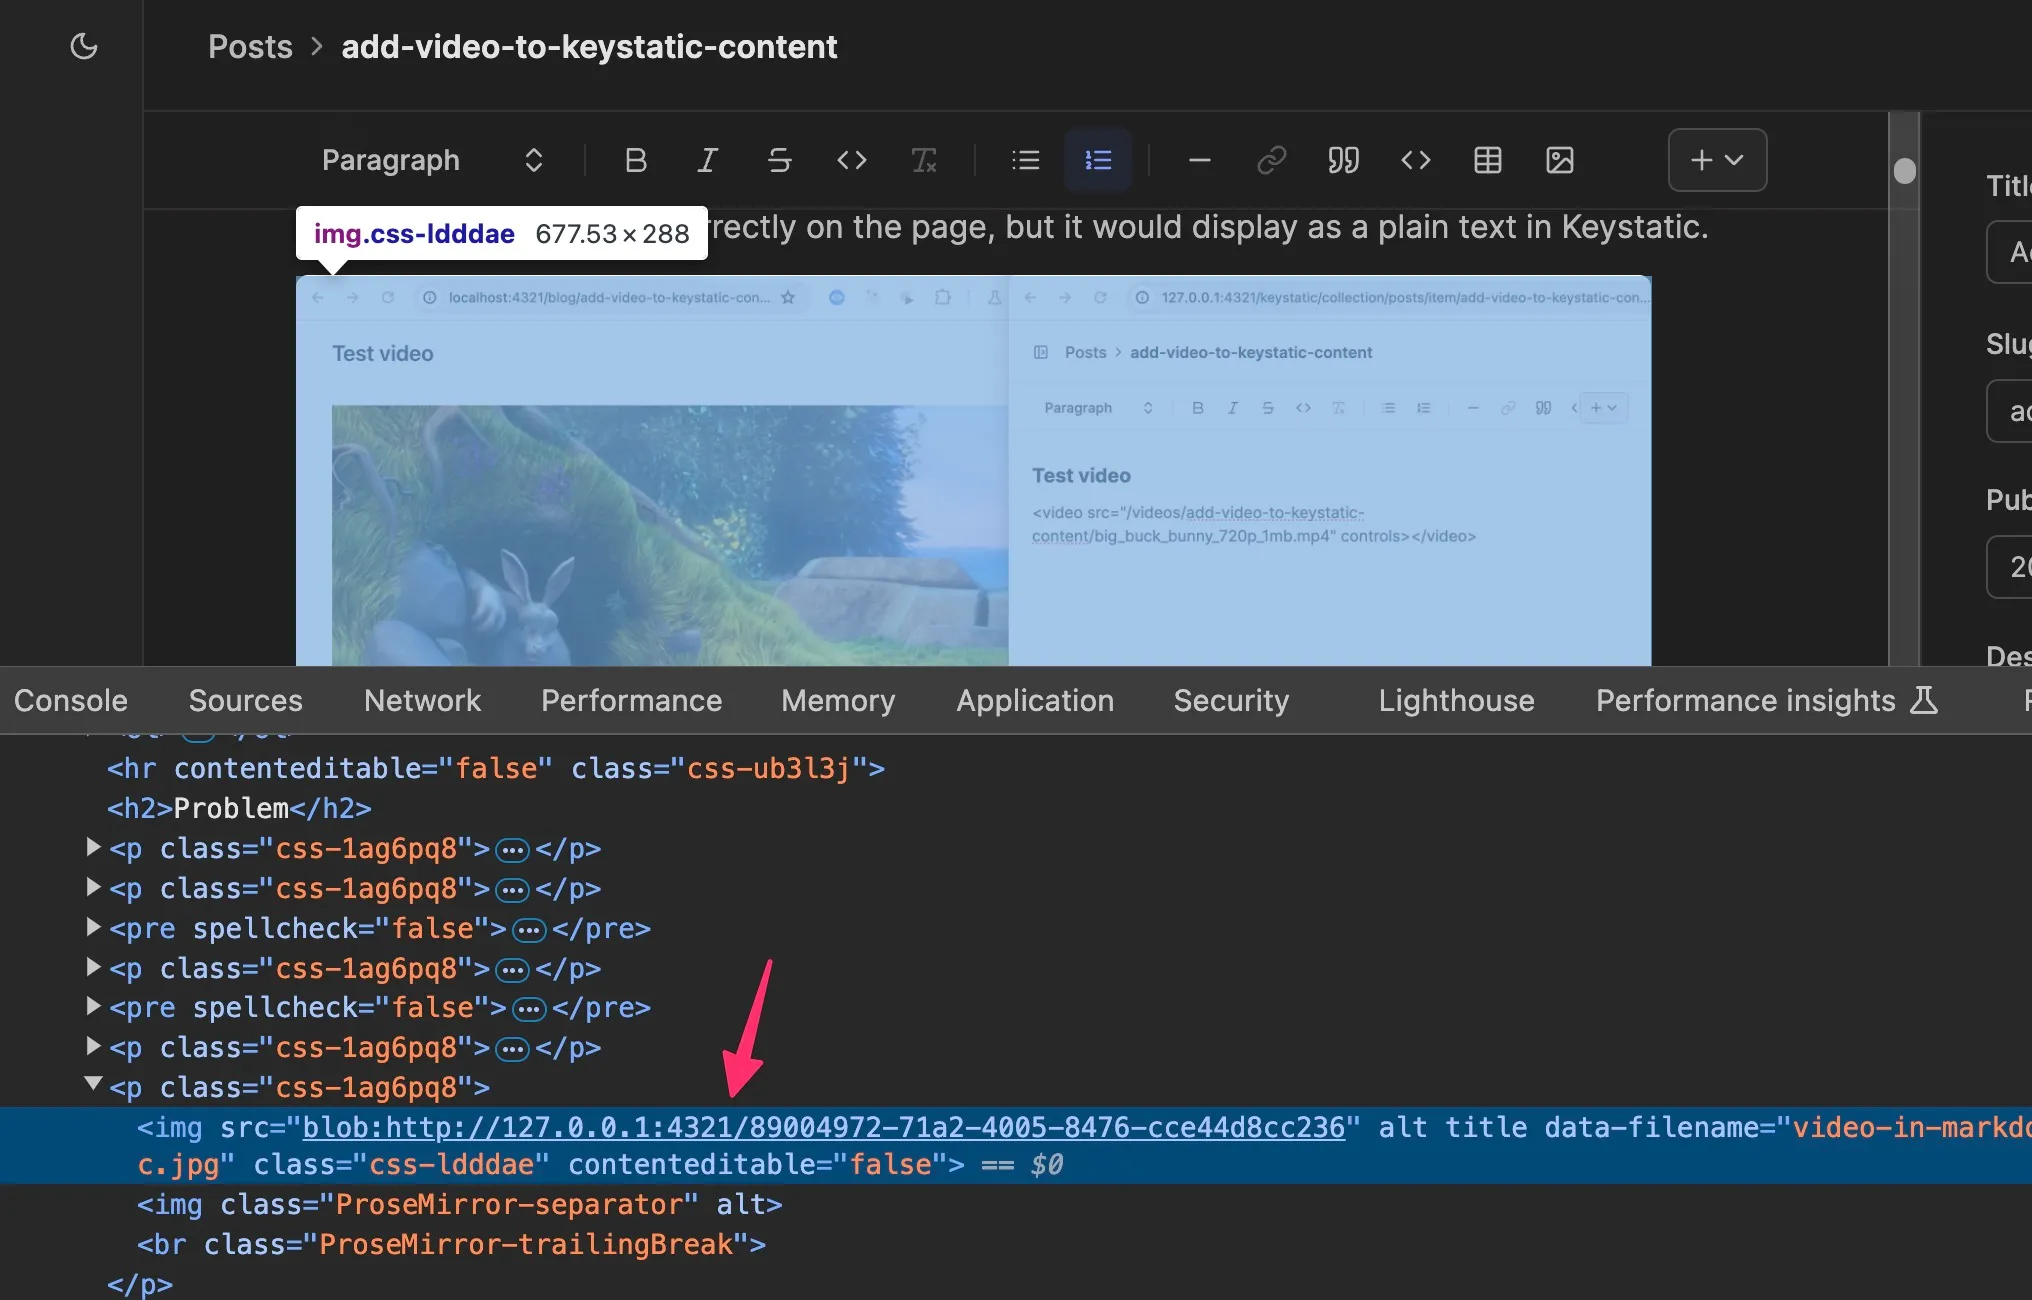
});The video renders correctly on the page, but it displays as plain text in Keystatic.
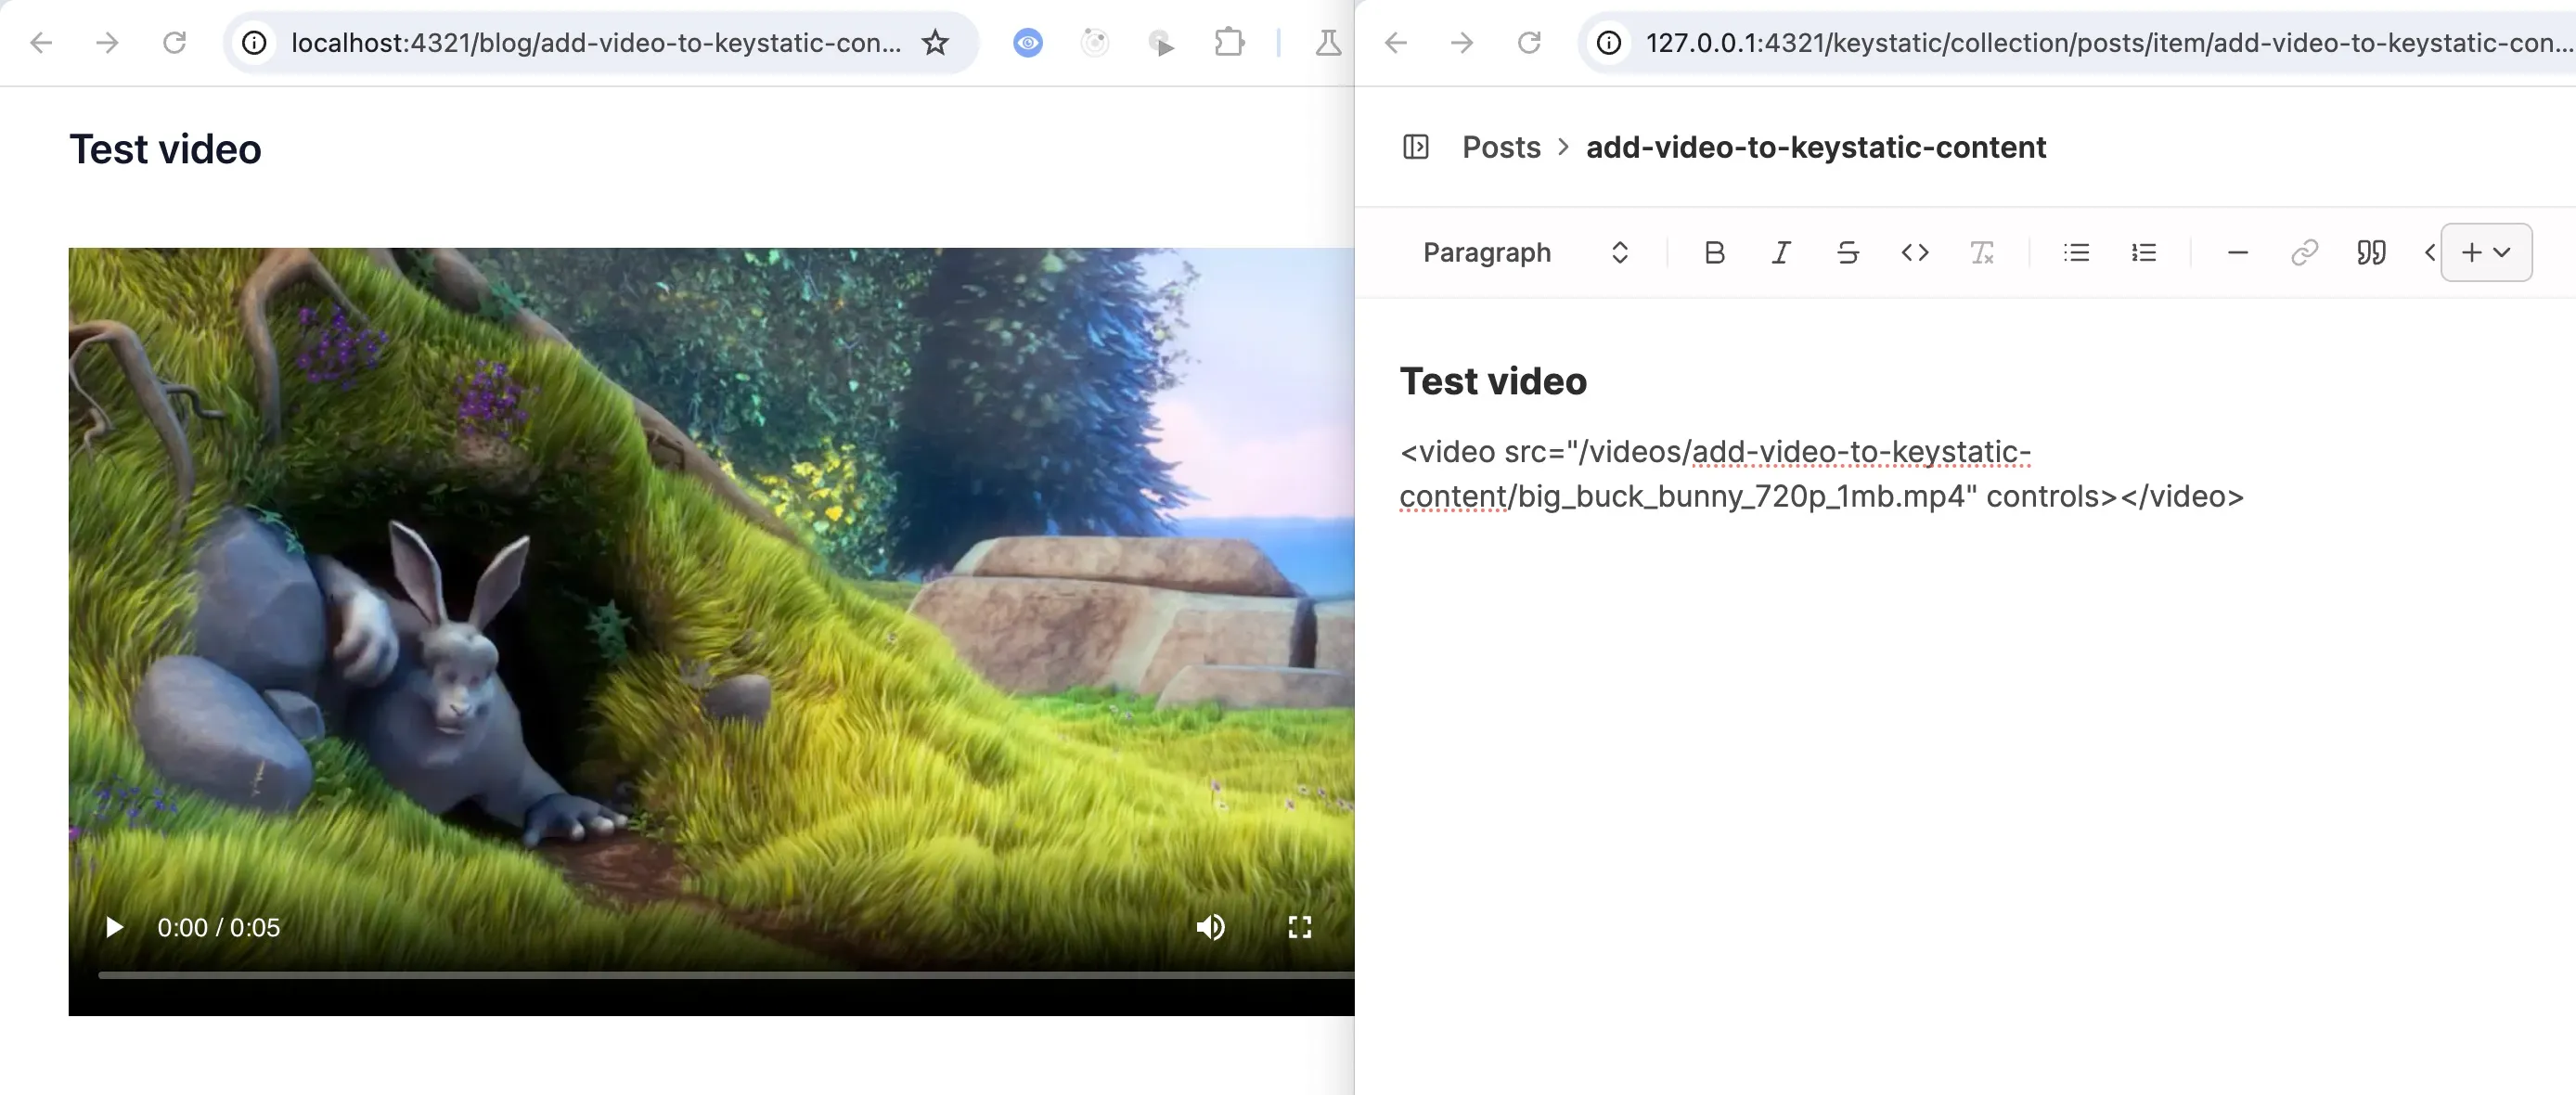
It would be nicer if it also displays as a video in Keystatic instead of raw HTML code. This gives a better editing experience and can prevent mistakes that can happen when managing raw HTML code in the page editor.
I'm curious if there's a way to do that, so I did some research and found that it's possible with Keystatic's Content Components feature.
Content Components
Content components feature allows us to create custom components for Keystatic's content field that is using Markdoc or MDX. The benefits would be not only to add custom components but also to edit/customize the component's content and props directly in Keystatic.
In this post, I'll go through steps and what I have learned from implementing a Video component in Keystatic that:
- can be added to Keystatic's editor
- displays as an actual
<video>element in both Keystatic and the actual blog post page - with some options for the component that can be set from the UI.
Here is the preview of the final results.
Create a Video Content Component in Keystatic
To add a custom component to Keystatic, there are 3 steps involved
- Define a new component for Keystatic
- Define a new tag for Markdoc
- Create an Astro (or framework X) component to render it
1. Define a New Content Component Block
There are 5 different component types to choose from: Wrapper, Block, Inline, Mark, and Repeating. For my video component, I choose the Block type.
In my keystatic.config.ts, under schema definitions for the content field, I add a components block with a configuration for the video component and its basic schema definitions.
For the video file itself, I'm using the File field type from Keystatic.
- Unlike the Images field, video files will not be processed by Astro's optimization. So they can be put directly in the
/publicfolder as defined in thedirectoryoption of thefields.file. - The File field puts the videos of the same blog post in the same folder e.g.
/public/videos/<post-slug>/<file-name>.mp4
- Unlike the Images field, video files will not be processed by Astro's optimization. So they can be put directly in the
For
controls,autoplay, andloopattributes that can be set to enabled or disabled, I'm using the Checkbox field for them.- There are more attributes of the
<video>tag. I only add what I need to keep it simple.
- There are more attributes of the
// keystatic.config.ts
content: fields.markdoc({
...
components: {
video: block({
label: 'Video',
description: 'Upload a video',
schema: {
src: fields.file({
label: 'Video file',
description: 'Select a video file',
directory: 'public/videos/',
publicPath: '/videos/',
}),
controls: fields.checkbox({
label: 'Controls',
description: 'Show video controls',
defaultValue: false
}),
autoplay: fields.checkbox({
label: 'Autoplay',
description: 'Enable autoplay (will mute the video)',
defaultValue: false
}),
loop: fields.checkbox({
label: 'Loop',
description: 'Enable looping',
defaultValue: false
})
},
})
}
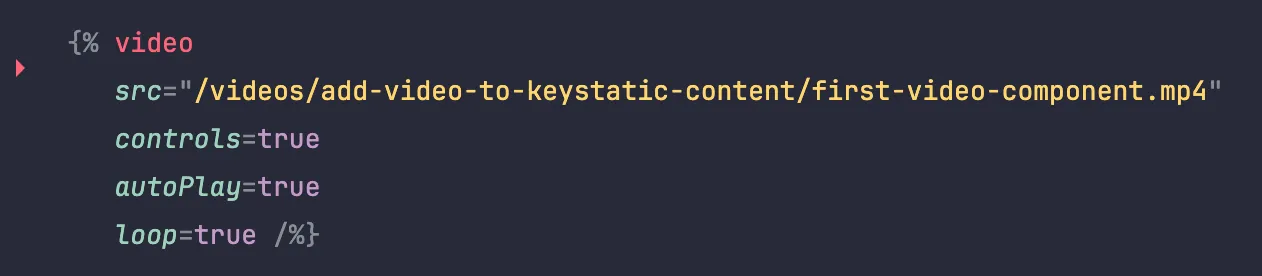
})This will produce the {% video /%} tag in the .mdoc file, which we have to register as a custom tag so Markdoc knows how to render it.
2. Define new Markdoc Tag for the New Component
In markdoc.config.mjs file, I define a new video tag that points to an Astro component.
export default defineMarkdocConfig({
  tags: {
    ...
    video: {
      render: component('./src/components/VideoPlayer.astro'),
      attributes: {
        src: {
          type: String,
          required: true
        },
        controls: {
          type: Boolean,
          required: false
        },
        autoplay: {
          type: Boolean,
          required: false
        },
        loop: {
          type: Boolean,
          required: false
        },
      }
    },
  }
});
3. Create a new Astro component to display the video
(I name the component VideoPlayer so as to not confuse myself with the native <video> tag.)
// src/components/VideoPlayer.astro
---
type Props = {
src: string;
controls?: boolean;
autoplay?: boolean;
loop?: boolean;
}
let props = Astro.props as Props;
---
<video {...props} class="max-w-full">
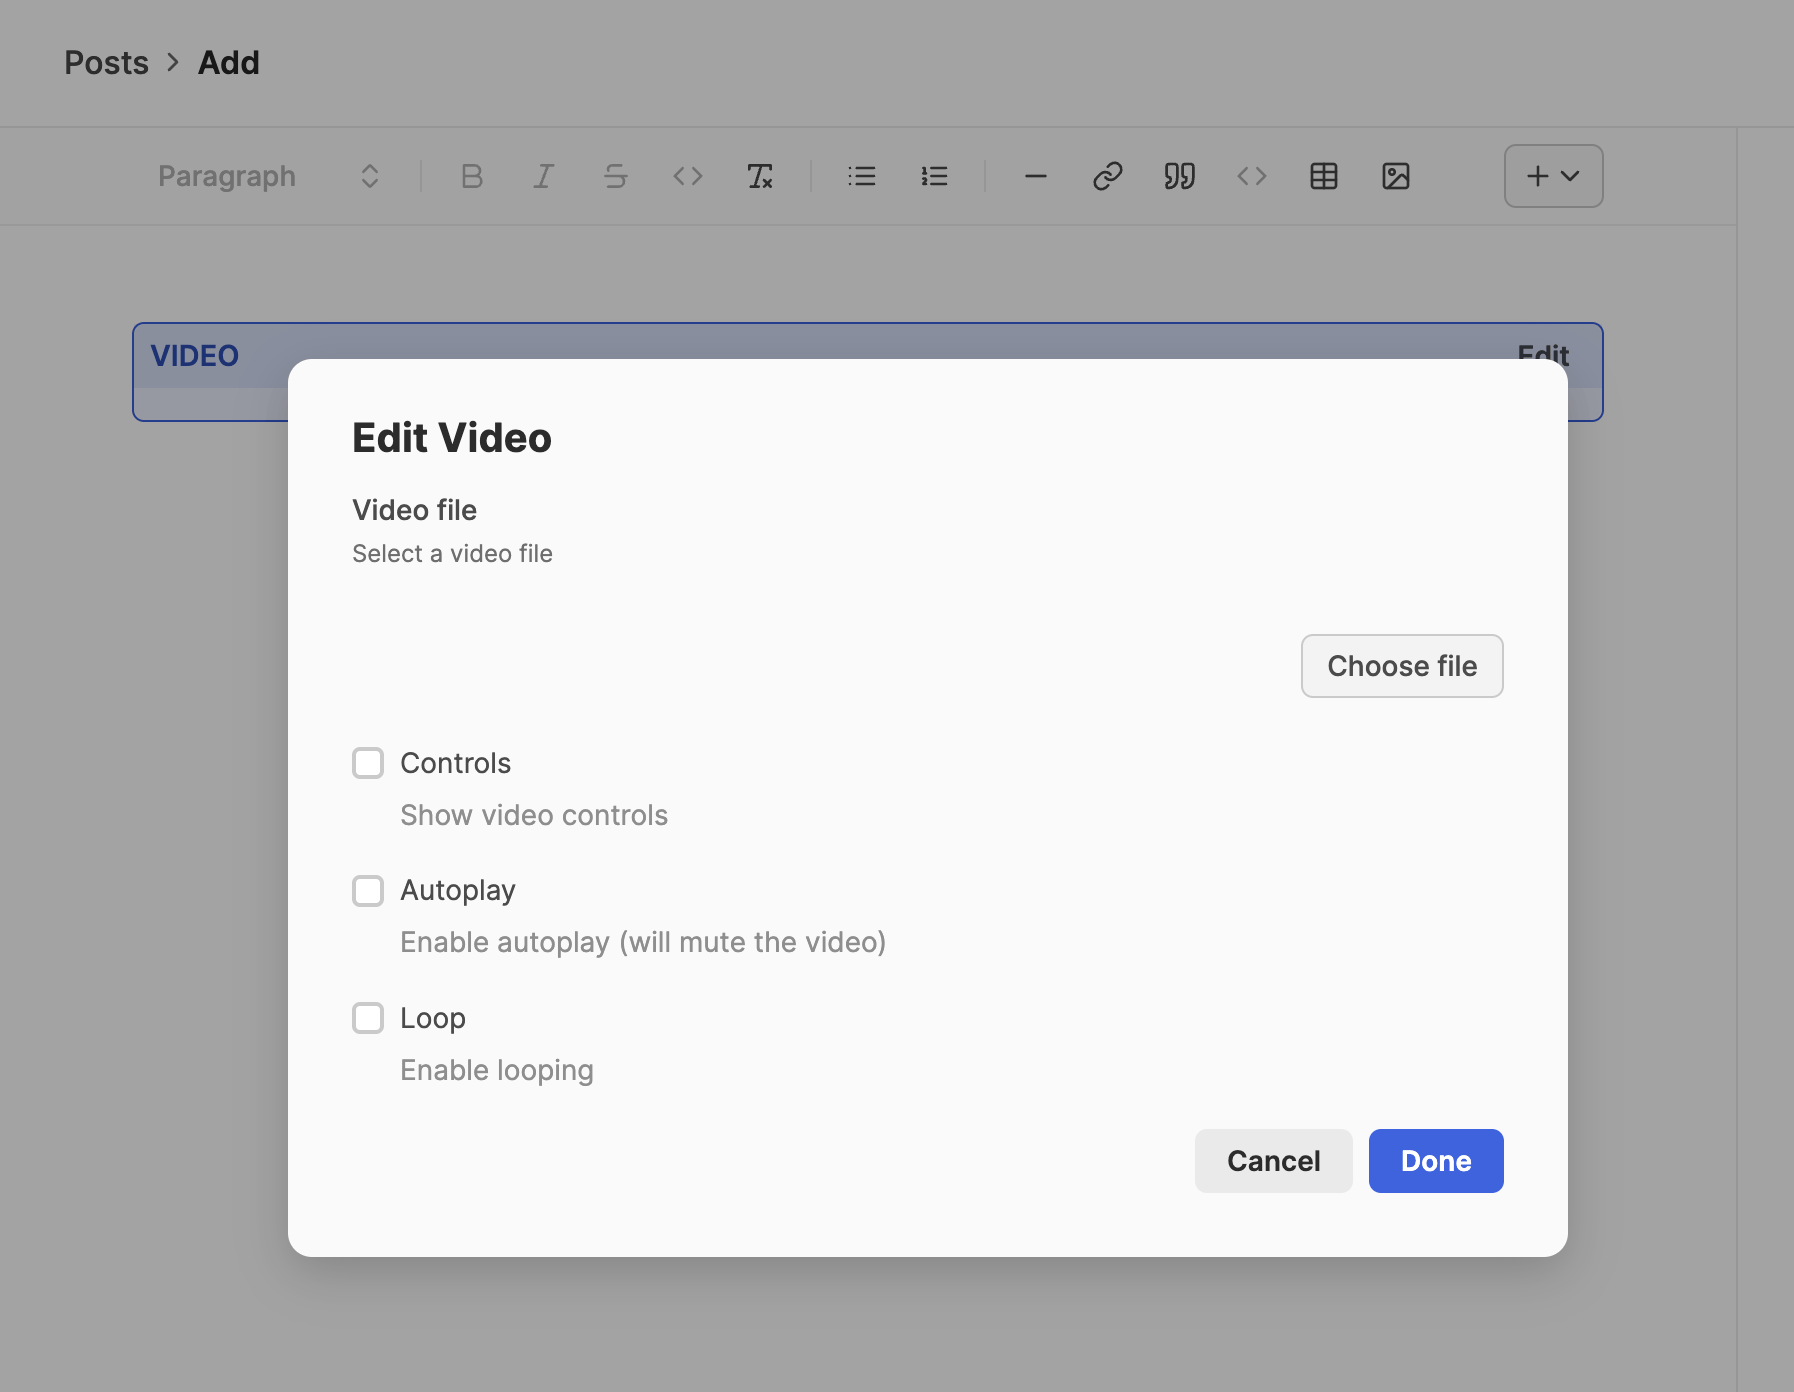
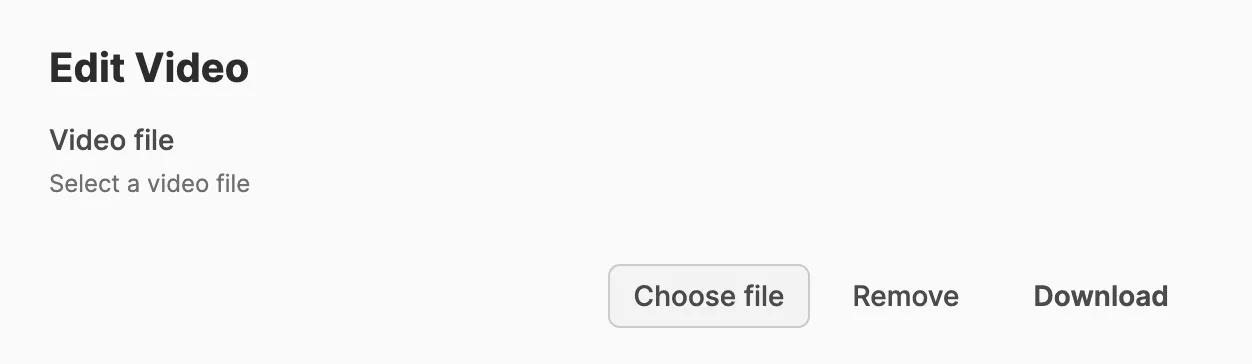
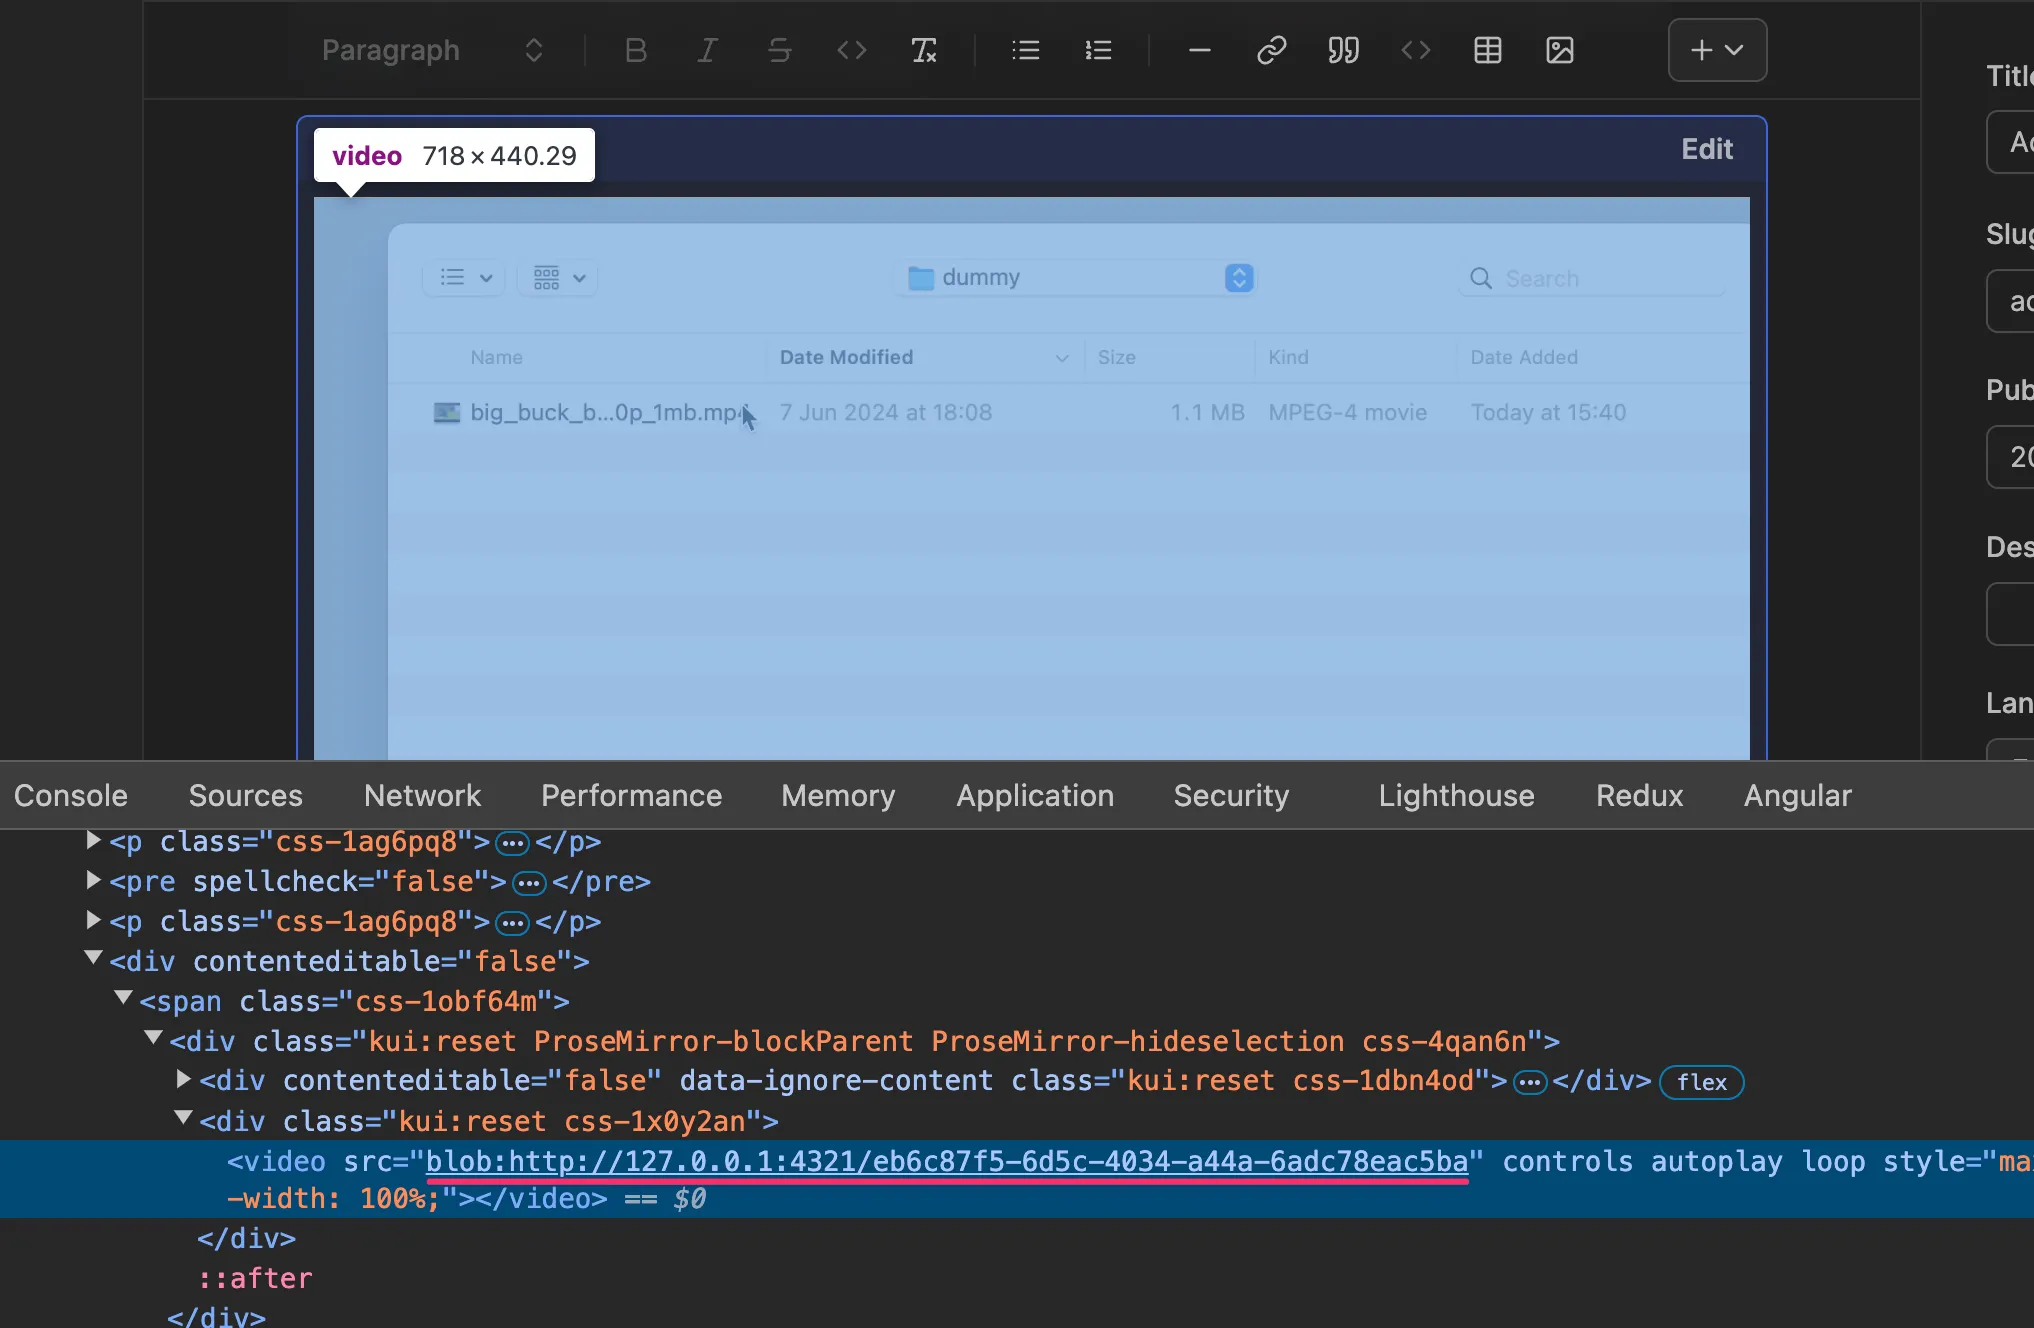
</video>As a result, I have a block with options like this video below in Keystatic. And it renders the <video> tag correctly on the actual page.
I think the File field could have some more love there: currently, it doesn't show much information of the selected file. At least displaying the selected file name would be nice.
Now I'm able to add a video to my blog post. The next step is to make it a little nicer by displaying something more useful than an empty box in Keystatic using the ContentView option.
Display component previews in Keystatic
ContentView option allows us to define what should be displayed in the editor. It's a function that returns a React component to display inside of the component box in Keystatic's page editor.
ContentView?: (props) => ReactNode;Since Keystatic itself is a React app, it can only render a React component. The VideoPlayer.astro component I created earlier will not work because it's an Astro component.
Fortunately, with the power of Astro that it supports components from other frameworks, I can change the VideoPlayer Astro component I created earlier to a React component, and use it in both Astro site and in Keystatic.
1. Add React Integration
The first thing I have to do is to install React integration for Astro
npx astro add reactand add react() integration in astro.config.ts
import react from '@astrojs/react';

export default defineConfig({
  // ...
  integrations: [react()],
});
2. Convert Astro component to React
From src/components/VideoPlayer.astro
// src/components/VideoPlayer.astro
---
type Props = {
  src: string;
  controls?: boolean;
  autoplay?: boolean;
  loop?: boolean;
}

let props = Astro.props as Props;
---

<video {...props}>
</video>
to src/components/VideoPlayer.tsx
// src/components/VideoPlayer.tsx
type VideoPlayerProps = {
  src: string;
  controls?: boolean;
  autoPlay?: boolean;
  loop?: boolean;
}

export default function VideoPlayer(props: VideoPlayerProps) {
  return (
    <video {...props}>
    </video>
  );
}
3. Update Markdoc's config file to point to the React component
// markdoc.config.js
tags: {
  video: {
-   render: component('./src/components/VideoPlayer.astro'),
+   render: component('./src/components/VideoPlayer.tsx'),
At this point, everything should work as before.
Now comes the challenging part.
4. Display the new React component in ContentView
In keystatic.config.ts file, I add the ContentView option to the video component.
// keystatic.config.ts
import VideoPlayer from '@components/VideoPlayer';

video: block({
  ...
  ContentView: (props) => {
    return (
      <VideoPlayer {...props} />
    )
  },
  schema: ...
My VSCode and my terminal start throwing errors at me that I cannot use JSX in a .ts file. So I rename keystatic.config.ts to keystatic.config.tsx.
It doesn't work at first because, for some reason, it still tries to look for the old file (.ts) - similar to the issue #1030. For me, deleting both .astro/ and node_modules/ folders solved the problem.
The next challenge is to construct the src attribute for the <video> tag.
When using the File field, the information is passed via props to ContentView contains the:
data- AUint8Arraydata of the video fileextensionfilename
but not the actual path to the file itself that is stored in /public/videos/<post-slug>/<file-name>.mp4 as configured earlier.
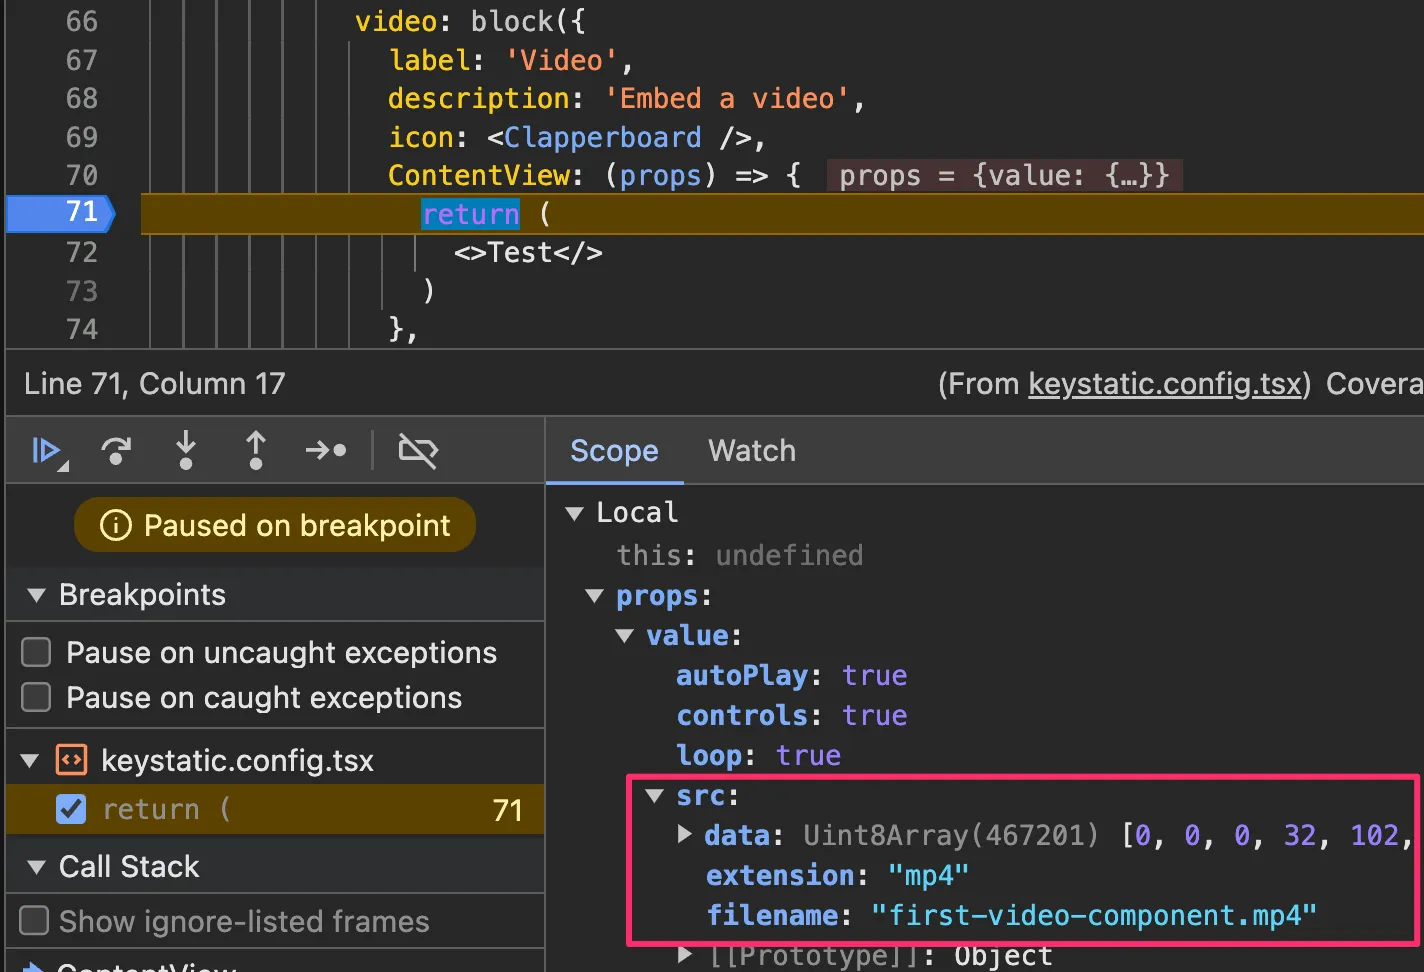
even though that full path is already in the source in .mdoc file.
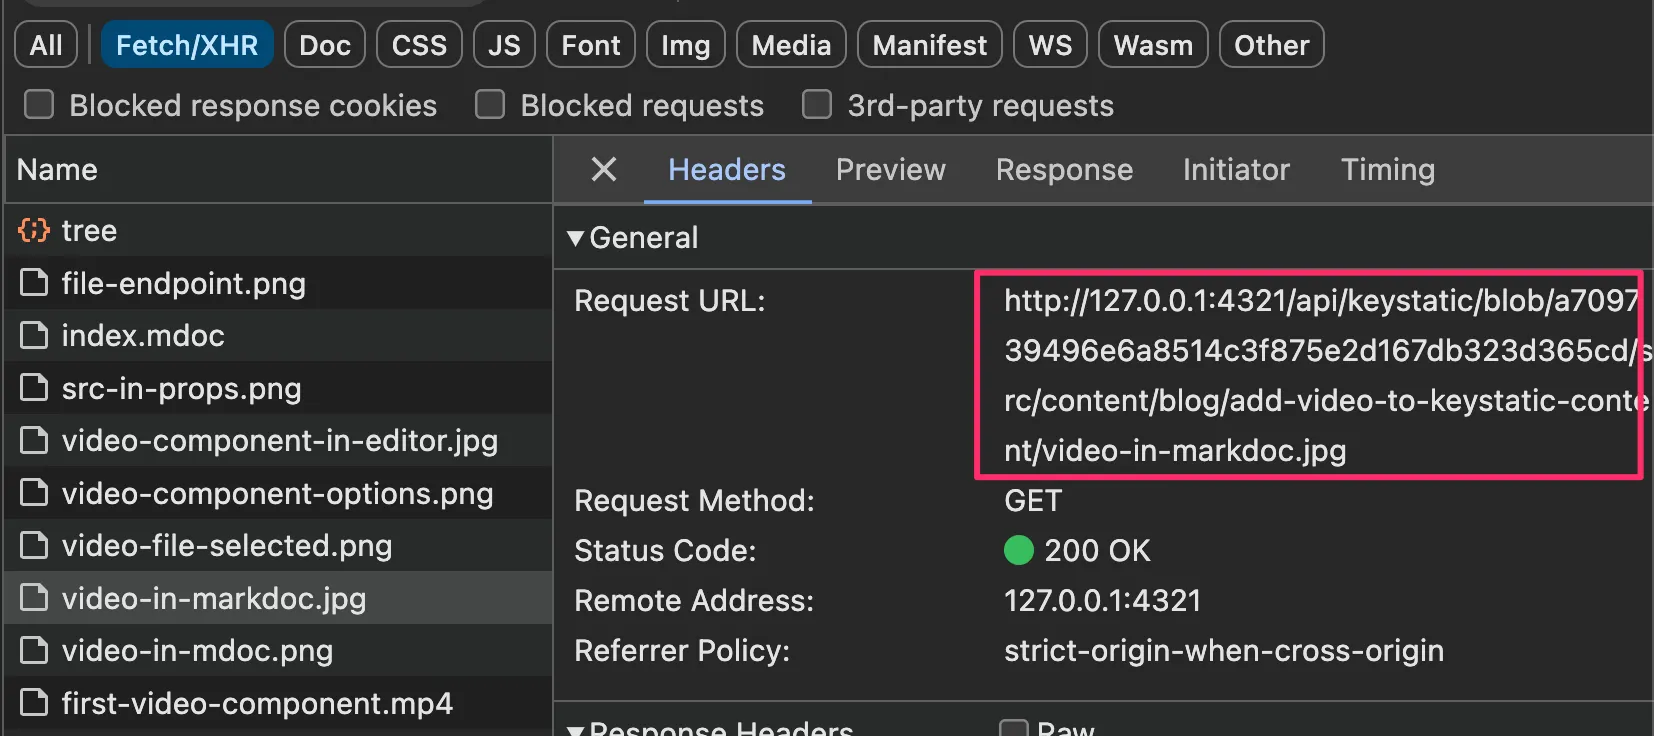
I think Keystaic handles this internally. If we look at the Network tab, Keystatic does that also for image files. It makes a fetch request to get the Blob of the given file from an internal endpoint, make a data URL out of the Blob, and then put in the <img> tag's src attribute.
So I can do the same for my video component by
- Create a Blob from Uint8Array data passed to the
props - Create a data URL from the Blob
- Pass it as a
srcprop to my<VideoPlayer>component.
ContentView: (props) => {
  const { src, ...otherProps} = props.value;
  if (!src) {
    return <></>;
  }

  // (1)
  const blob = new Blob([src.data], { type: 'video/mp4' });

  // (2)
  const url = URL.createObjectURL(blob);

  // (3)
  return (
    <VideoPlayer src={url} {...otherProps} />
  )
},
And now I can use the same <VideoPlayer> component both in the actual content and in Keystatic 🎉.
Fine-tuning
The Content Components support a custom icon and a description to make it nicely aligned with the built-in components in the menu and the slash command.
![]()
The icon option can be any React component. I use the icon from Lucide.
import { Clapperboard } from 'lucide-react';
...

video: block({
  ...
  description: 'Upload a video',
  icon: <Clapperboard />,
Another thing is to make the video fit in the container in both Keystatic and the actual page. I put inline styles to my <VideoPlayer> component to set its max-width to 100%. I can't use Tailwind's max-w-full class here because Keystatic doesn't have access to my Tailwind classes.
 return (
-  <video {...props} className="max-w-full">
+  <video {...props} style={{ maxWidth: '100%'}}>
   </video>
 );
Summary
It might look like a lot of work to add videos to the content, but it's a one-time configuration that I can reuse for my future blog posts.
I'm pretty sure I only scratched the surface of it, but I personally really like the Content Components feature. I can see the potential to create more complex content in Keystatic using this feature.
And I like it even more that it works very well with Astro 🚀.
I hope you'll like it too. ✌️
Related posts