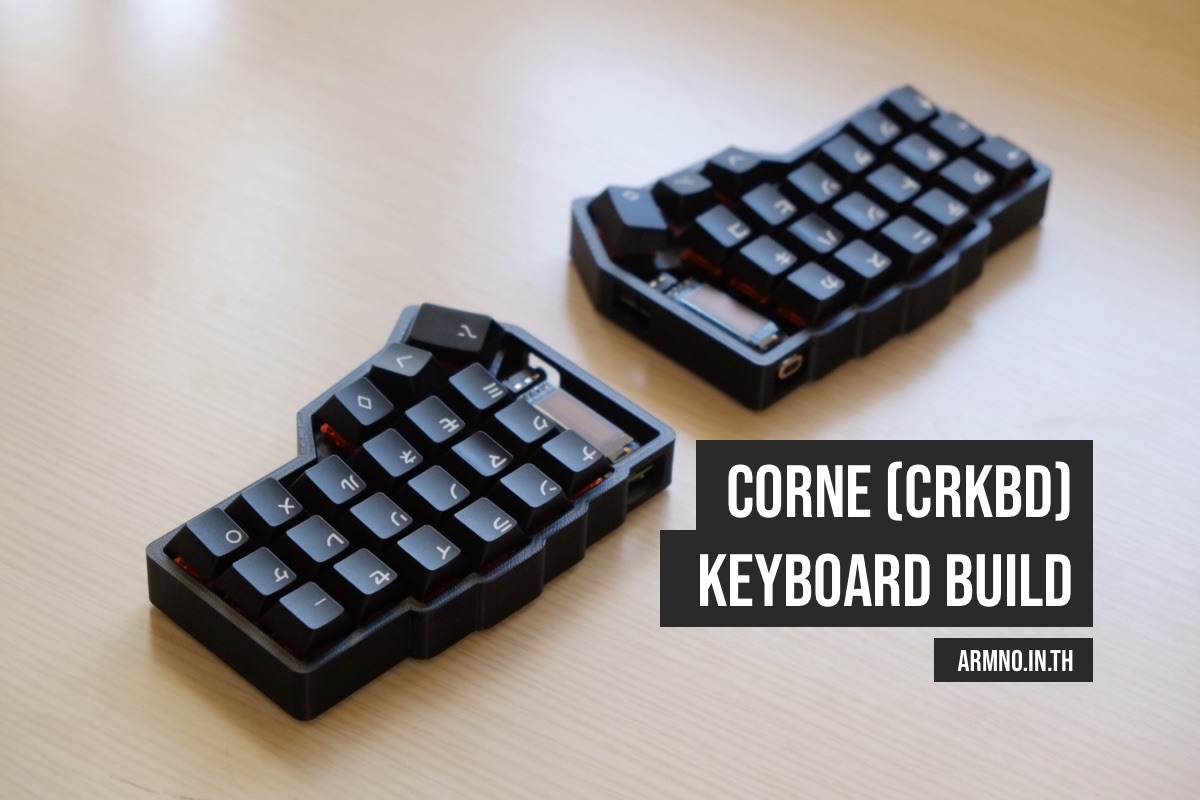
Building a Wireless Corne Keyboard
In my earlier post on building a Corne keyboard, my first Corne keyboard stopped working after using it for a month. I tried different ways to fix the keyboard. None of them helped.
Since the keyboard is already kind of broken, I thought why not experiment with it a bit further? Just to see how far I can go. What if I could even upgrade the keyboard, from a wired version to a wireless one?
With wireless split keyboards, there are a few extra benefits:
- No TRRS cable is needed to connect between each side of the keyboard.
- No USB cable is needed to plug into the computer (except for charging). The keyboard works via Bluetooth.
- Which means each side of the keyboard is completely free from each other, and even from each other. I could put each side of the keyboard anyway or anyhow I want - as long as both sides are in the Bluetooth range.
I did some research. I found that it is possible to make a wireless version of the Corne keyboard using the existing parts I have. I would take the chance to fix my previous mistakes too.
After using this build for a few months, I wouldn't recommend the same approach I used. The main reason is the battery life - this board drains the battery power very quickly. The left side only lasts about a couple hours.
It's better to use a PCB and parts that are designed for a wireless build. Check out my other post: Low Profile Wireless Corne Keyboard.
Getting Parts
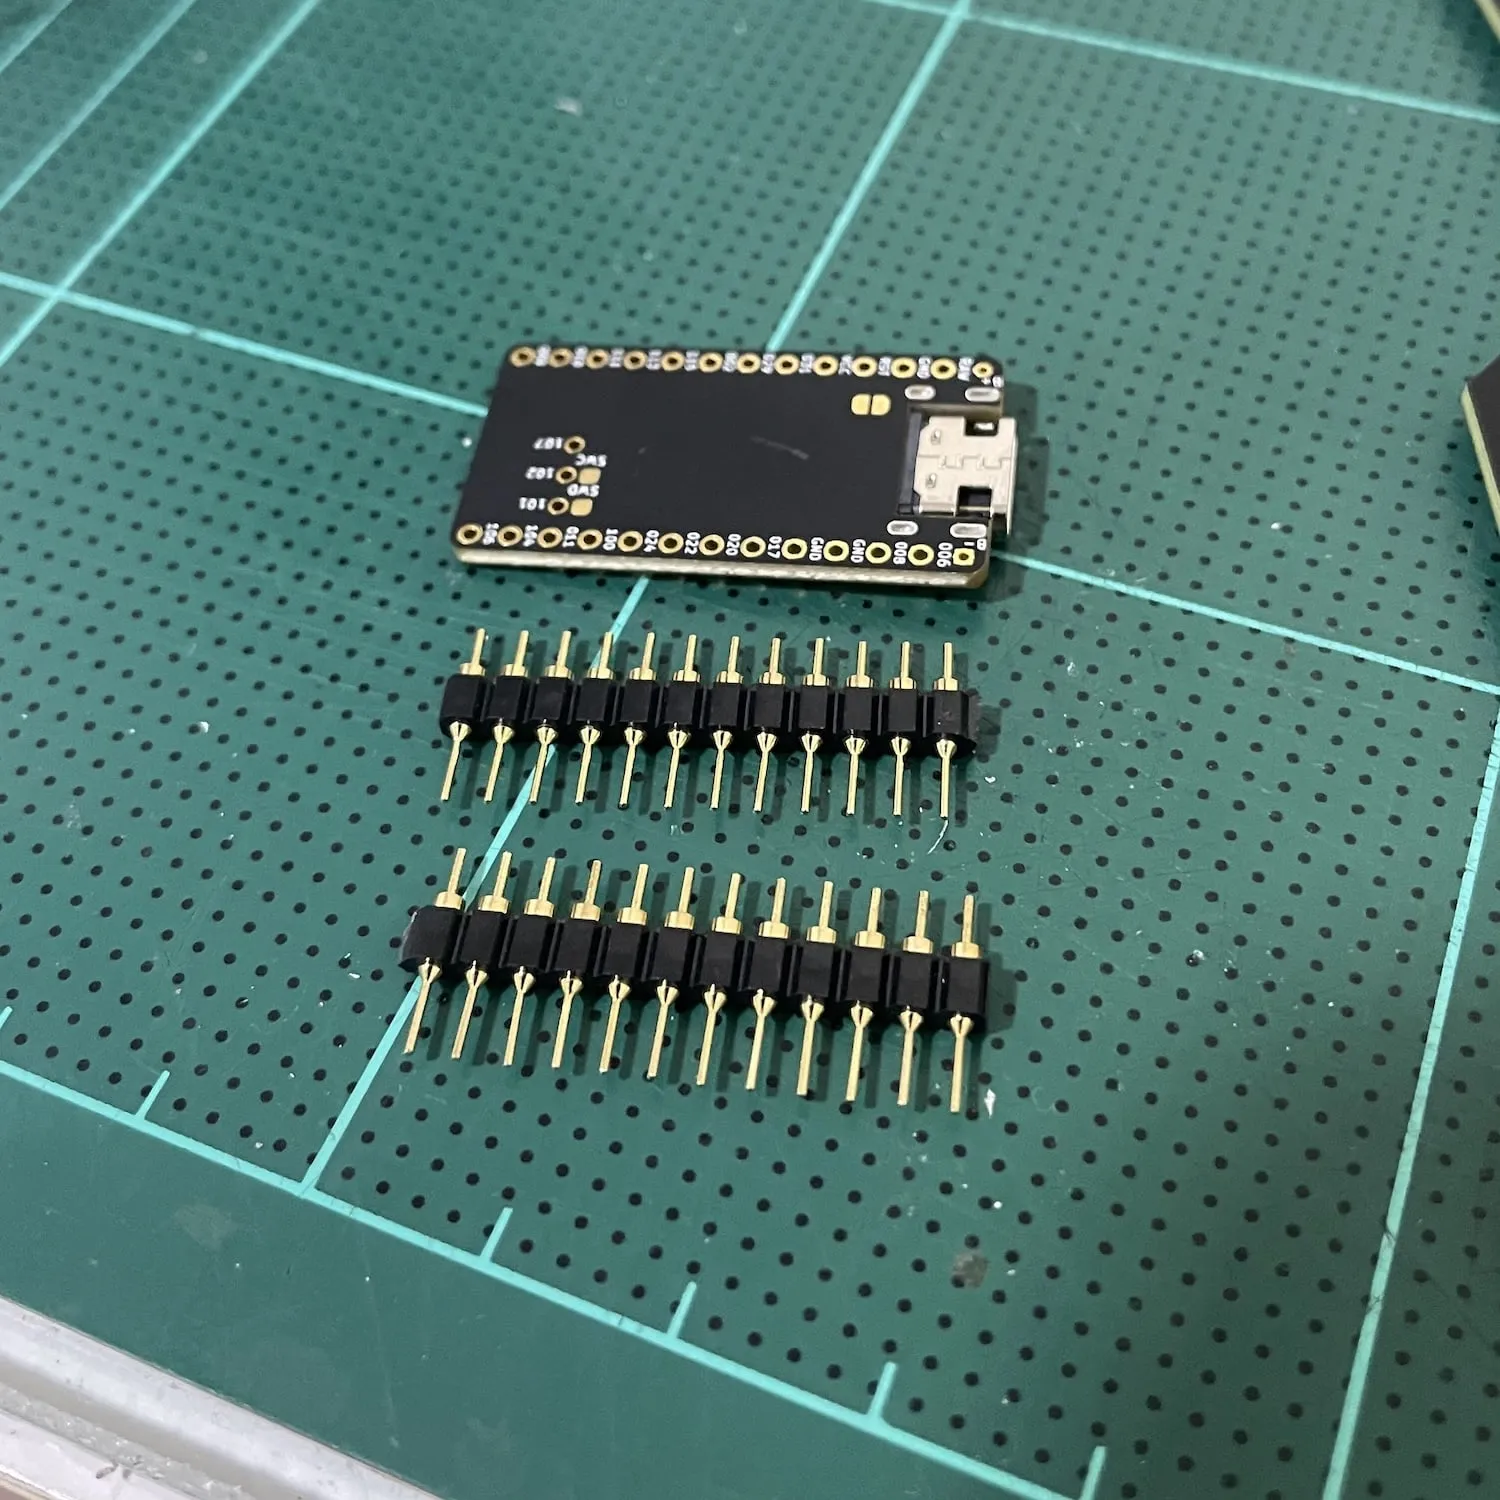
- 2x Nice!nano v2 controllers from BeeKeep (~2,200THB / $63. Yes, this thing is not cheap.)
- 5x female, 5x male round straight Pin Headers from Shopee (175THB / $4.9)
- 2x Lithium-Polymer 3.7v 160mAh (361230) from Lazada (100THB / $2.80)
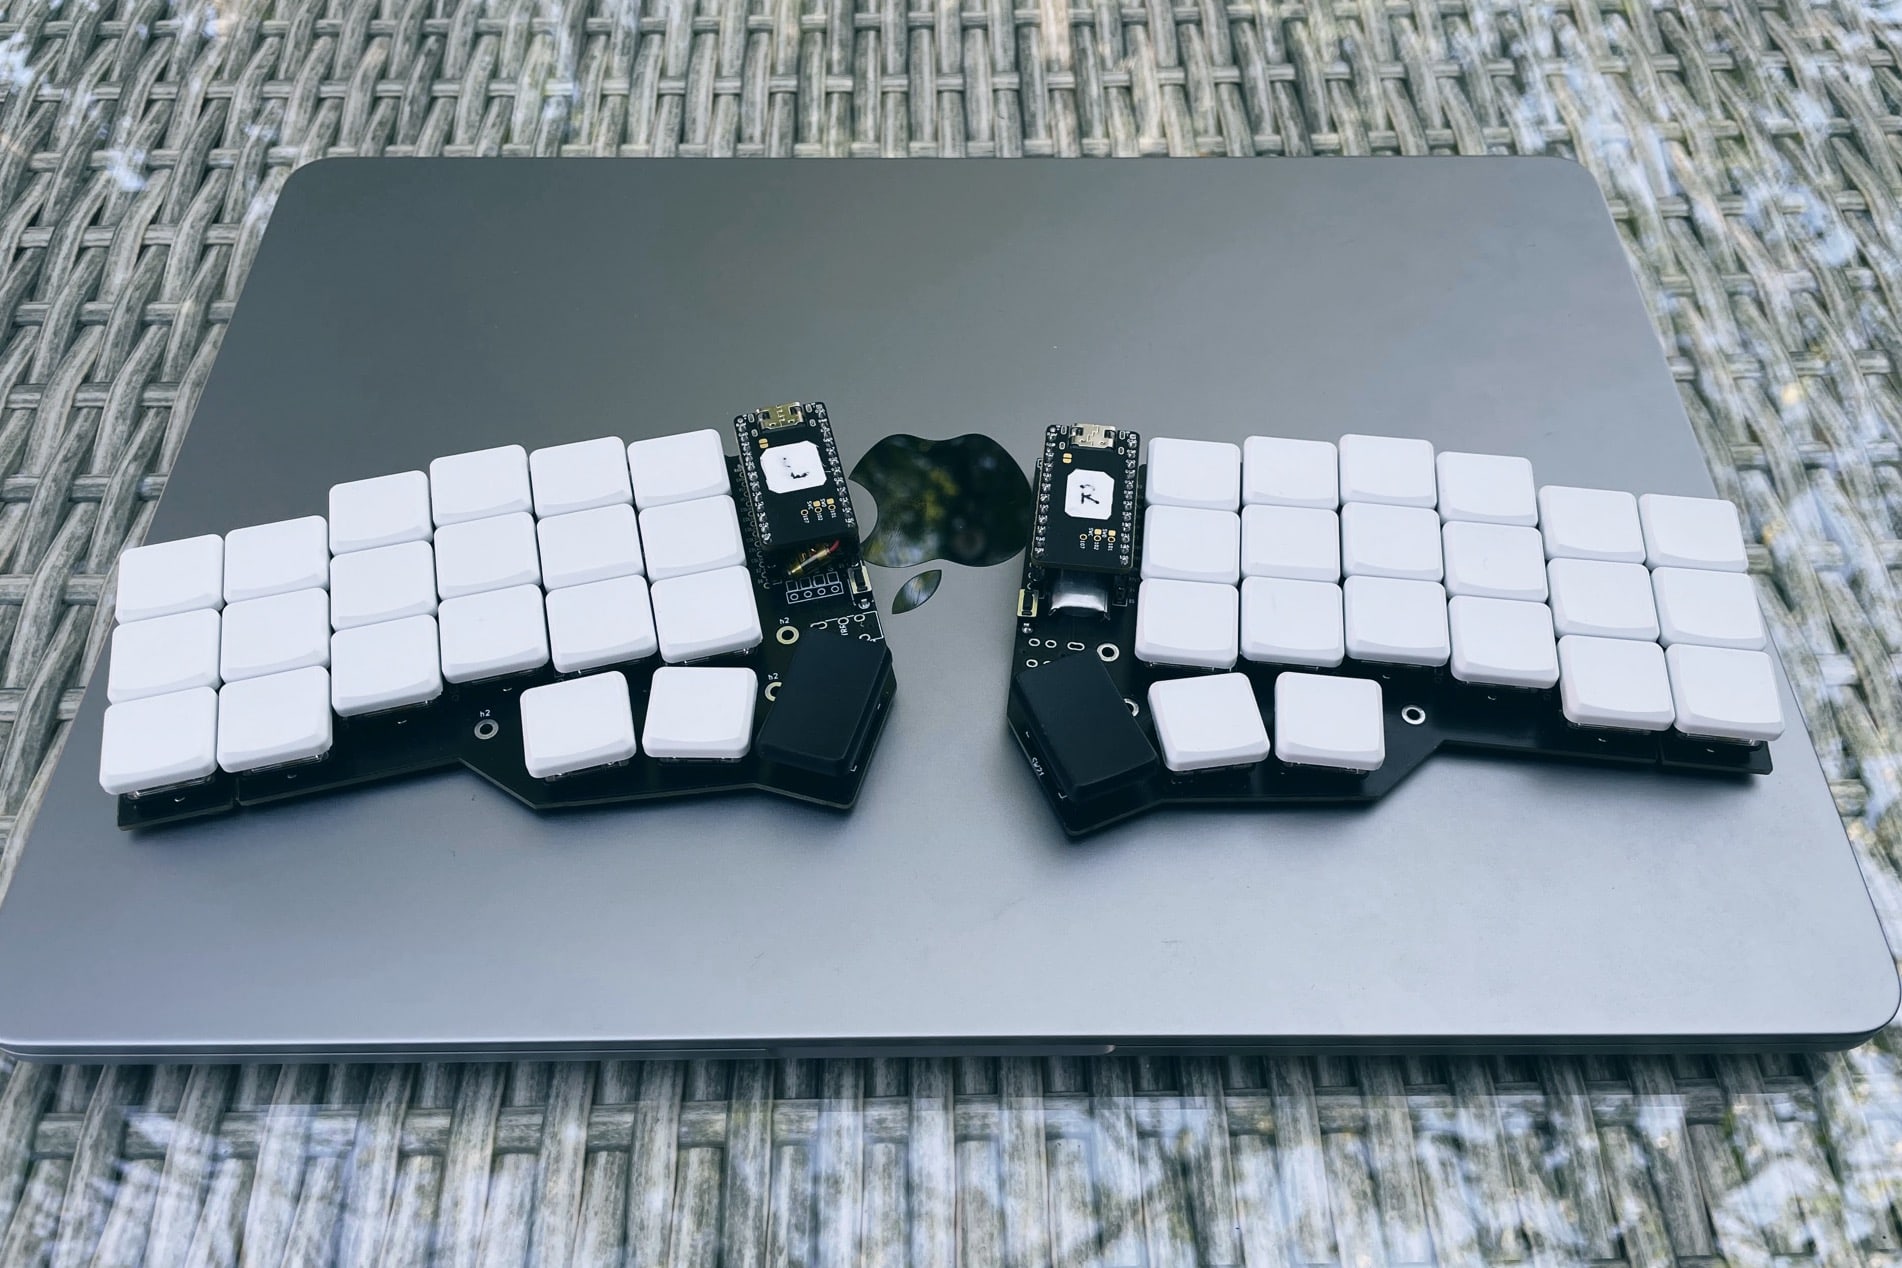
Socketing and installing Nice!nano controllers
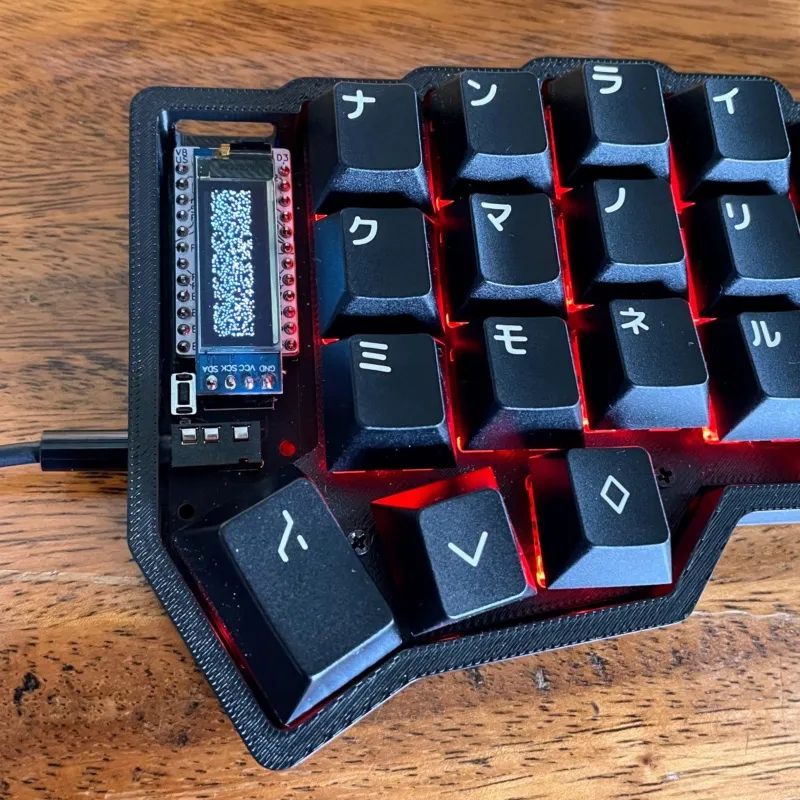
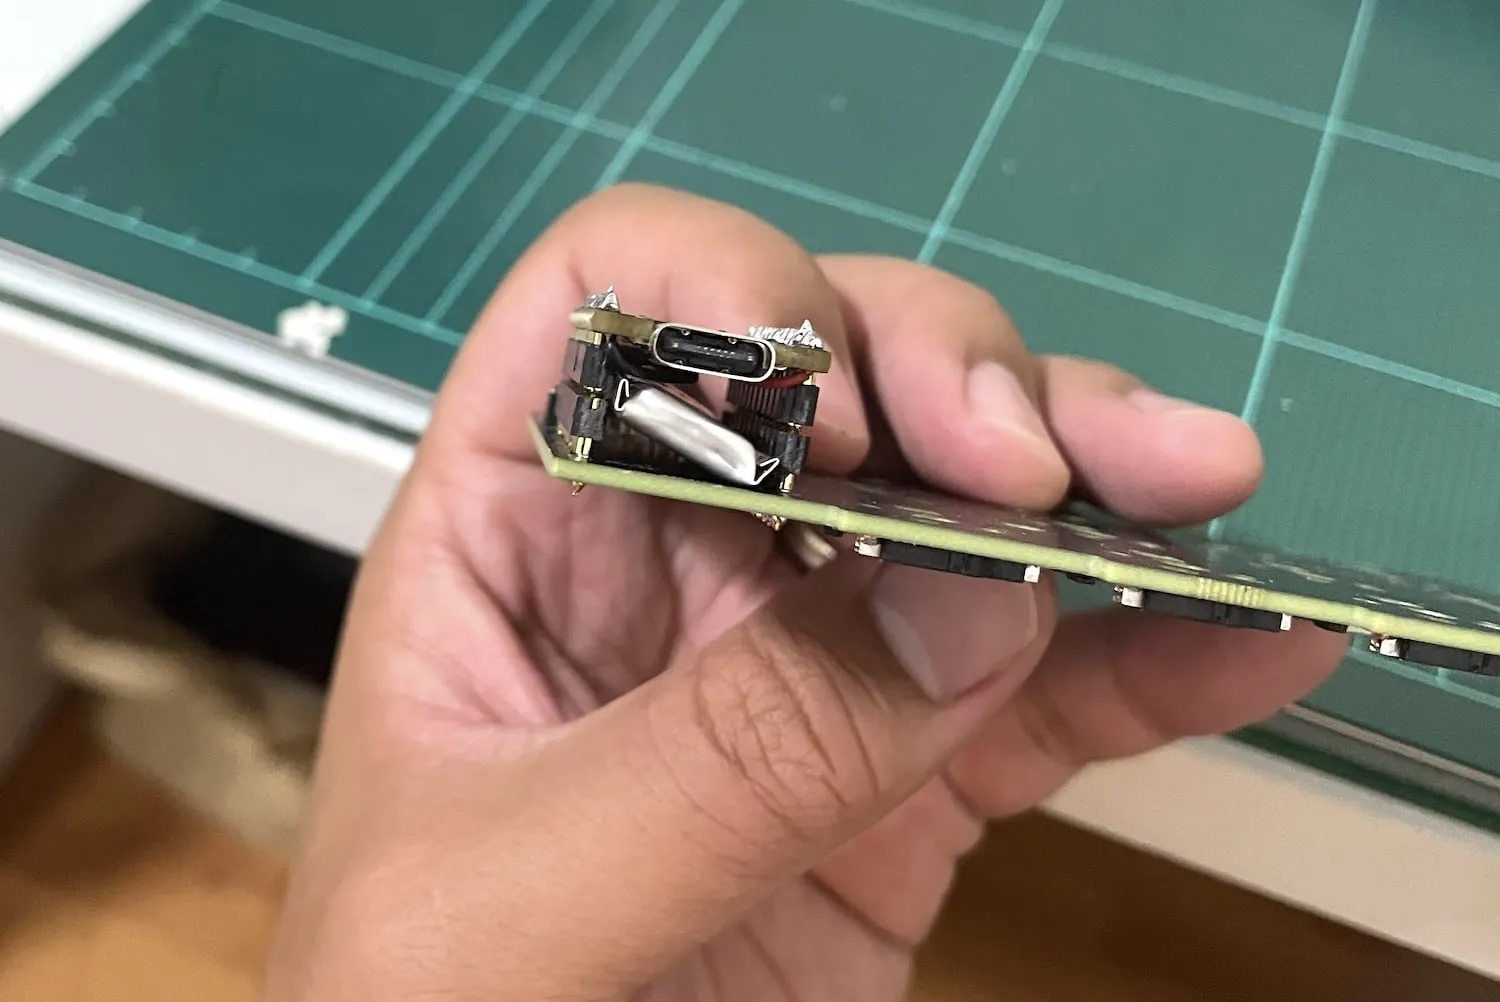
I remove the controller, the OLED screen, and the TRRS jack from the PCB. I left the reset switch on the board.
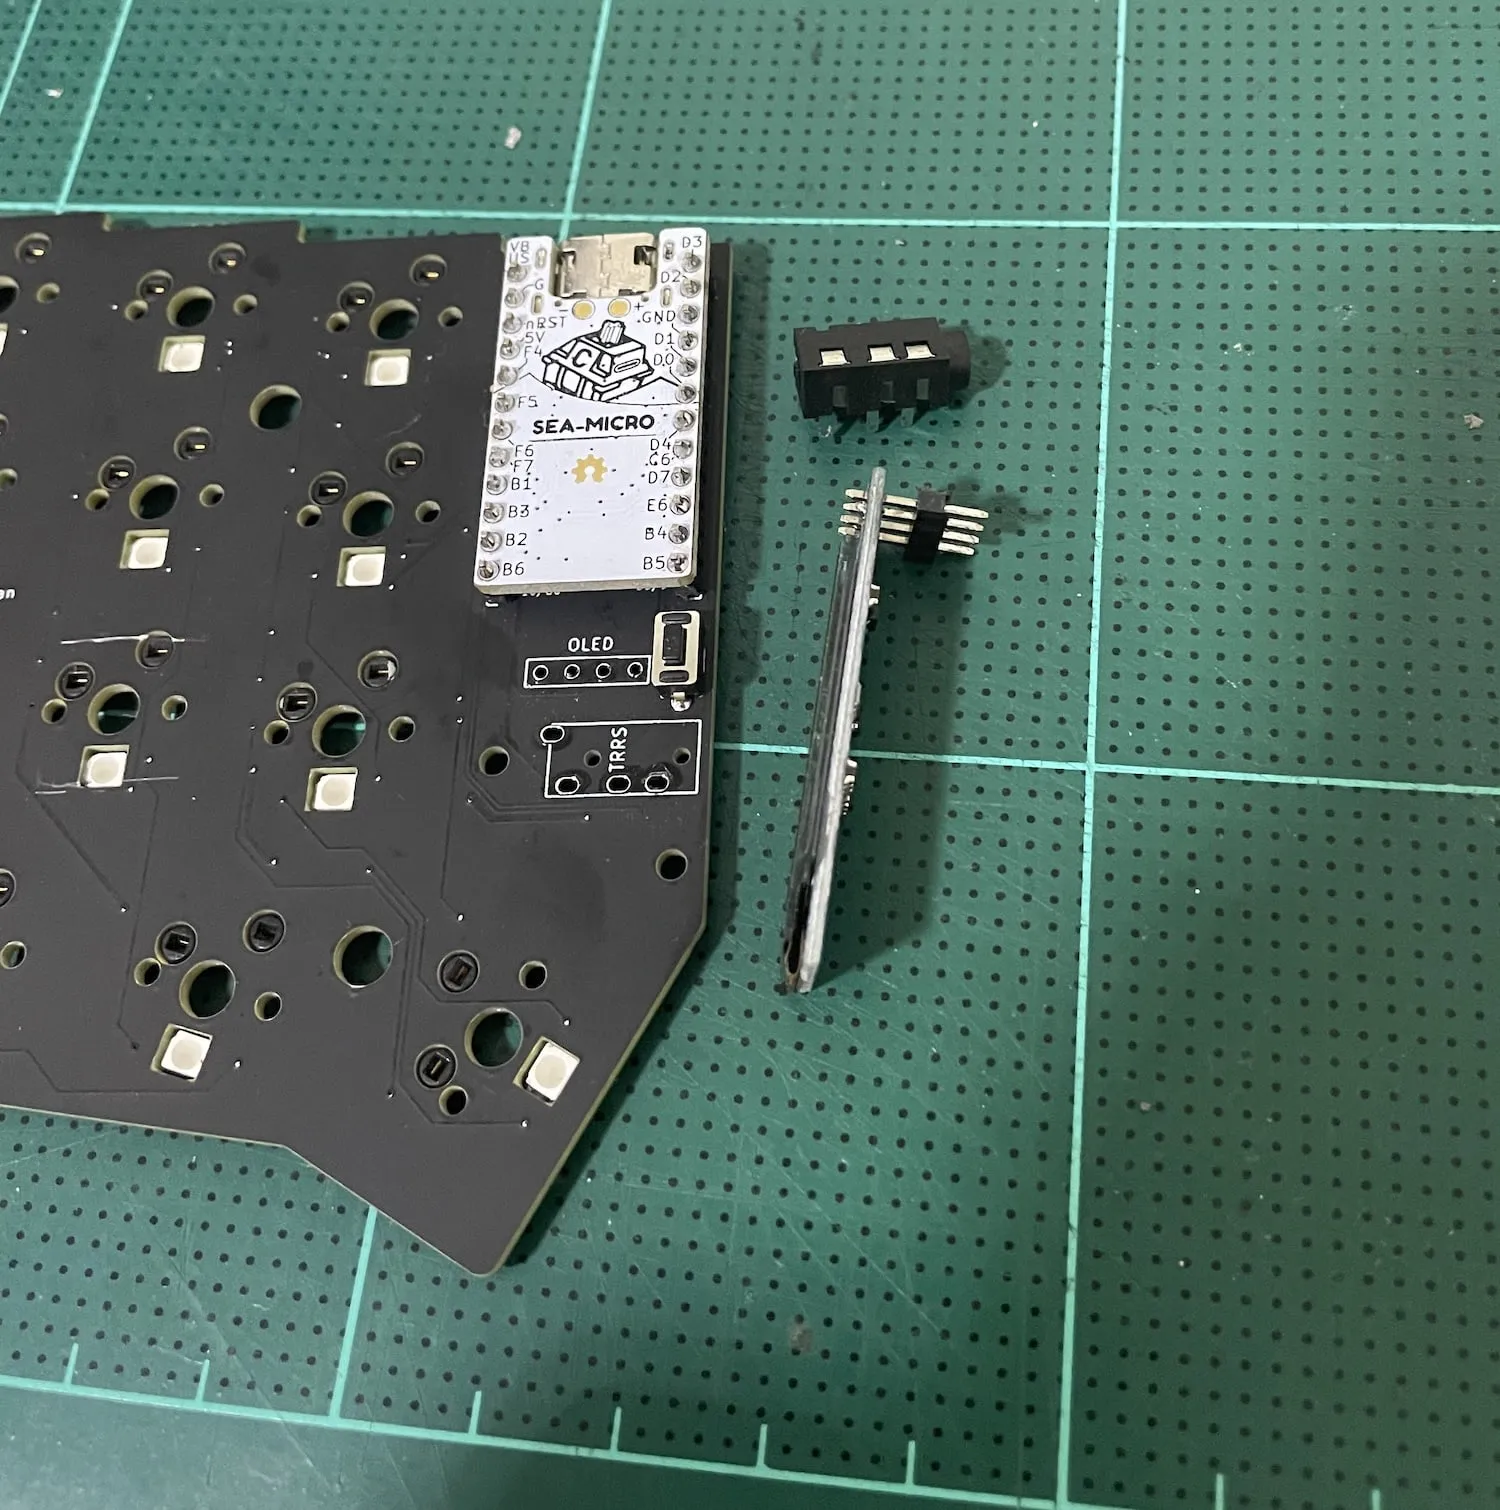
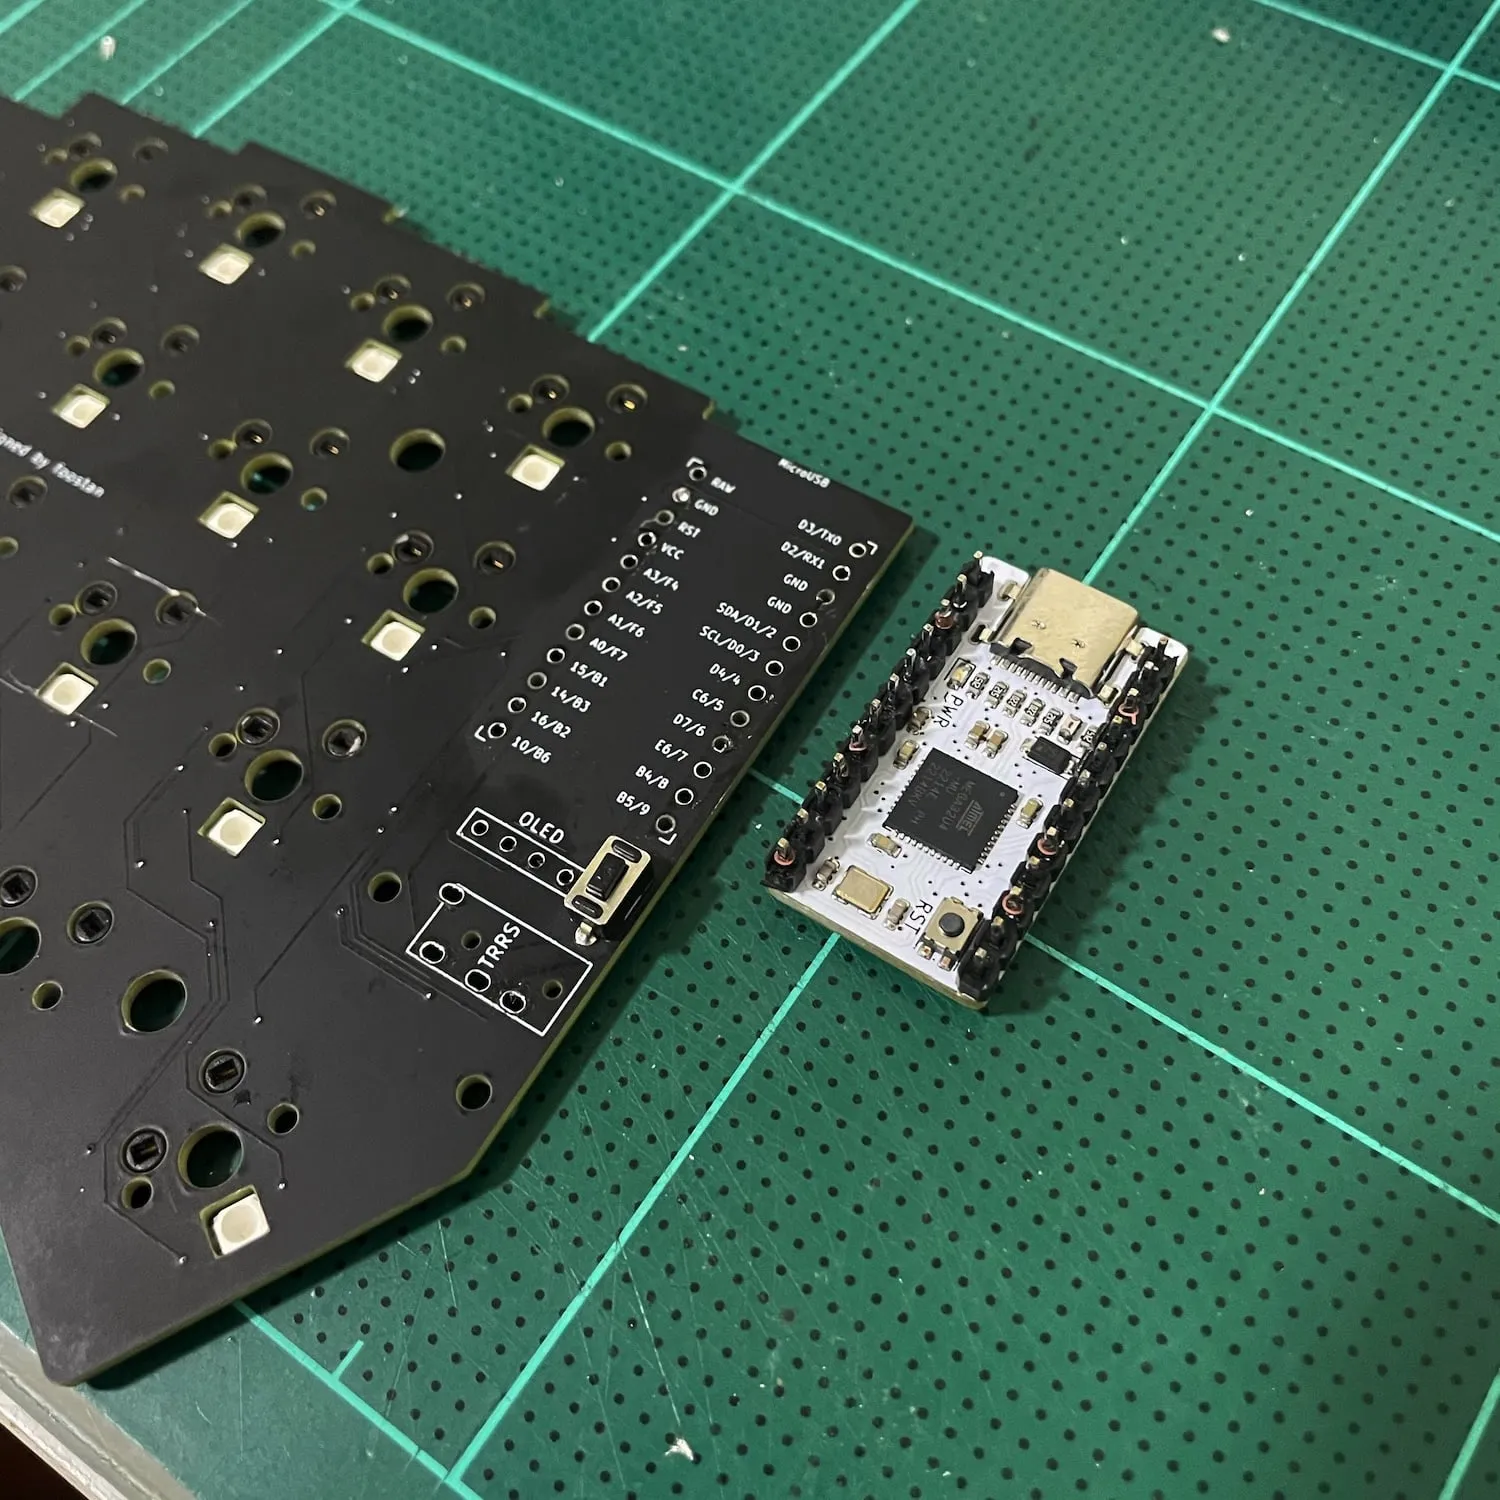
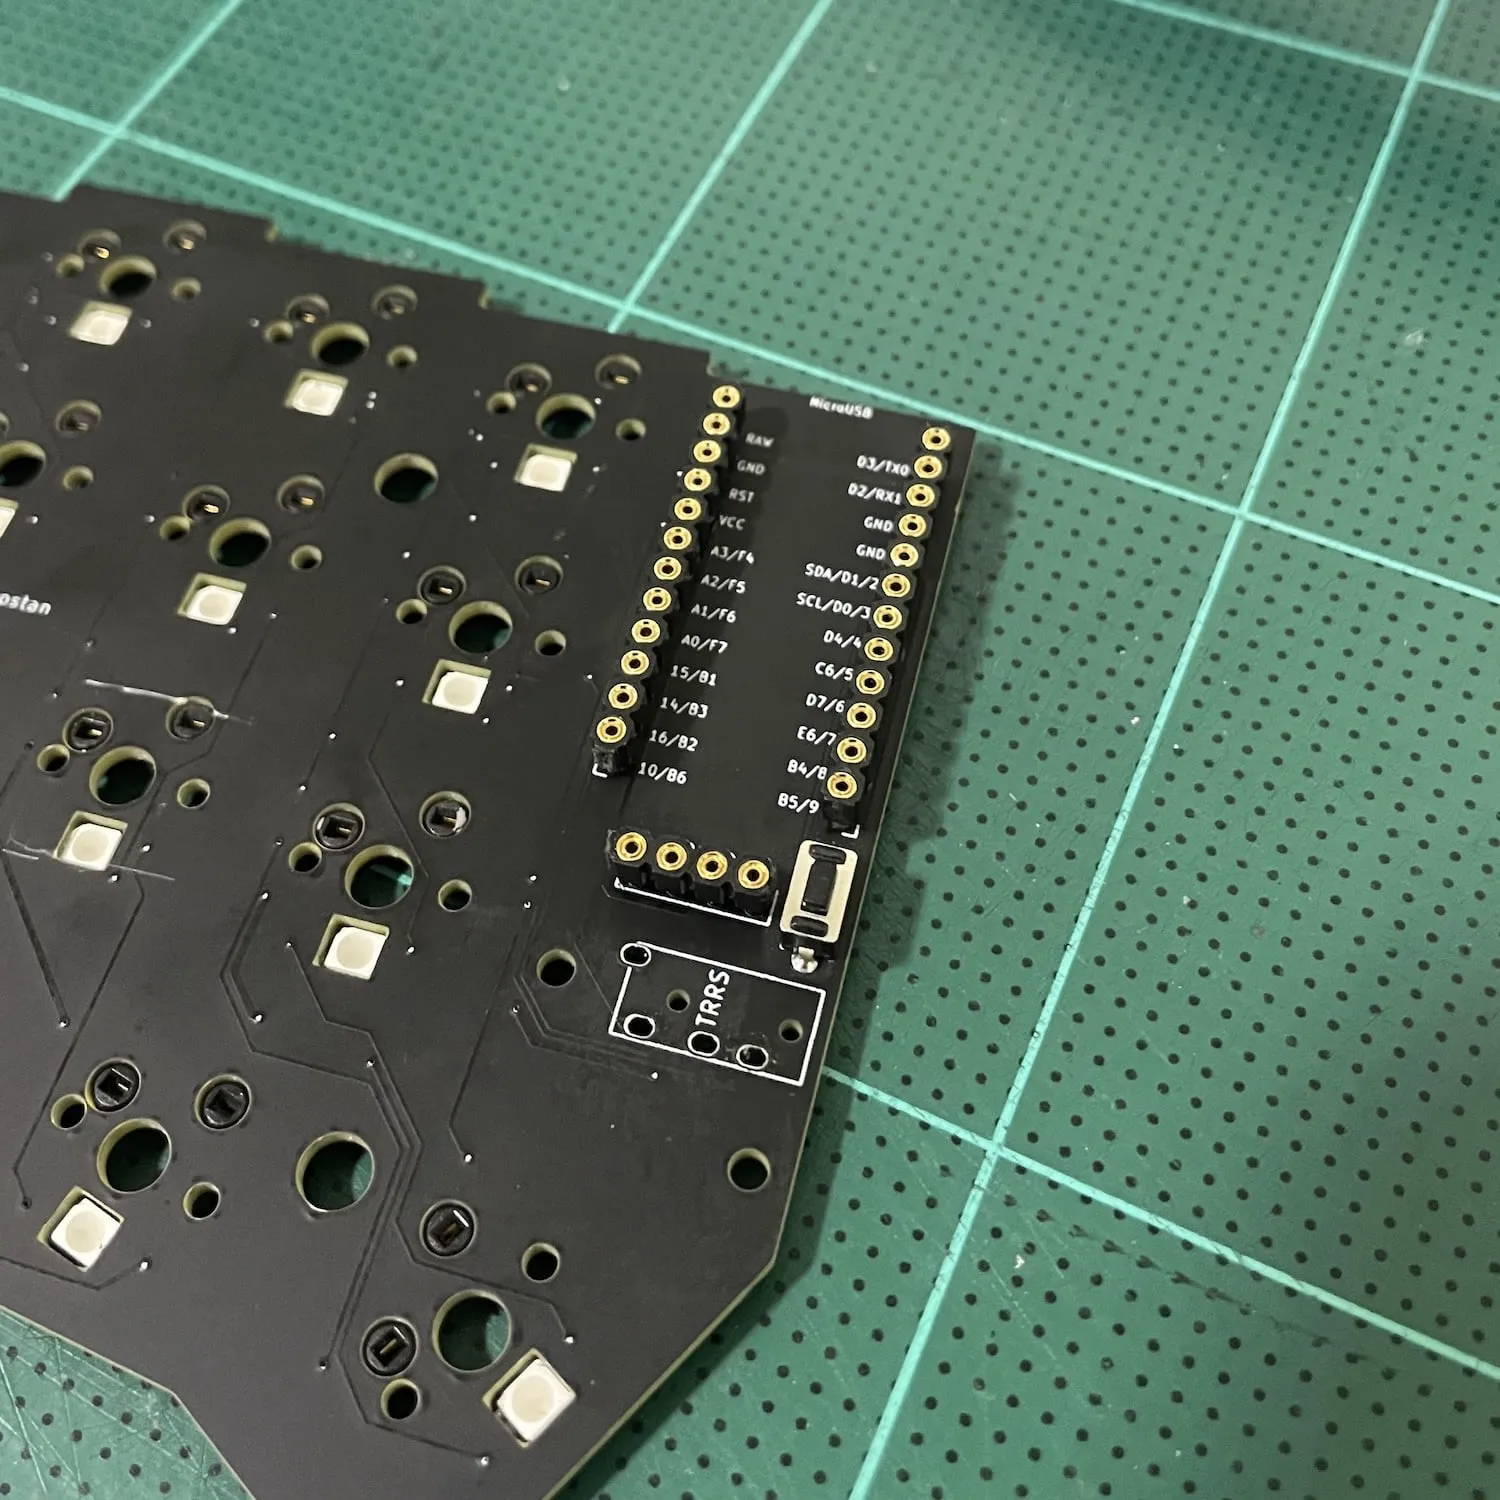
I socket the board using the male and female 2.54mm pin socket headers. The female goes to the board.
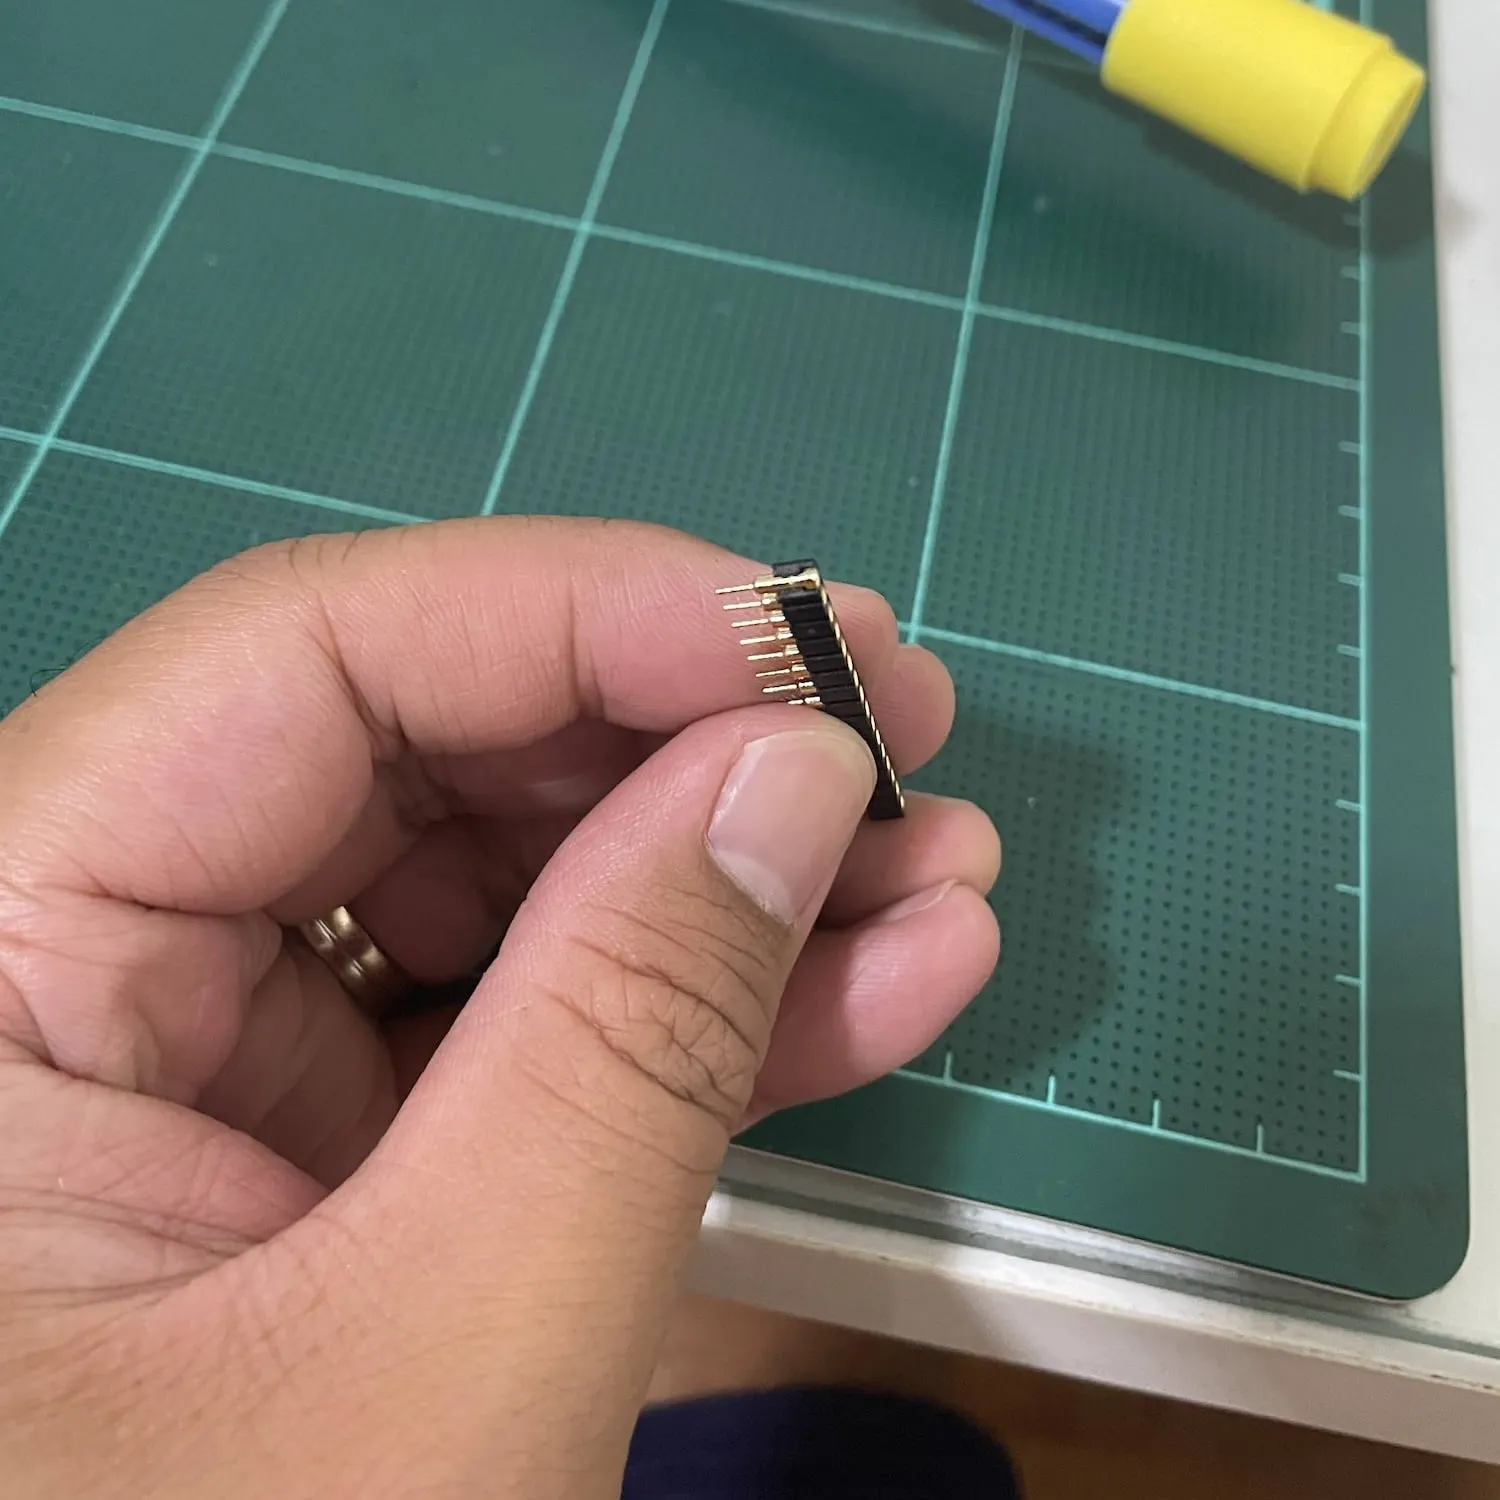
The male pin headers go to the Nicenanos controllers. I put the masking tape between the pin headers and the socket. It's the technique I learned from many YouTube videos.
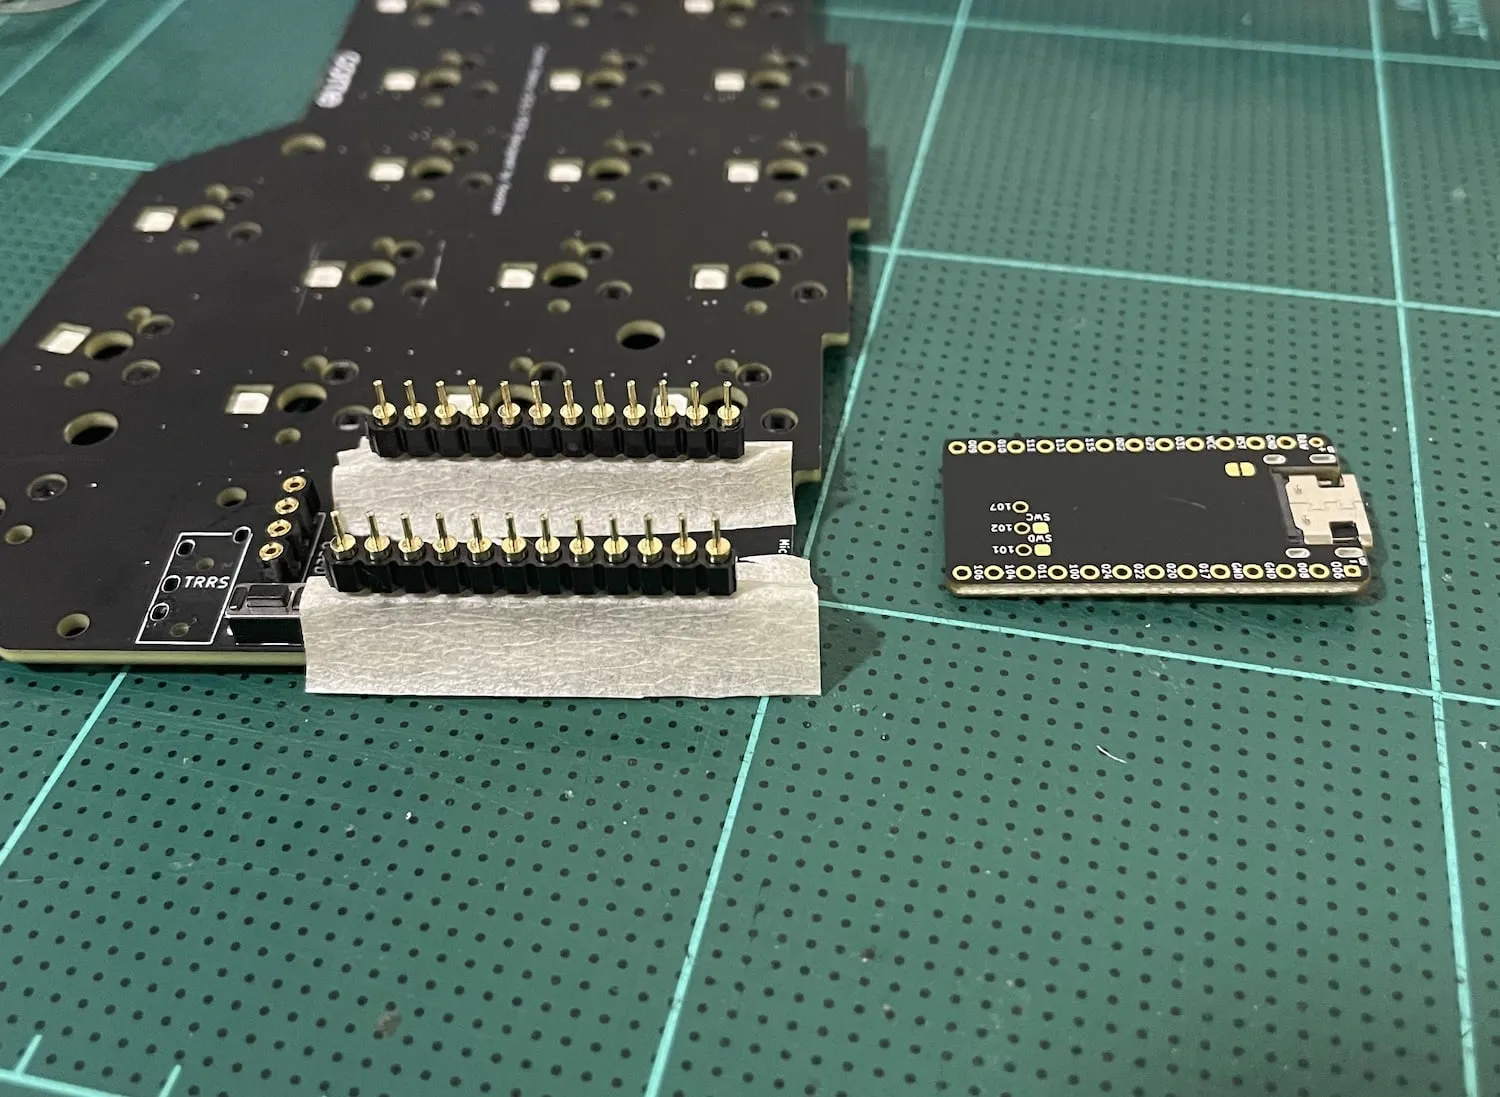
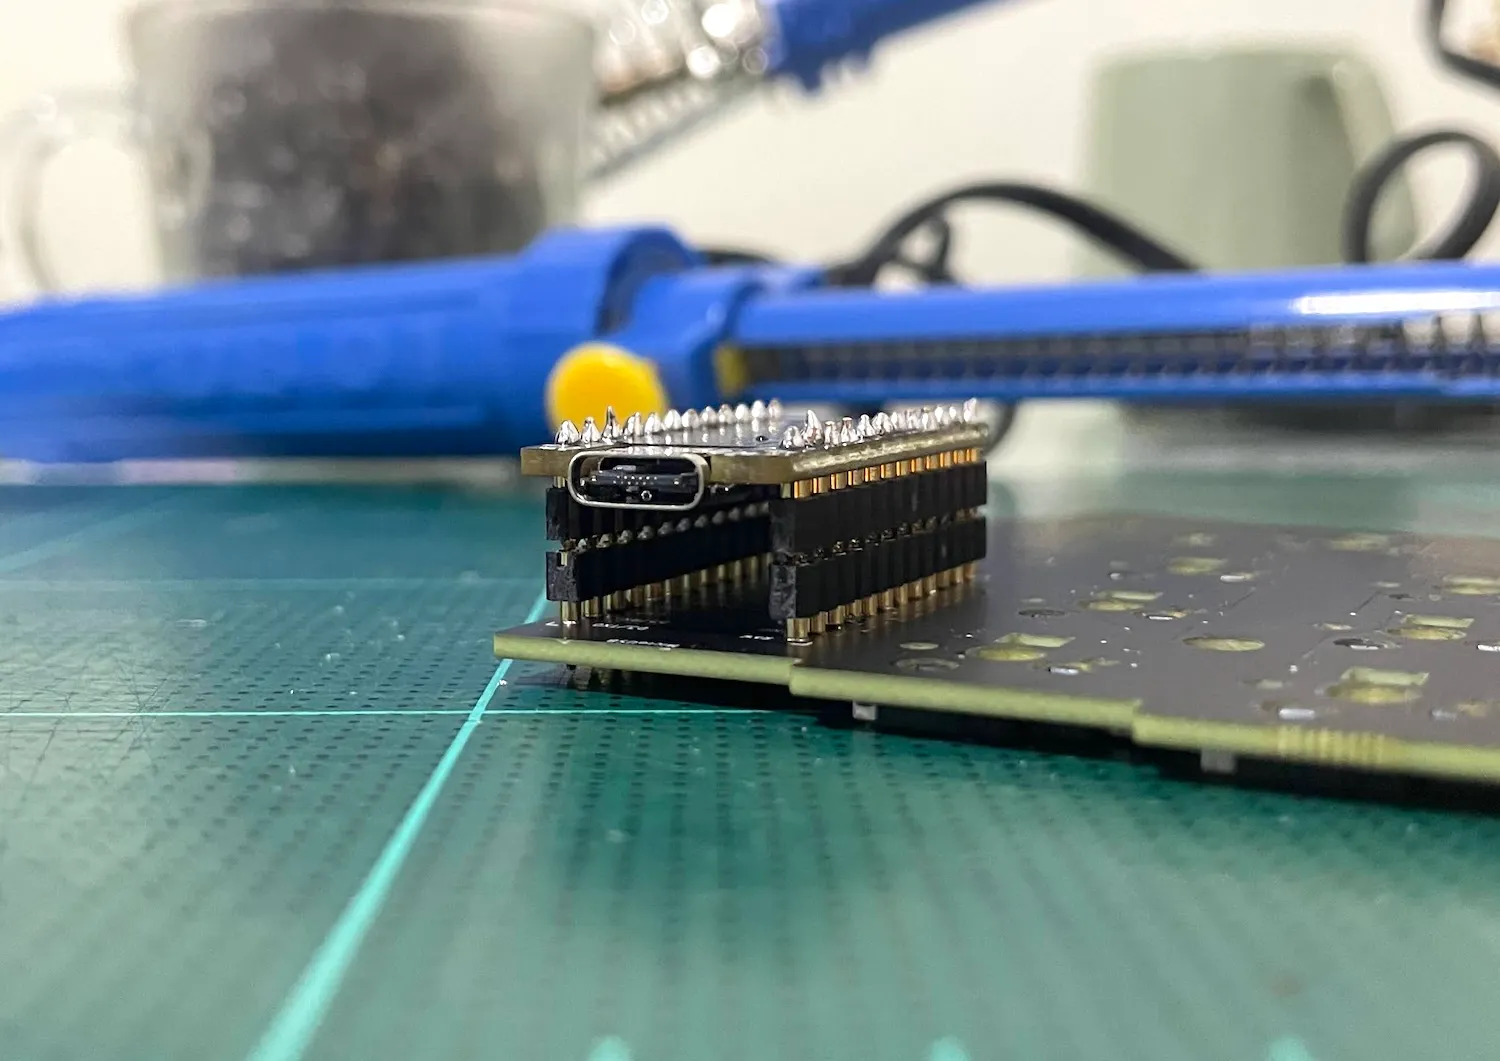
Then I solder the nicenano controller to the pins. From now on I can remove the controller from the board without having to desolder it. I can take the controller to use with another board too.
Installing batteries
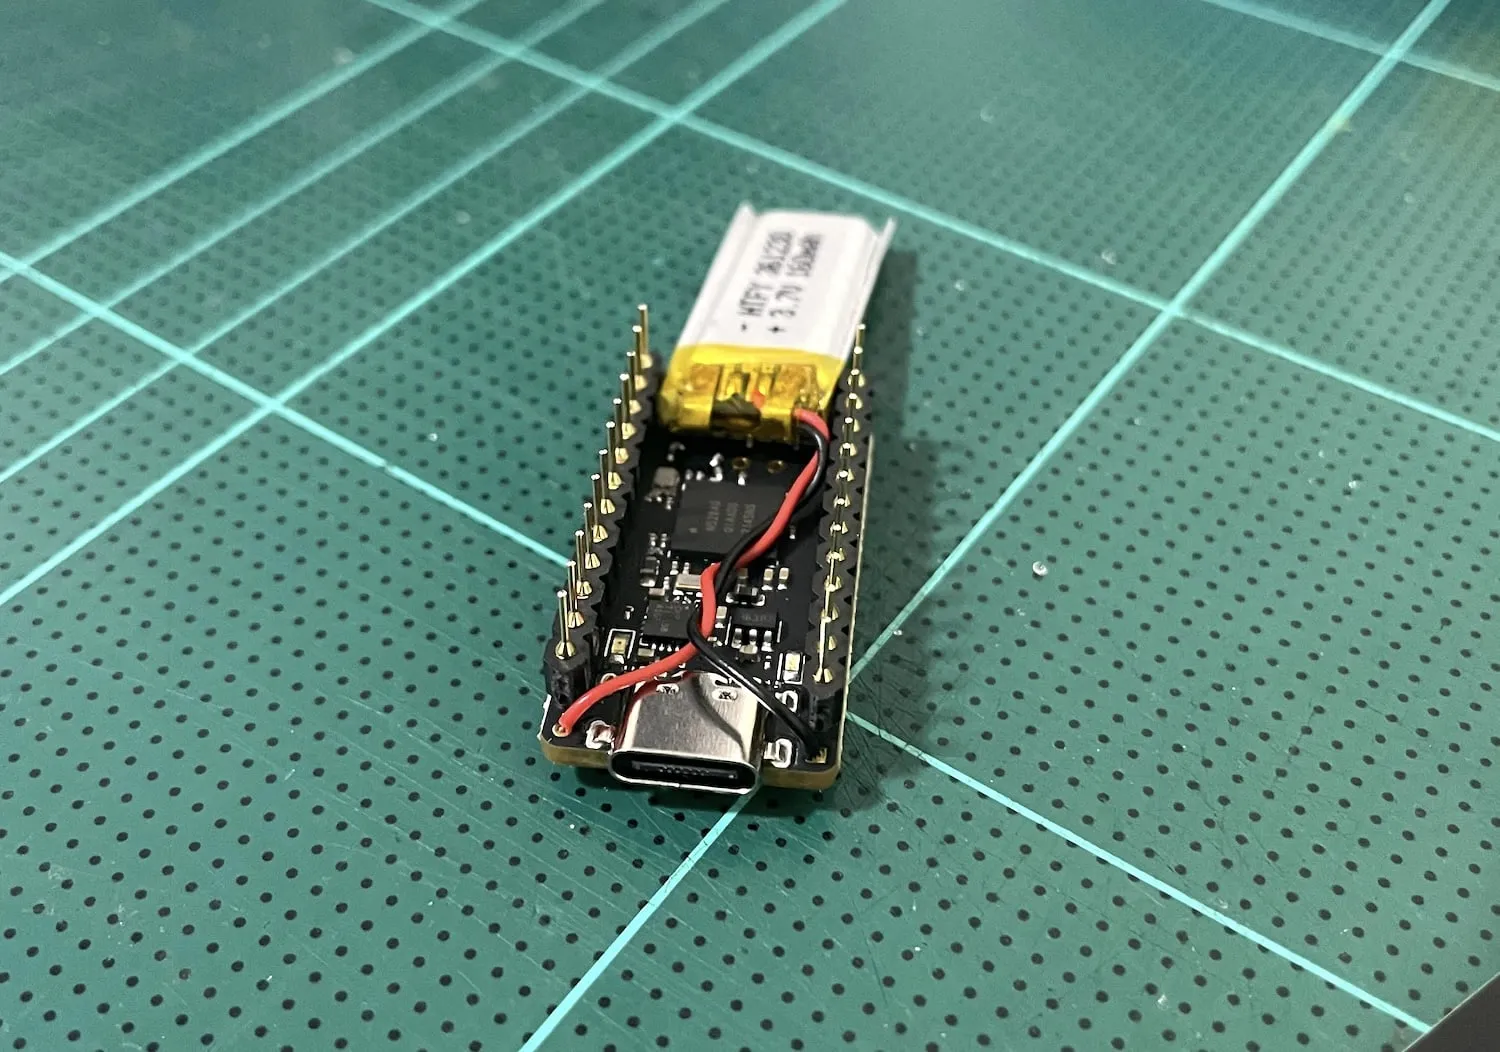
The Corne PCB I'm using doesn't have a battery socket. I install the battery on the Nicenano controller instead.
With this method, the connection between the batteries and the Nice!nanos are very fragile, and can fall off easily if I'm not careful when removing the Nice!nanos from the board. The battery's wires are very small. Make sure to solder them securely.
The battery I'm using is the Li-po 3.7v 160mAh (361230). It sits perfectly underneath the Nice!nano controller.

Nice!nano & ZMK Firmware
Going from a wired to a wireless build requires me to change the controllers from the Sea Micro to the Nice!nano. And with this, I have to switch the firmware from QMK to ZMK too, which is new to me.
Luckily, ZMK has very good documentation. I follow the Installing ZMK guide and can flash the first firmware within minutes.
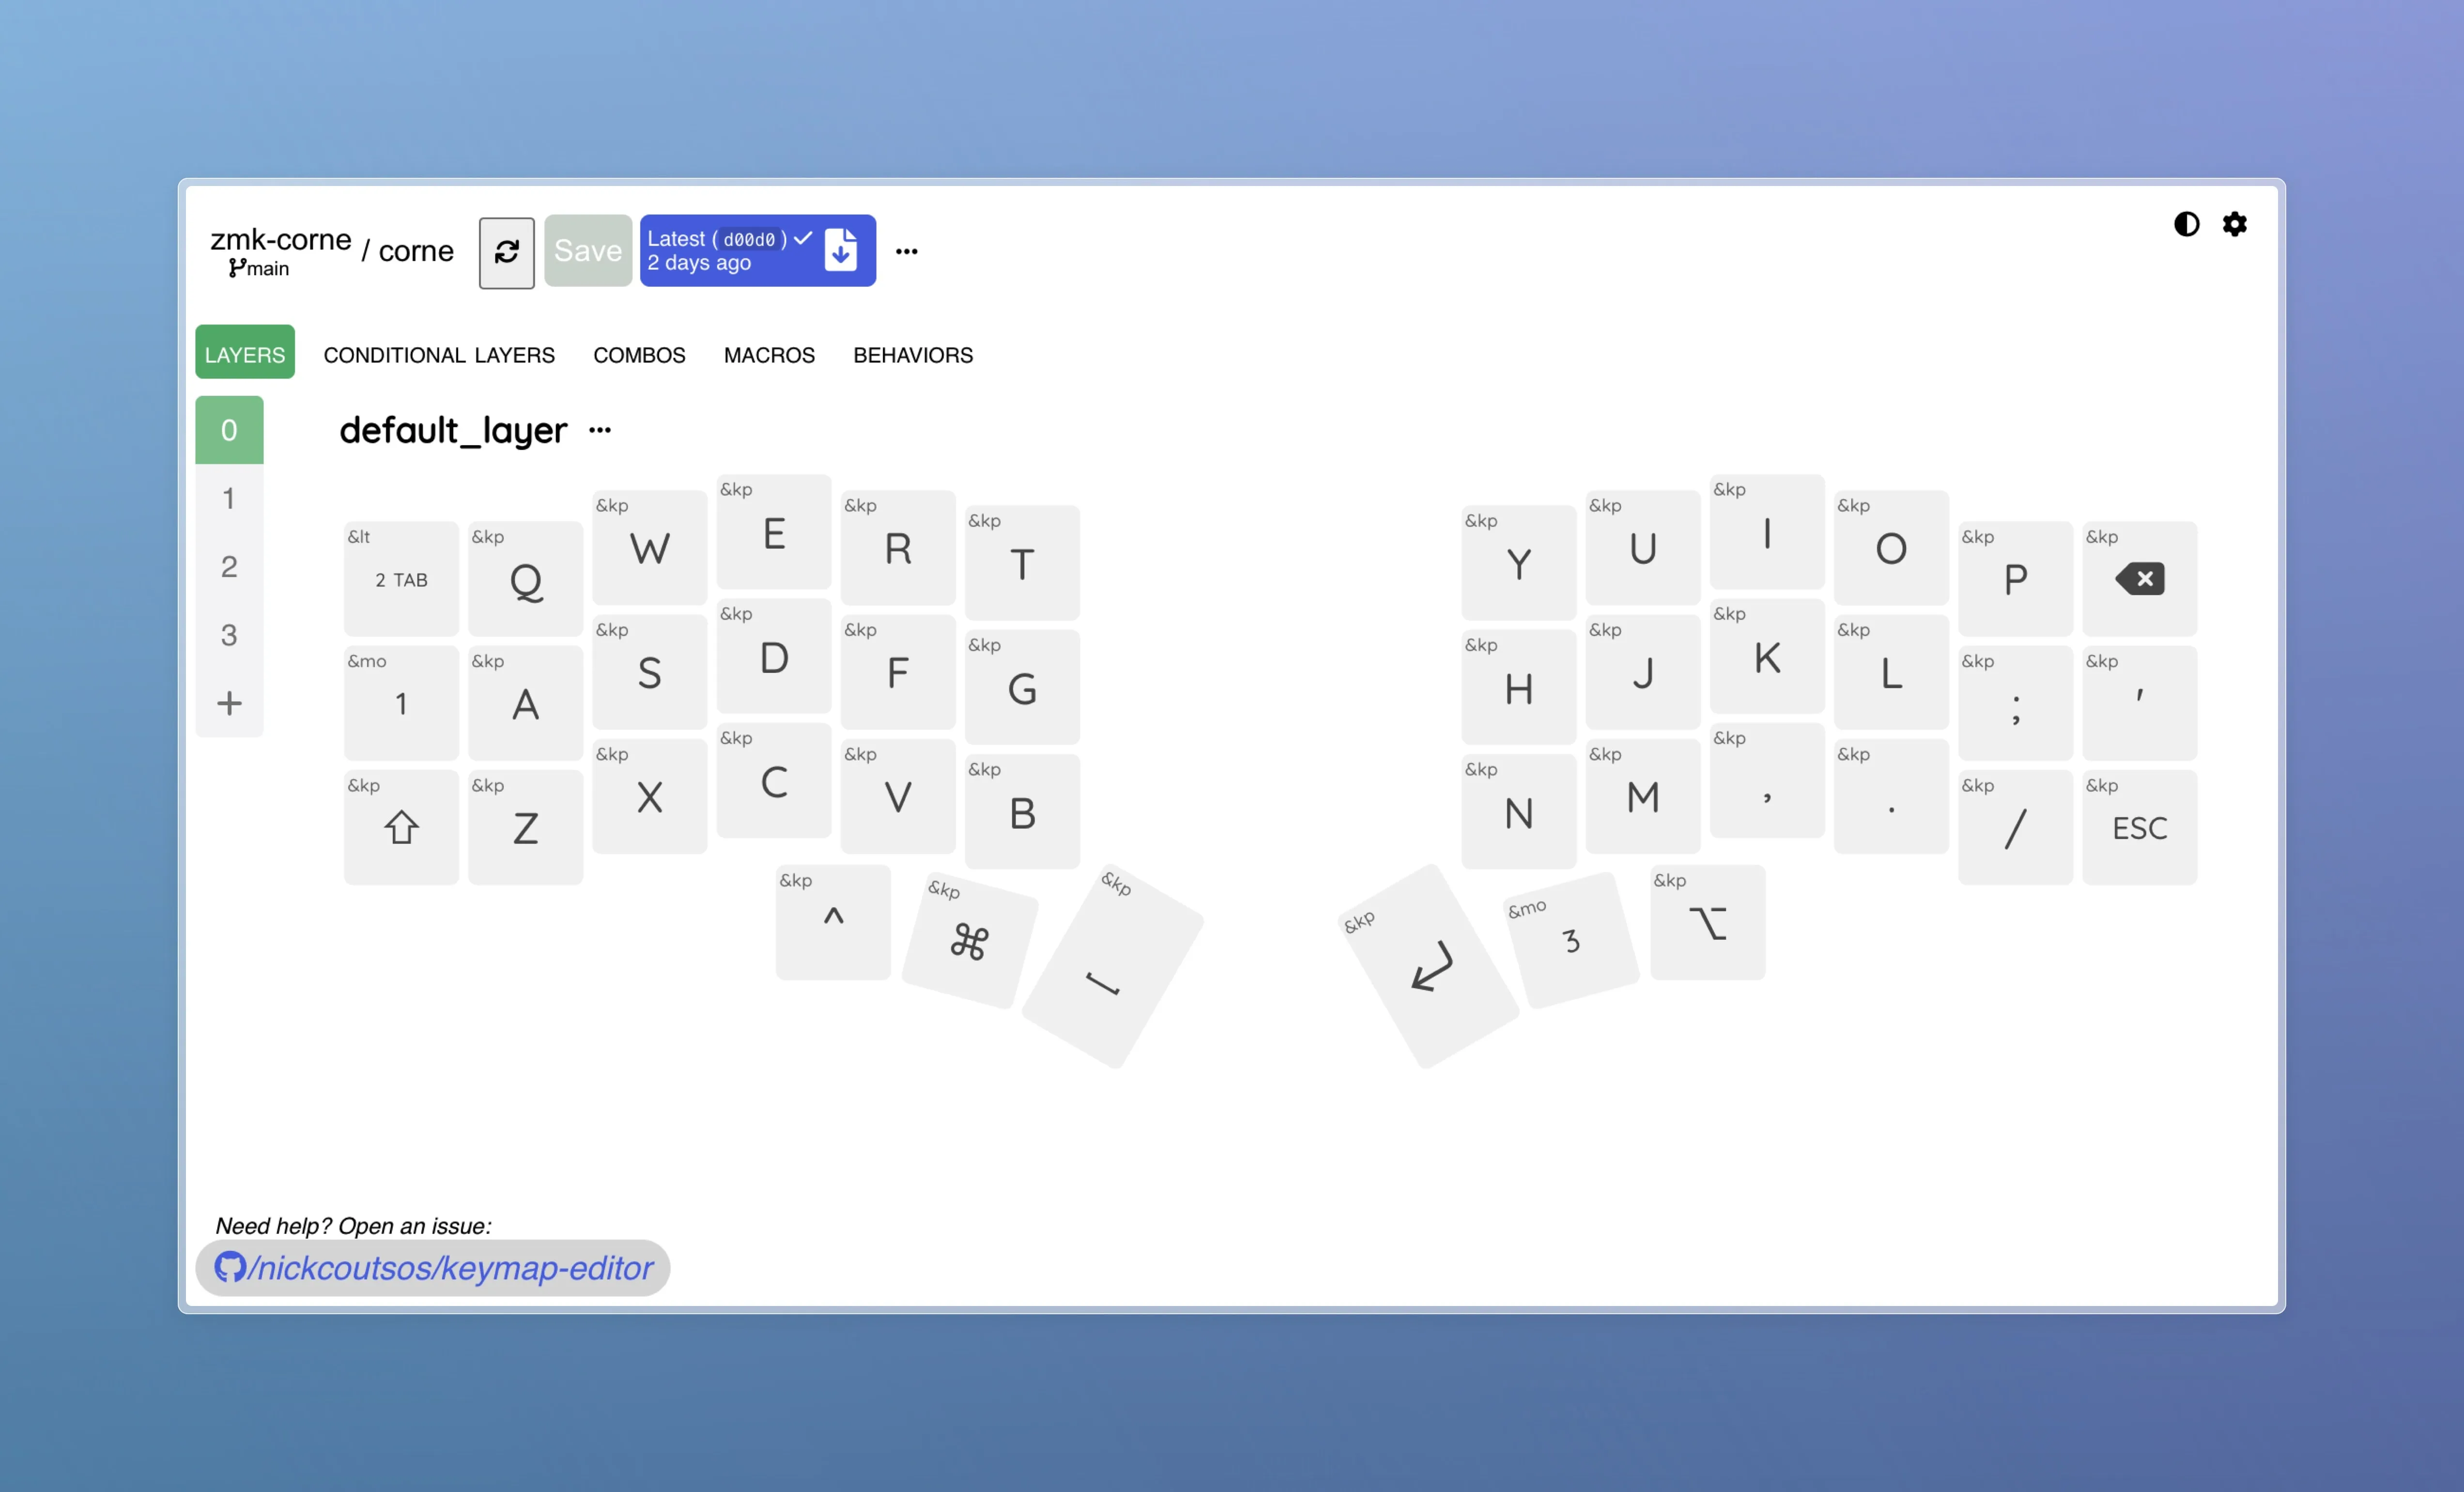
Customizing the firmware confused me at first because I had to work with the plain text .keymap file which took me a good amount of time to understand how it works. Once I get it and can see the pattern, then it's not too confusing anymore.
Later on, I discovered the Keymap Editor app for ZMK that provides a very nice UI to customize the keymap. It supports a lot of ZMK features. It can connect to my ZMK config repo on GitHub, and can commit my changes back to GitHub, the new firmware gets built via GitHub Actions. I can then download and flash the firmware to the Nice!nano.
My keymap and config are at the repo @armno/zmk-corne on GitHub.
Flashing the firmware
Flashing the firmware has more steps compared to using VIA for QMK.
Once a version of the firmware is built on GitHub Actions, I can download the firmware files, which include 2 firmware files in each build - one for the left side and another one for the right side of the keyboard. Flashing the firmware is done one side at a time. I usually flash the left side first.
- Put the left side into the Bootloader mode by pressing the reset switch twice, or short-circuiting the GND and RST pins twice. I usually use a tweezer to double-tap both pins. When the Nice!nano is in the Bootloader mode, there is a blue light blinking.
- Plug it into a computer with a USB cable. It will recognize the controller as a storage drive named
NICENANO. - Copy the firmware of the left side
corne_left-nice_nano_v2-zmk.uf2to theNICENANOstorage. When it is done, the storage will be unmounted automatically. - Repeat for another side of the keyboard.
Result
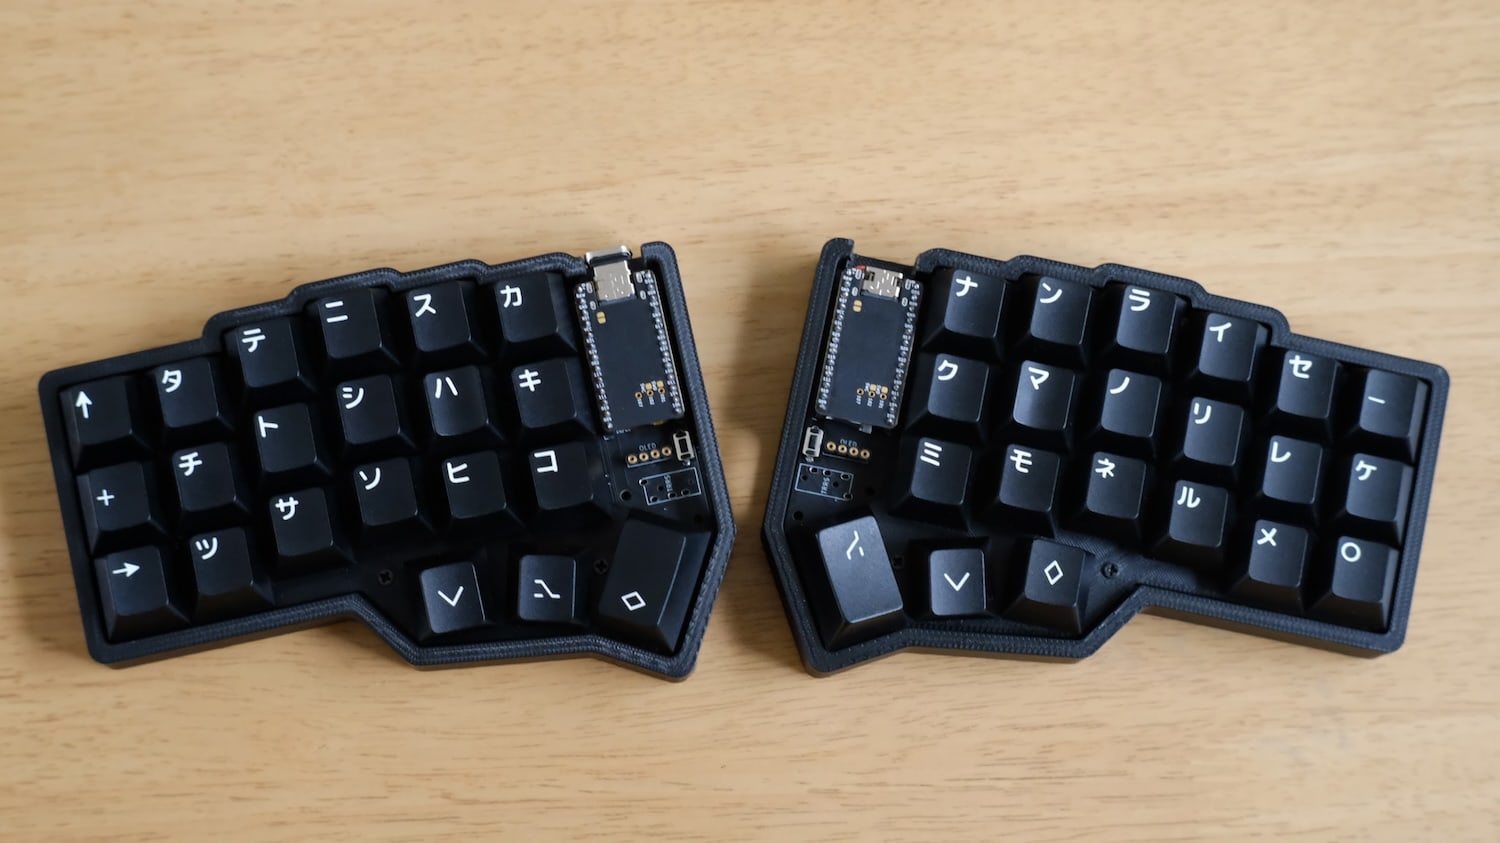
Here is my wireless Corne keyboard:
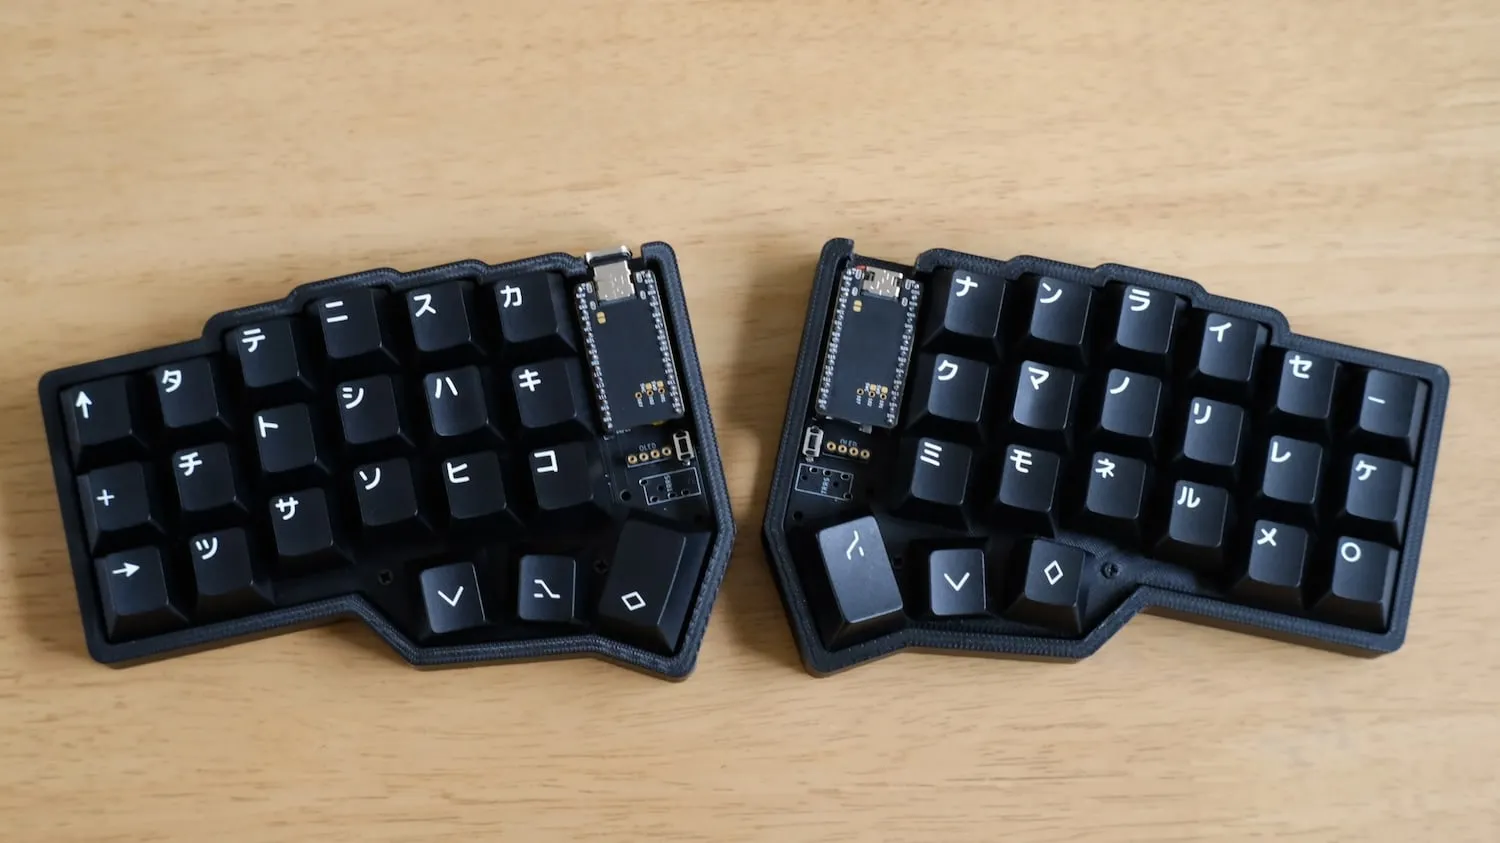
With all the cables removed, it looks much cleaner. It is also more portable because I don't have to take 2 cables every time with the keyboard anymore.
The battery life is questionable. From what I learned from YouTube videos, typically the battery should last about a week on the left side, and 2-3 weeks on the right side.
But my keyboard's battery life is much shorter. It only lasts a few days hours 🤯 before empty. I don't find a reason why it is like that yet. To me, charging every day is not a problem because charging time is very fast. It takes less than an hour to charge for a full day of use.
Overall, I'm very happy with the result and I wish I could have done this earlier. Building was fun. I learned a few new things.
Happy building. ✌️
Related posts