Customizing Keyboard Firmware for GH60
I have a custom mechanical keyboard built with GH60 Satan PCB. It is currently used by my colleague and she needs some custom keys.
The GH60 PCB uses TMK firmware. I kind of forgot already how to flash the firmware onto a board with TMK so I take this note also for my future self.
Here are steps I use to customize the keyboard’s firmware with custom keys.
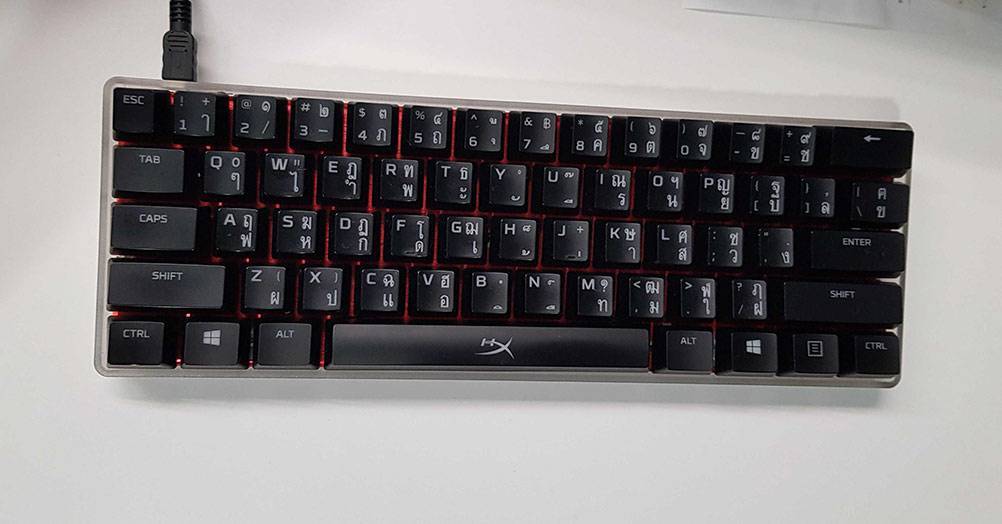
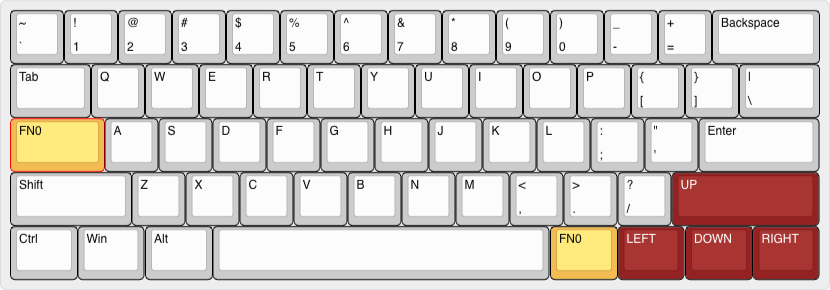
The keyboard is a 60% with standard ANSI layout. The goals are:
- turn 4 keys at the bottom right into arrow keys
- add
print screenkey somewhere on the keyboard.
I go to keyboard-layout-editor.com then I go to the menu on the top > select Preset > Default 60%. It will load the layout in the editor area.
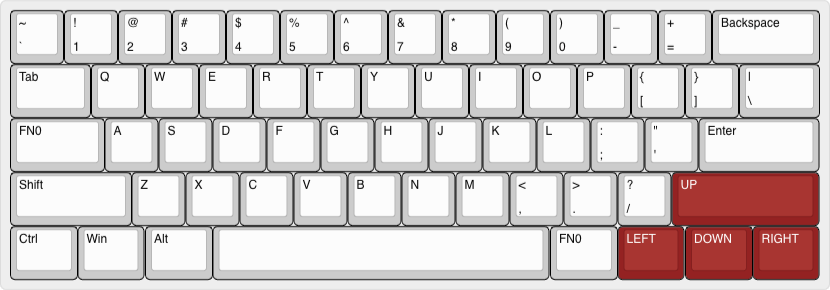
First, I want to remap the right shift key to an arrow up.
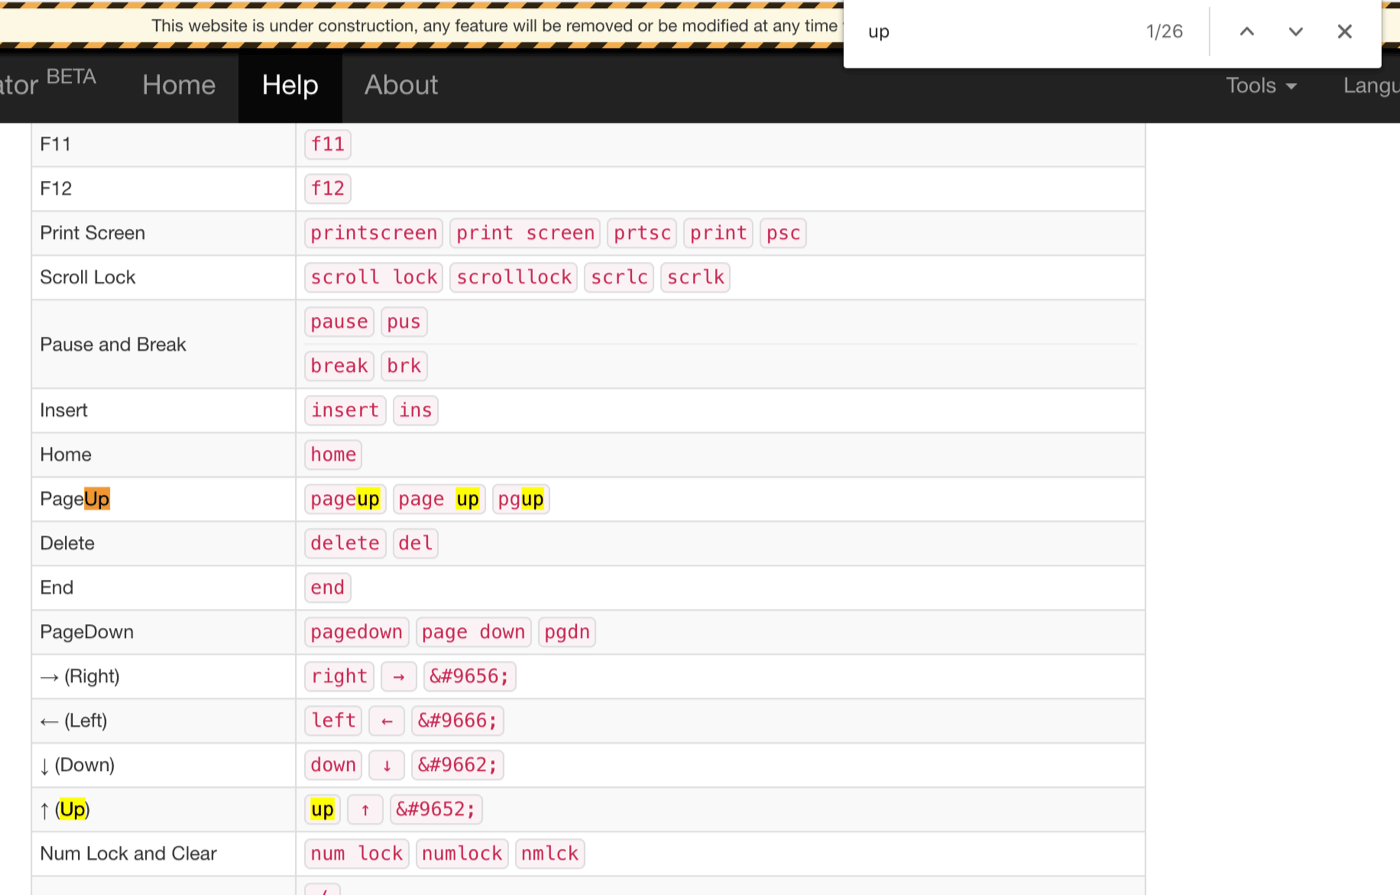
I go to https://tkg.io/#help and search for up.
The values in the right column are ones I need.
Back to the keyboard-layout-editor.com, I select the right shift key (it will highlight in red border).
Then I change the Top Legend: value from Shift to UP.
And I do the same for LEFT, DOWN, and RIGHT keys.
Values are case-insensitive. up and Up and UP are the same key.
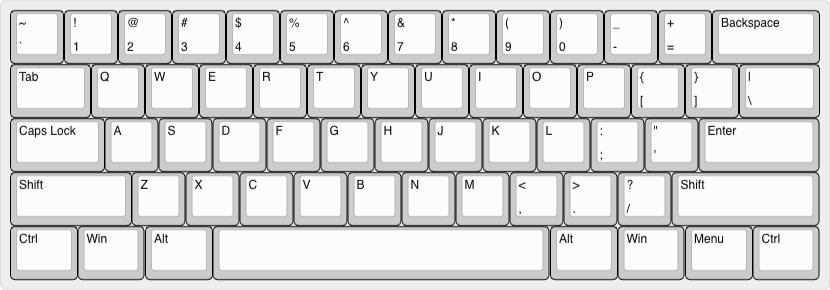
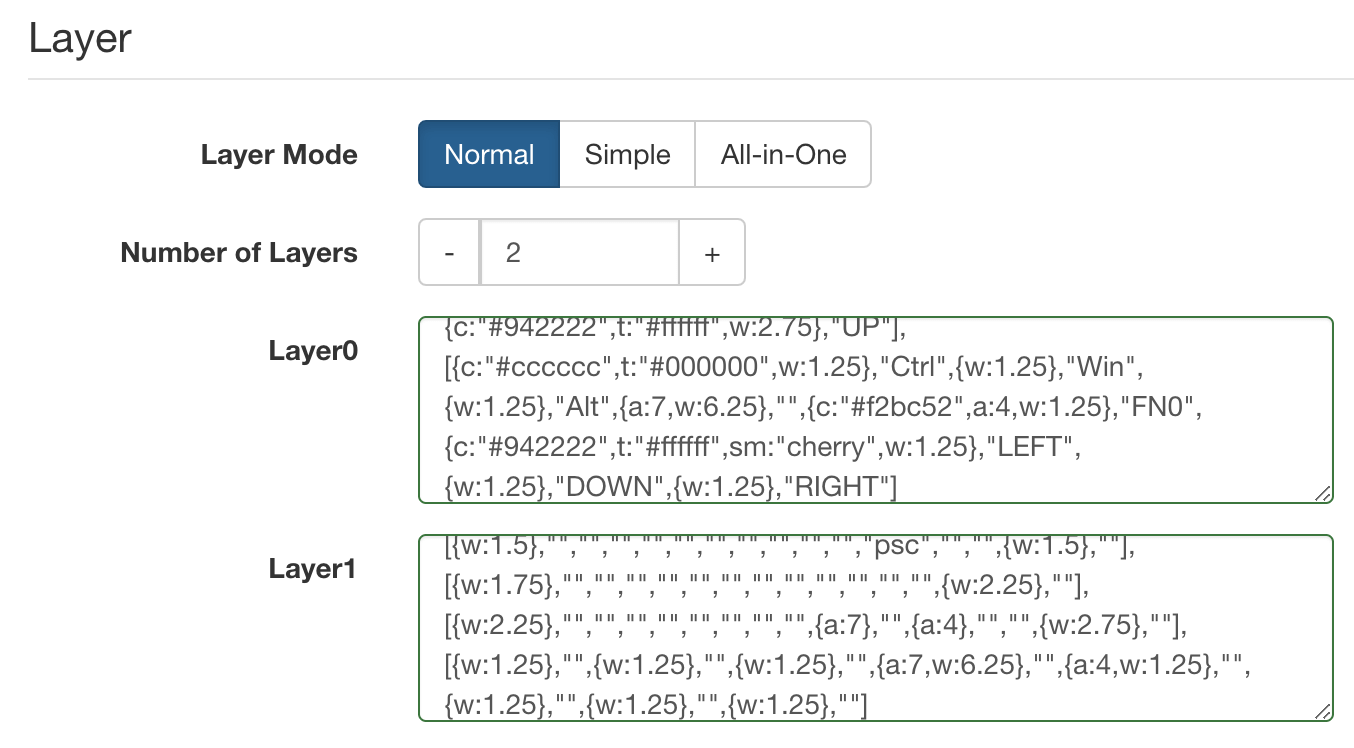
Layers
I want to have another layer of the keyboard to have more keys.
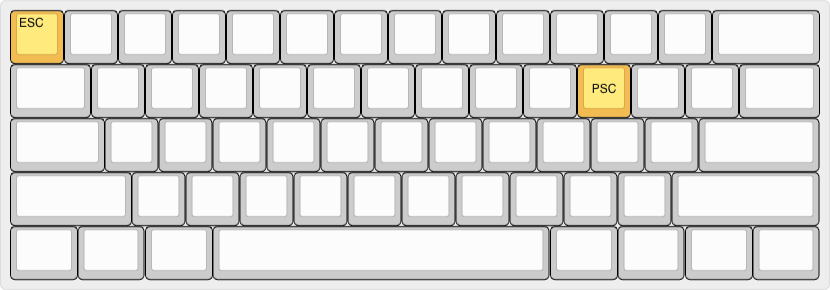
For now it will have only 2 keys on the second layer: esc and print screen.
I map the caps lock and the right alt keys to FN0 - the Function key.
I will use them to toggle another layer of the keyboard.
The function key itself doesn’t do anything special, but we will set its behavior later on.
For another layer, there are only 2 keys in this layer: esc and print screen.
The layout look like this:
I go to Raw data tab below the keyboard layout.
I will need raw data for each layer to build the firmware.
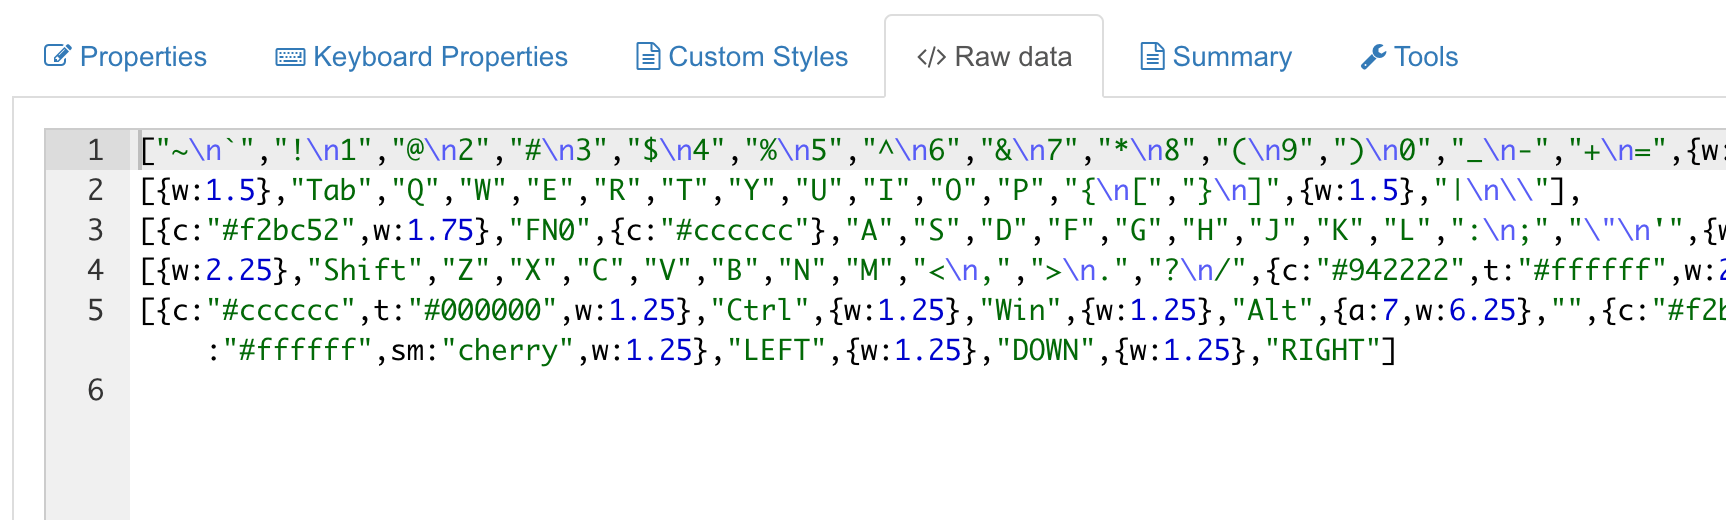
Here are my raw data for both layers.
Layer0
["~\n`","!\n1","@\n2","#\n3","$\n4","%\n5","^\n6","&\n7","*\n8","(\n9",")\n0","_\n-","+\n=",{w:2},"Backspace"],
[{w:1.5},"Tab","Q","W","E","R","T","Y","U","I","O","P","{\n[","}\n]",{w:1.5},"|\n\\"],
[{c:"#f2bc52",w:1.75},"FN0",{c:"#cccccc"},"A","S","D","F","G","H","J","K","L",":\n;","\"\n'",{w:2.25},"Enter"],
[{w:2.25},"Shift","Z","X","C","V","B","N","M","<\n,",">\n.","?\n/",{c:"#942222",t:"#ffffff",w:2.75},"UP"],
[{c:"#cccccc",t:"#000000",w:1.25},"Ctrl",{w:1.25},"Win",{w:1.25},"Alt",{a:7,w:6.25},"",{c:"#f2bc52",a:4,w:1.25},"FN0",{c:"#942222",t:"#ffffff",sm:"cherry",w:1.25},"LEFT",{w:1.25},"DOWN",{w:1.25},"RIGHT"]
Layer1
[{c:"#f2bc52"},"ESC",{c:"#cccccc",a:7},"","","","","","","","","","","","",{w:2},""],
[{w:1.5},"","","","","","","","","","",{c:"#f2bc52"},"PSC",{c:"#cccccc"},"","",{w:1.5},""],
[{w:1.75},"","","","","","","","","","","","",{w:2.25},""],
[{w:2.25},"","","","","","","","","","","",{w:2.75},""],
[{w:1.25},"",{w:1.25},"",{w:1.25},"",{w:6.25},"",{w:1.25},"",{w:1.25},"",{w:1.25},"",{w:1.25},""]
Then I go back to tkg.io, on the home page, paste the copied raw data into Layer0
and Layer1 fields.
FN0 key
Now we are going to set the behavior for the function key FN0.
Still on tkg.io, under Fn section, at Fn0 I select Layout action > Momentary and select layer 1
on the right side.
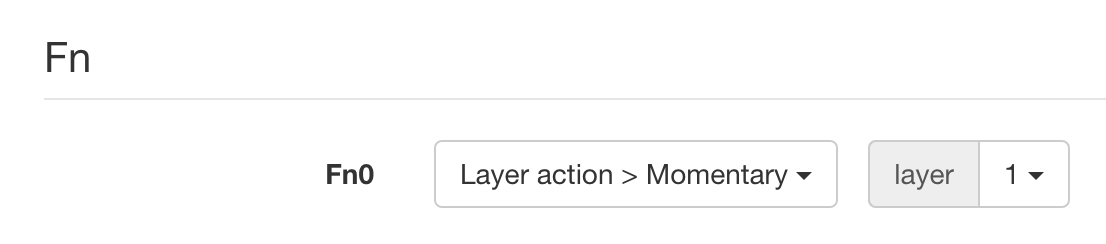
This means when I press and hold FN0 key, it will switch to layer1.
When I release the FN0 key, it will switch back to the default layer0.
Then I download the .eep file.
Flashing .eep file to the keyboard
First I clone the tkg-toolkit repo to my computer.
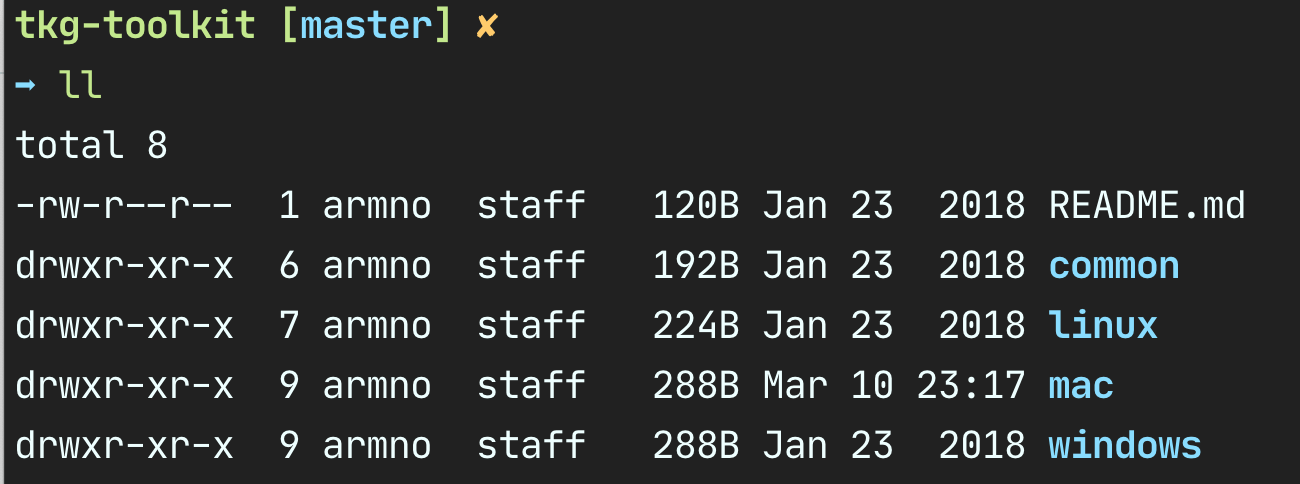
Then I copy the downloaded .eep file from the previous step to under mac/ in this folder
as I’m using a Mac to flash the firmware.
$ cp ~/Desktop/keymap.eep ~/code/tkg-toolkit/macI go to ~/code/tkg-toolkit/mac folder and run
$ ./reflash.sh keymap.eepenter Y
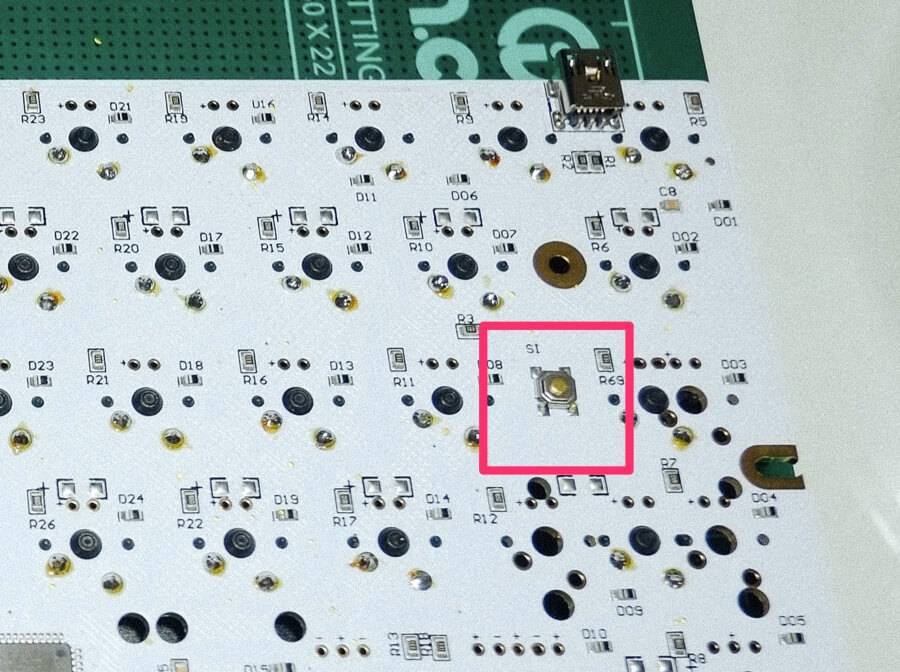
and when it says “waiting for bootloder”, I flip the keyboard and press RESET button on the PCB.
wait for a few seconds and it is done. the new firmware is now on the keyboard.

Related posts